


Fantastic, Stress-Free Activity Food
Quantity for a Large Group
First, let’s talk a minute about quantity. When feeding any large group there are two things you want to keep in mind: 1) Number of servings (and serving size) the recipe produces, and 2) the “uptake” of your guests (how much food the WHOLE GROUP will take). So what does this mean for you exactly? Well, let’s say you have a queso recipe that produces 100 (1/2 cup) servings. That means if you’re serving 100 people, and each one takes exactly one 1/2 cup of queso, you’ll have exactly enough queso to feed the group with no leftovers. But we all know that’s not what happens. Some people take more than that. But usually EVEN MORE people take less or none (especially if you have multiple food choices) so you generally end up with more queso than you need. Sometimes WAY more.
My Experience
My experience with these Activity foods is you’ll usually have about a 75 – 80% “uptake”. Which means that you can generally plan on a recipe which produces 100 (1/3 cup) servings actually serving about 120 – 125 people. Since I’ve served each of these large group recipes multiple times (to rave reviews!), I’ll give you not only the number of servings and serving size, I’ll also tell you my experience on the amount the recipe “Should Serve”. This means that a recipe which displays “Servings of 100 (1/3 cup) ” will also display “Should Serve” 120- 125 people.
Let me give you a quick example. I recently planned on 2 pizza slices per youth for a youth activity. The young men ate first and (as you can imagine) there were no leftovers. The young women ate second (it was hot and I also served salad). The uptake was about 1 slice per girl. Next time, if the groups are fed separately, we’ll plan to feed the girls first.
Your Choice
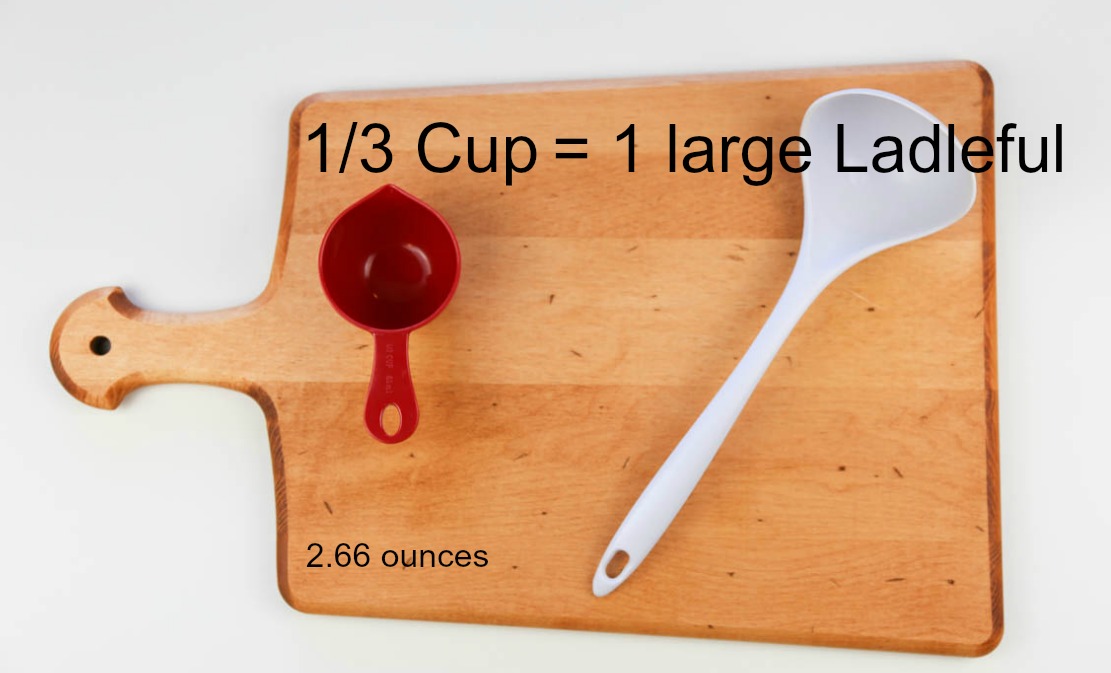
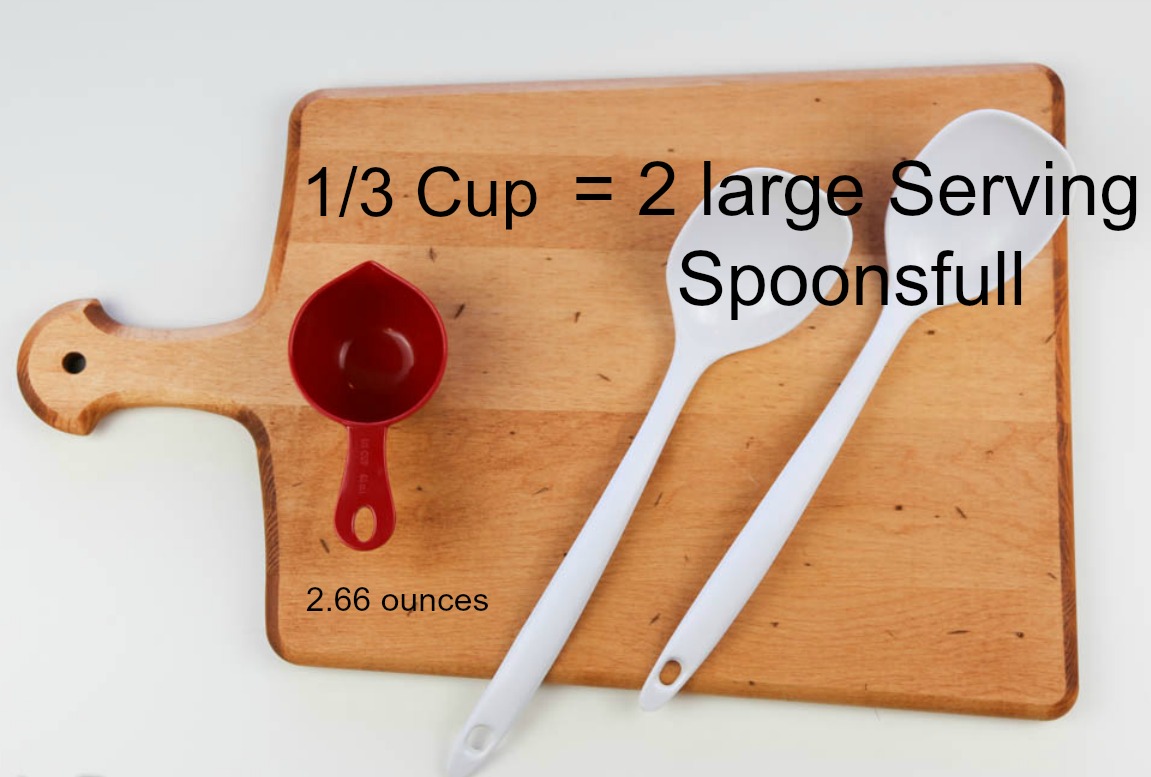
You can decide which which of the two “Serving” quantities to go with. I will tell you that almost all of the time you can very safely go with the larger (120) number. In addition, if it’s hot, if you have 2 or 3 other things for your guests to eat beside that one item or if you have a mixed crowd of young men and young women – your uptake will be reduced. However, if you have a group of young men and men who have not eaten for a while or if you are not serving much else, then go with the actual “Servings” of 100. One final note: my serving sizes (1/3 cup) are generous. It is the equivalent of 2 large serving spoons-full or 1 ladle-full. Enjoy!

Welcome to Aloha Dreams!
I'm so glad you dropped by. I'm Betsy. Here you'll find my favorite fabulous, trusted recipes - everything from delicious, quick meals for your family to wonderful classics made easy.
I'm also here to help you with large group recipes from 20 to 200. So next opportunity you get to cook for a large group - Say 'Yes!' Then relax. I've got your back.
Ever wished you could build your dream home? How about building your dream home in a tropical paradise? Join me, room by room, as we design and build a fabulous dream home in Hawaii!

Savory Snacks
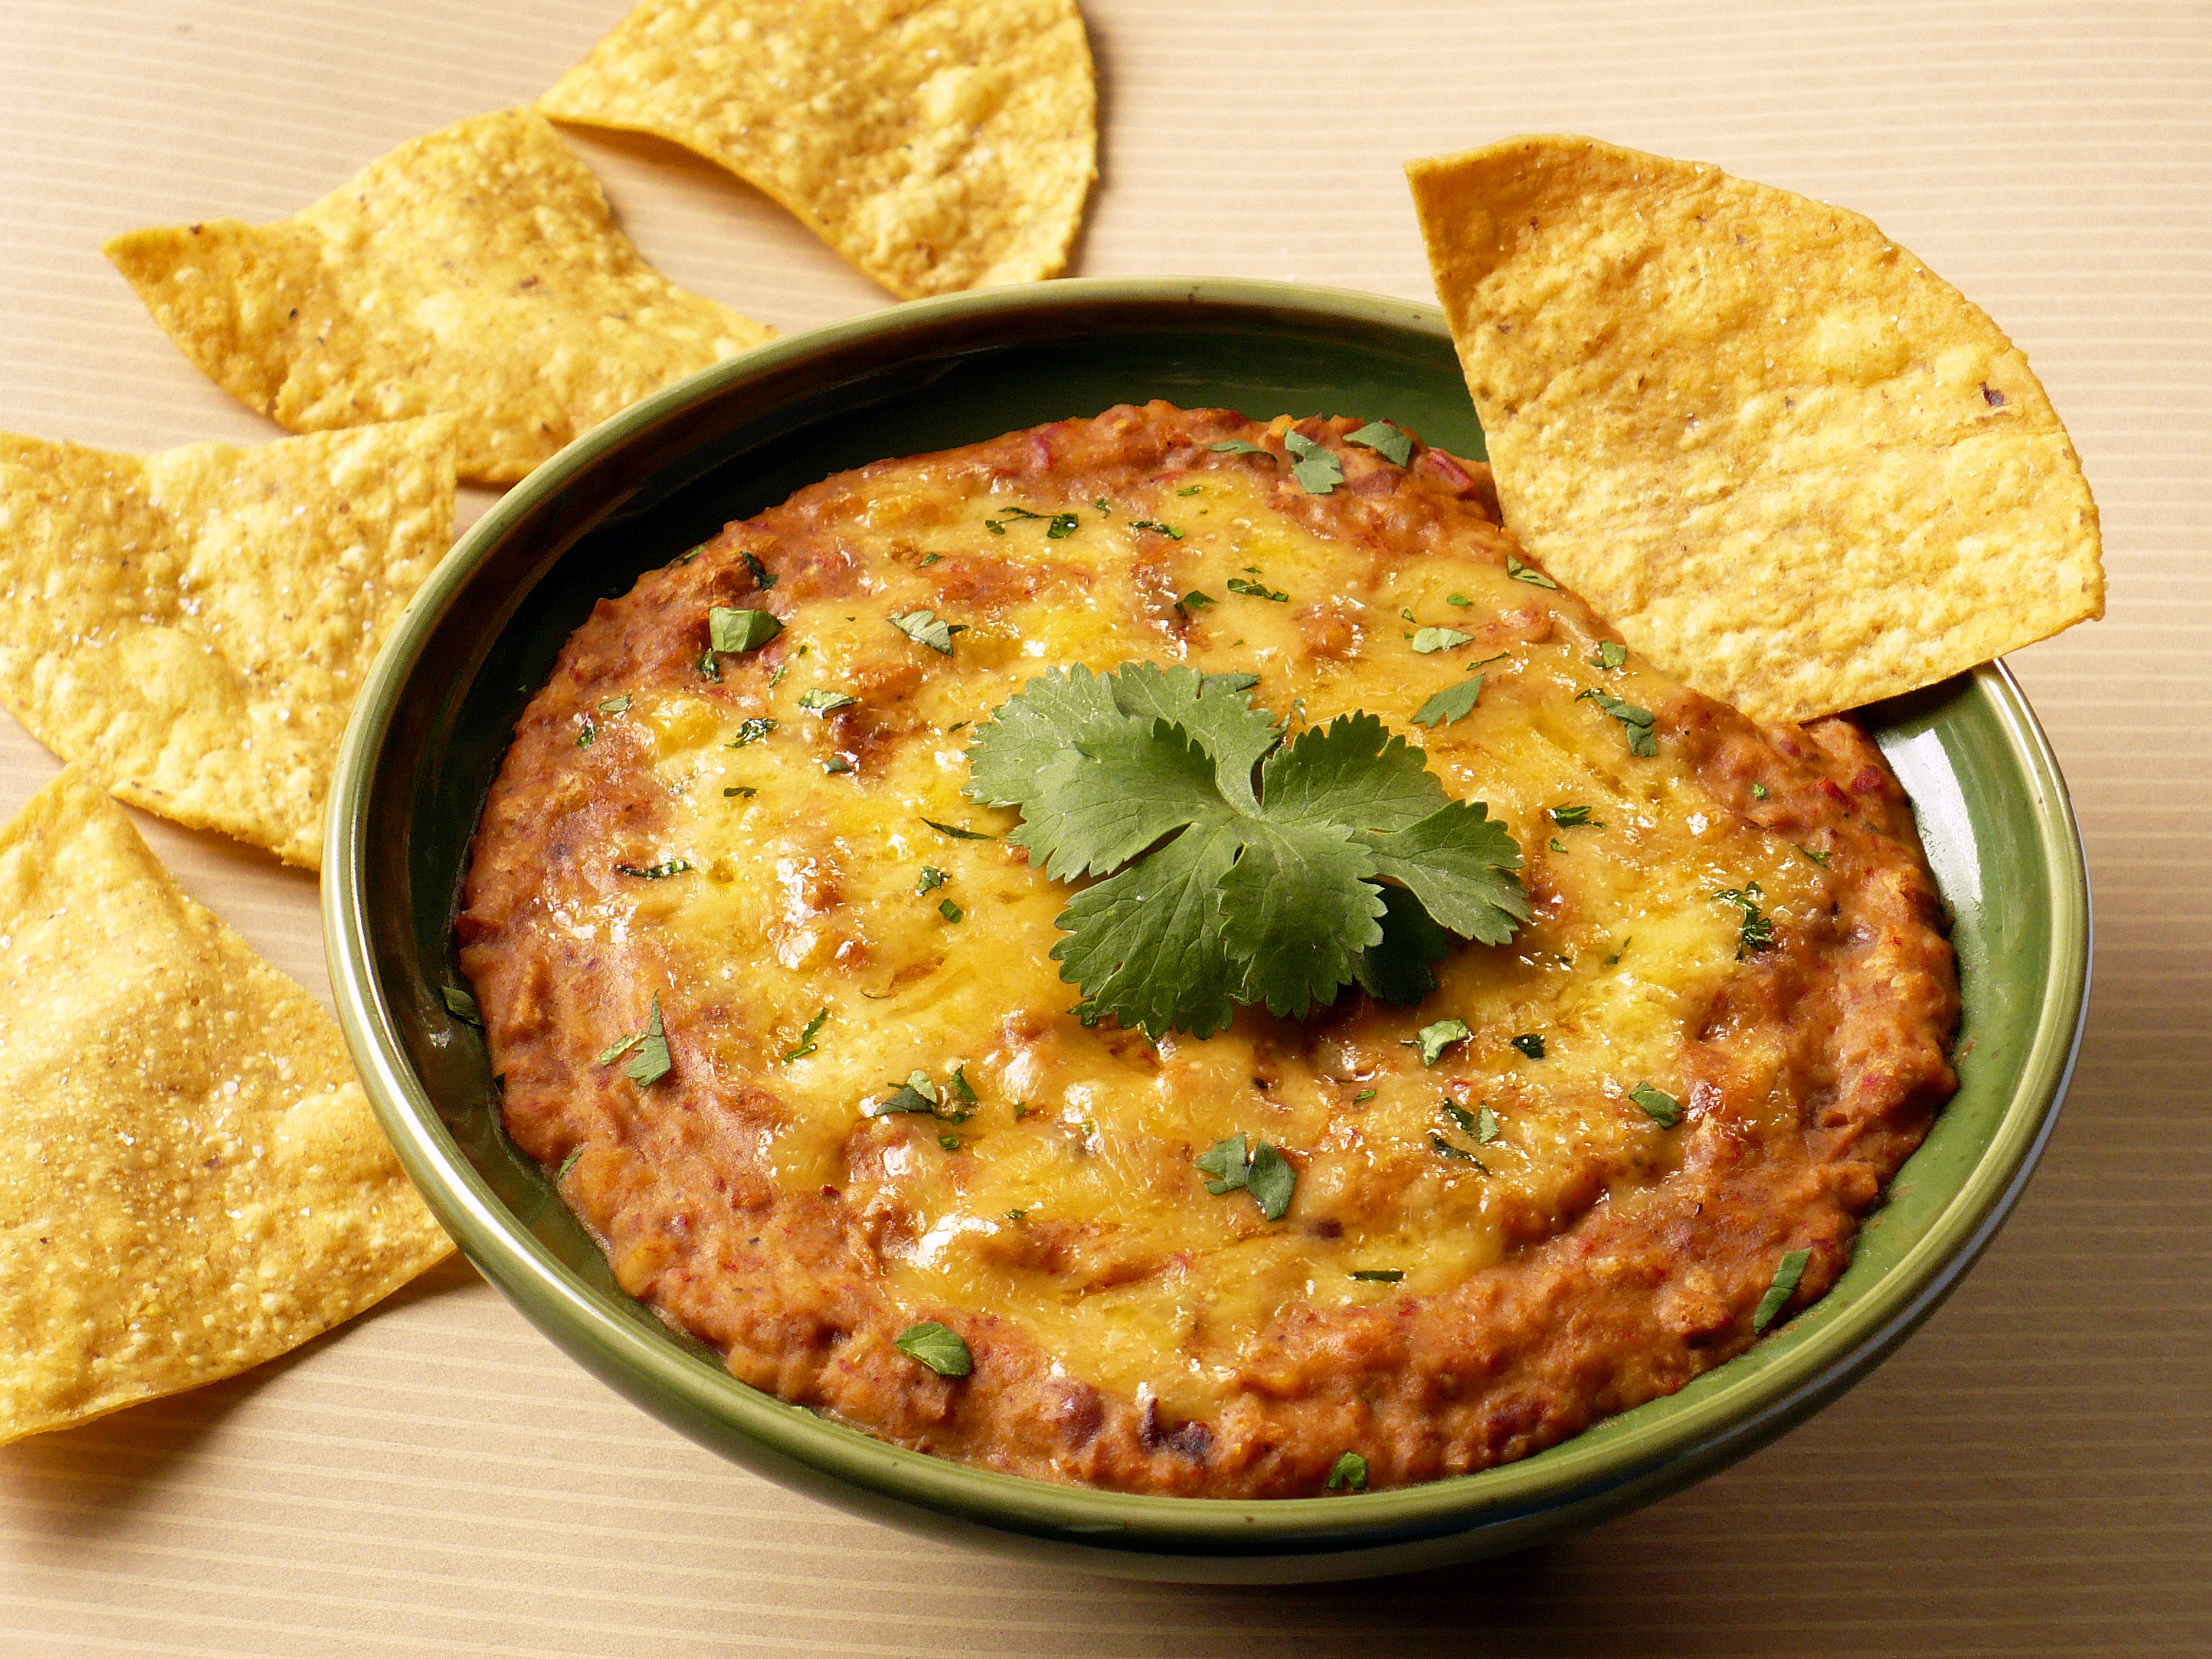
Beefy Taco Queso for 80
A real crowd-pleaser, which can be made the night before and will hold up well in a slow cooker.
Yield: 21 1/2 cups (this will fit in, and fill a 6 quart slow cooker)
64 (1/3 cup) servings
Should Serve 80 people

Yield: 21 1/2 cups (this will fit in, and fill (but not alarmingly so) a 6 quart slow cooker)
64 (1/3 cup) servings
Should Serve 80 - 100 people
Prep Time: 20 min. Cook Time: 2 hours and 1/2 hours on LOW or 2 hours on HIGH, stirring several times.
- 2 pounds hamburger
- 2 cups water
- 3 (1 ounce) packets taco seasoning mix, mild I use Old El Paso
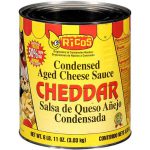
- 1 (6 pound, 11 ounce) can Condensed Cheddar Cheese Sauce
- 2 (10 ounce) cans Rotel, Mild - don't drain
- 3 (28 ounce) bags tortilla chips
- 6 quart slow cooker
-
In a large skillet, over medium high heat fry the hamburger, breaking up the meat into small pieces with a potato masher or spatula, until no longer pink. Drain off the fat and pour in 1 1/2 cups water and 3 packets taco seasoning mix. Heat to boiling. Reduce heat to medium low and simmer 3 minutes, stirring occasionally.
-
In your largest bowl, mix hamburger, 2 cans Mild Rotel (un-drained), the Condensed Cheese Sauce and 2 cups water.
-
2 1/2 hours prior to serving, transfer to a 6 quart slow cooker cover and cook on LOW for 2 1/2 hours or until heated through or for 2 hours on HIGH, stirring several times.
-
Serve with tortilla chips.
NOTE: It’s been my experience that 1 (28 ounce) bags of tortilla chips will serve about 25 people.
An Aloha Dreams Cooking for a Crowd Recipe

Buffalo Wing Queso for 80
Teens especially love this dip. It has a bit of a kick, but not too much. It’s easy to prepare, can be made the night before and will hold up well in a slow cooker. NOTE: You’ll need 6 cups of cooked chicken, which is 2 rotisserie chickens. Or you can use my easy tasty Poached Chicken recipe.
Yield: 21 cups
63 (1/3 cup) Servings
Should Serve 80 people
Teens especially love this dip. It's easy to prep, can be made in advance and holds well. It’s not too hot, super cheesy and really has that dynamite taste of Buffalo wings.
Yield: 21 cups (this will require an 8 quart slow cooker)
63 (1/3 cups) Servings
Should Serve 80 people
TOTAL TIME:
Prep Time: 20 min. Cook Time: 2 hours and 1/2 hours on LOW or 2 hours on HIGH, stirring several times.
- 1 1/2 cups milk
- 4 (8 ounce) packages cream cheese - softened
- 4 cups ranch salad dressing - this is 32 ounces
- 1/2 to 1 cup Buffalo wing sauce - I use Frank's RedHot Original Sauce
- 1/2 (6 pound, 11 ounce) can Condensed Cheddar Cheese
- 6 cups shredded cooked chicken - this is 2 Rotisserie chickens or use my poached chicken recipe
- 3 (28 ounce) bag tortilla chips
- 6 quart slow cooker (NOTE: If you only have a 6 quart slow cooker, then go with 3 cups chicken)
-
Shred or tear 2 rotisserie chickens (meat only, not skin) into 1 inch (bite size) chunks. Set aside.
-
In your largest bowl (or 2 medium bowls), mix well the milk, softened cream cheese, ranch salad dressing and wing sauce. Stir in the one-half of the can of cheese and mix well to combine. Gently fold in the chicken.
-
When you are 2 1/2 hours from serving, transfer to a 6 quart slow cooker. Prep Time: 20 min. Cook Time: 2 hours and 1/2 hours on LOW or 2 hours on HIGH, stirring several times.
NOTE: It’s been my experience that 1 (28 ounce) bags of tortilla chips will serve about 25 people.
To quickly soften an 8-ounce block of cream cheese, place the completely unwrapped cheese on a microwave-safe plate and microwave it on high for 15 seconds. Just add 10 seconds for each additional 8 ounces of cheese.
An Aloha Dreams Cooking for a Crowd Recipe

Warm & Creamy Bean Dip for 70
A great change from the traditional nacho cheese dip. You’ll be making this one over and over again. It’s quick, easy, can be made in advance and delicious!
Yield: 18 cups
Servings: 55 (1/3 cups)
Should Serve 70 people
Yield: 22 cups
66 (1/3 cups) Servings
Should Serve 70 people
- 3 (31 ounce) cans refried beans
- 2 cups picante sauce
- 3 cups shredded Monterey Jack cheese
- 3 cups shredded cheddar cheese - divided
- 2 1/2 cups sour cream
- 8 ounces cream cheese - softened
- 3 tablespoons chili powder
- 1 tablespoon ground cumin
- 3 (28 ounce) bags tortilla chips
- 6 quart slow cooker
-
In a large bowl, combine everything EXCEPT 1/2 cup of the shredded cheddar cheese and the tortilla chips.
-
If cooking directly from refrigerator, start 2 1/2 hours in advance. If cooking at room temperature, start 2 hours in advance. Transfer to a 6 quart slow cooker. Cover and cook on HIGH for 2 hours (or 2 1/2 hours if cold) or until heated through, stirring once or twice. 30 minutes prior to serving, top with remaining cheddar cheese to allow cheese to melt. Serve with tortilla chips
NOTE: It’s been my experience that 1 (28 ounce) bags of tortilla chips will serve about 25 people.
An Aloha Dreams Recipe
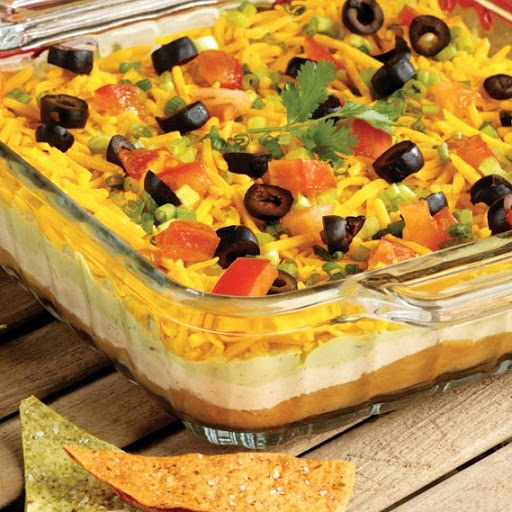
7 Layer Fiesta Bean Dip for 90
Another crowd-pleaser, which can be made the night before and will hold up well.
Yield: 25 cups
Servings: 75 (1/3 cup)
Should Serve: 90 people

Yield: 25 cups
75 (1/3 cup) Servings
Should Serve 75 - 90 people (this one doesn't go as far for some reason)
- 4 (16 ounce) cans refried beans
- 1 tablespoon cumin
- 2 (16 ounce) containers sour cream
- 2 packages taco seasoning mix
- 16 ounces cheddar cheese - shredded (4 cups)
- 4 cups tomatoes - chopped
- 4 cups guacamole
- 2 cups green onions - sliced
- 2 cups black olives
- 1 (28 ounce) bag tortilla chips
- 1 (11 x 9) inch Disposable Aluminum Roasting Pan - or roughly that size
-
Mix refried beans with cumin.
-
Spread refried beans in pan.
-
Mix sour cream and Taco Seasoning Mix in small bowl until well blended. Spread over refried beans.
-
Top with layers of cheese, guacamole, tomatoes, onions and olives. Serve 7 layer dip with tortilla chips.
-
Can be made up to 1 day ahead. Assemble all the layers except the tomatoes onions and olives. Cover and refrigerate for up to a day. Let the dip come to room temperature before serving then sprinkle the tomatoes, green onions and olives over just before serving.
NOTE: It’s been my experience that 1 (28 ounce) bags of tortilla chips will serve about 25 people.
An Aloha Dreams Recipe
Basic Nacho Cheese Sauce for a Large Group
Serving Size
How much nachos your guests eat will depend on a lot of factors, such as:
- Percentage of your guests who are men, young men or boys (or me)
- Amount of other food you have
- Temperature of the event (if it’s a hot venue they will eat less)
- In general, a typical serving size of queso dip is about 1/3 cup (a little over 2 1/2 ounces), which is about 1 full ladle.
1 (6 pounds, 11 ounce) can of cheese sauce + 3 cups water = 50 (1/5 cup) servings which should serve about 60 people.
How to Prepare
- Even heated, the sauce straight out of the can is far too thick to eat, let alone serve effectively. You’ll need to thin the sauce down with 3 cups (24 ounces) of water. This will give you 60 (1/4 cup) servings. NOTE: The instructions on the can indicate that you can thin it down with up to 32 ounces of water plus 20 ounces of pepper juice. Don’t. Doing that would make it way too thin. You could get away with 4 cups (32 ounces) of water if you want to stretch it a bit further, but that’s the most I would add.
- As an alternative to the 3 cups of water, you can add 20 ounces of water and 52 ounces of picante sauce. This will give you about 70 (1/3 cup) servings.
Will I have enough?
Yes. Here’s why:
All these Dips are based on generous 1/3 cup servings.
Chips

1 (28 once) bag of chips = 25 – 35 (7-8 chip) servings
- A typical serving size is 1 ounce (7-8 chips).
- On average if you’re feeding 100 people for a dance or party, get 4 (28 ounce) bags of chips and you’ll have plenty. You can probably even get by with 3 (28 ounce) bags for 100.
Sweets
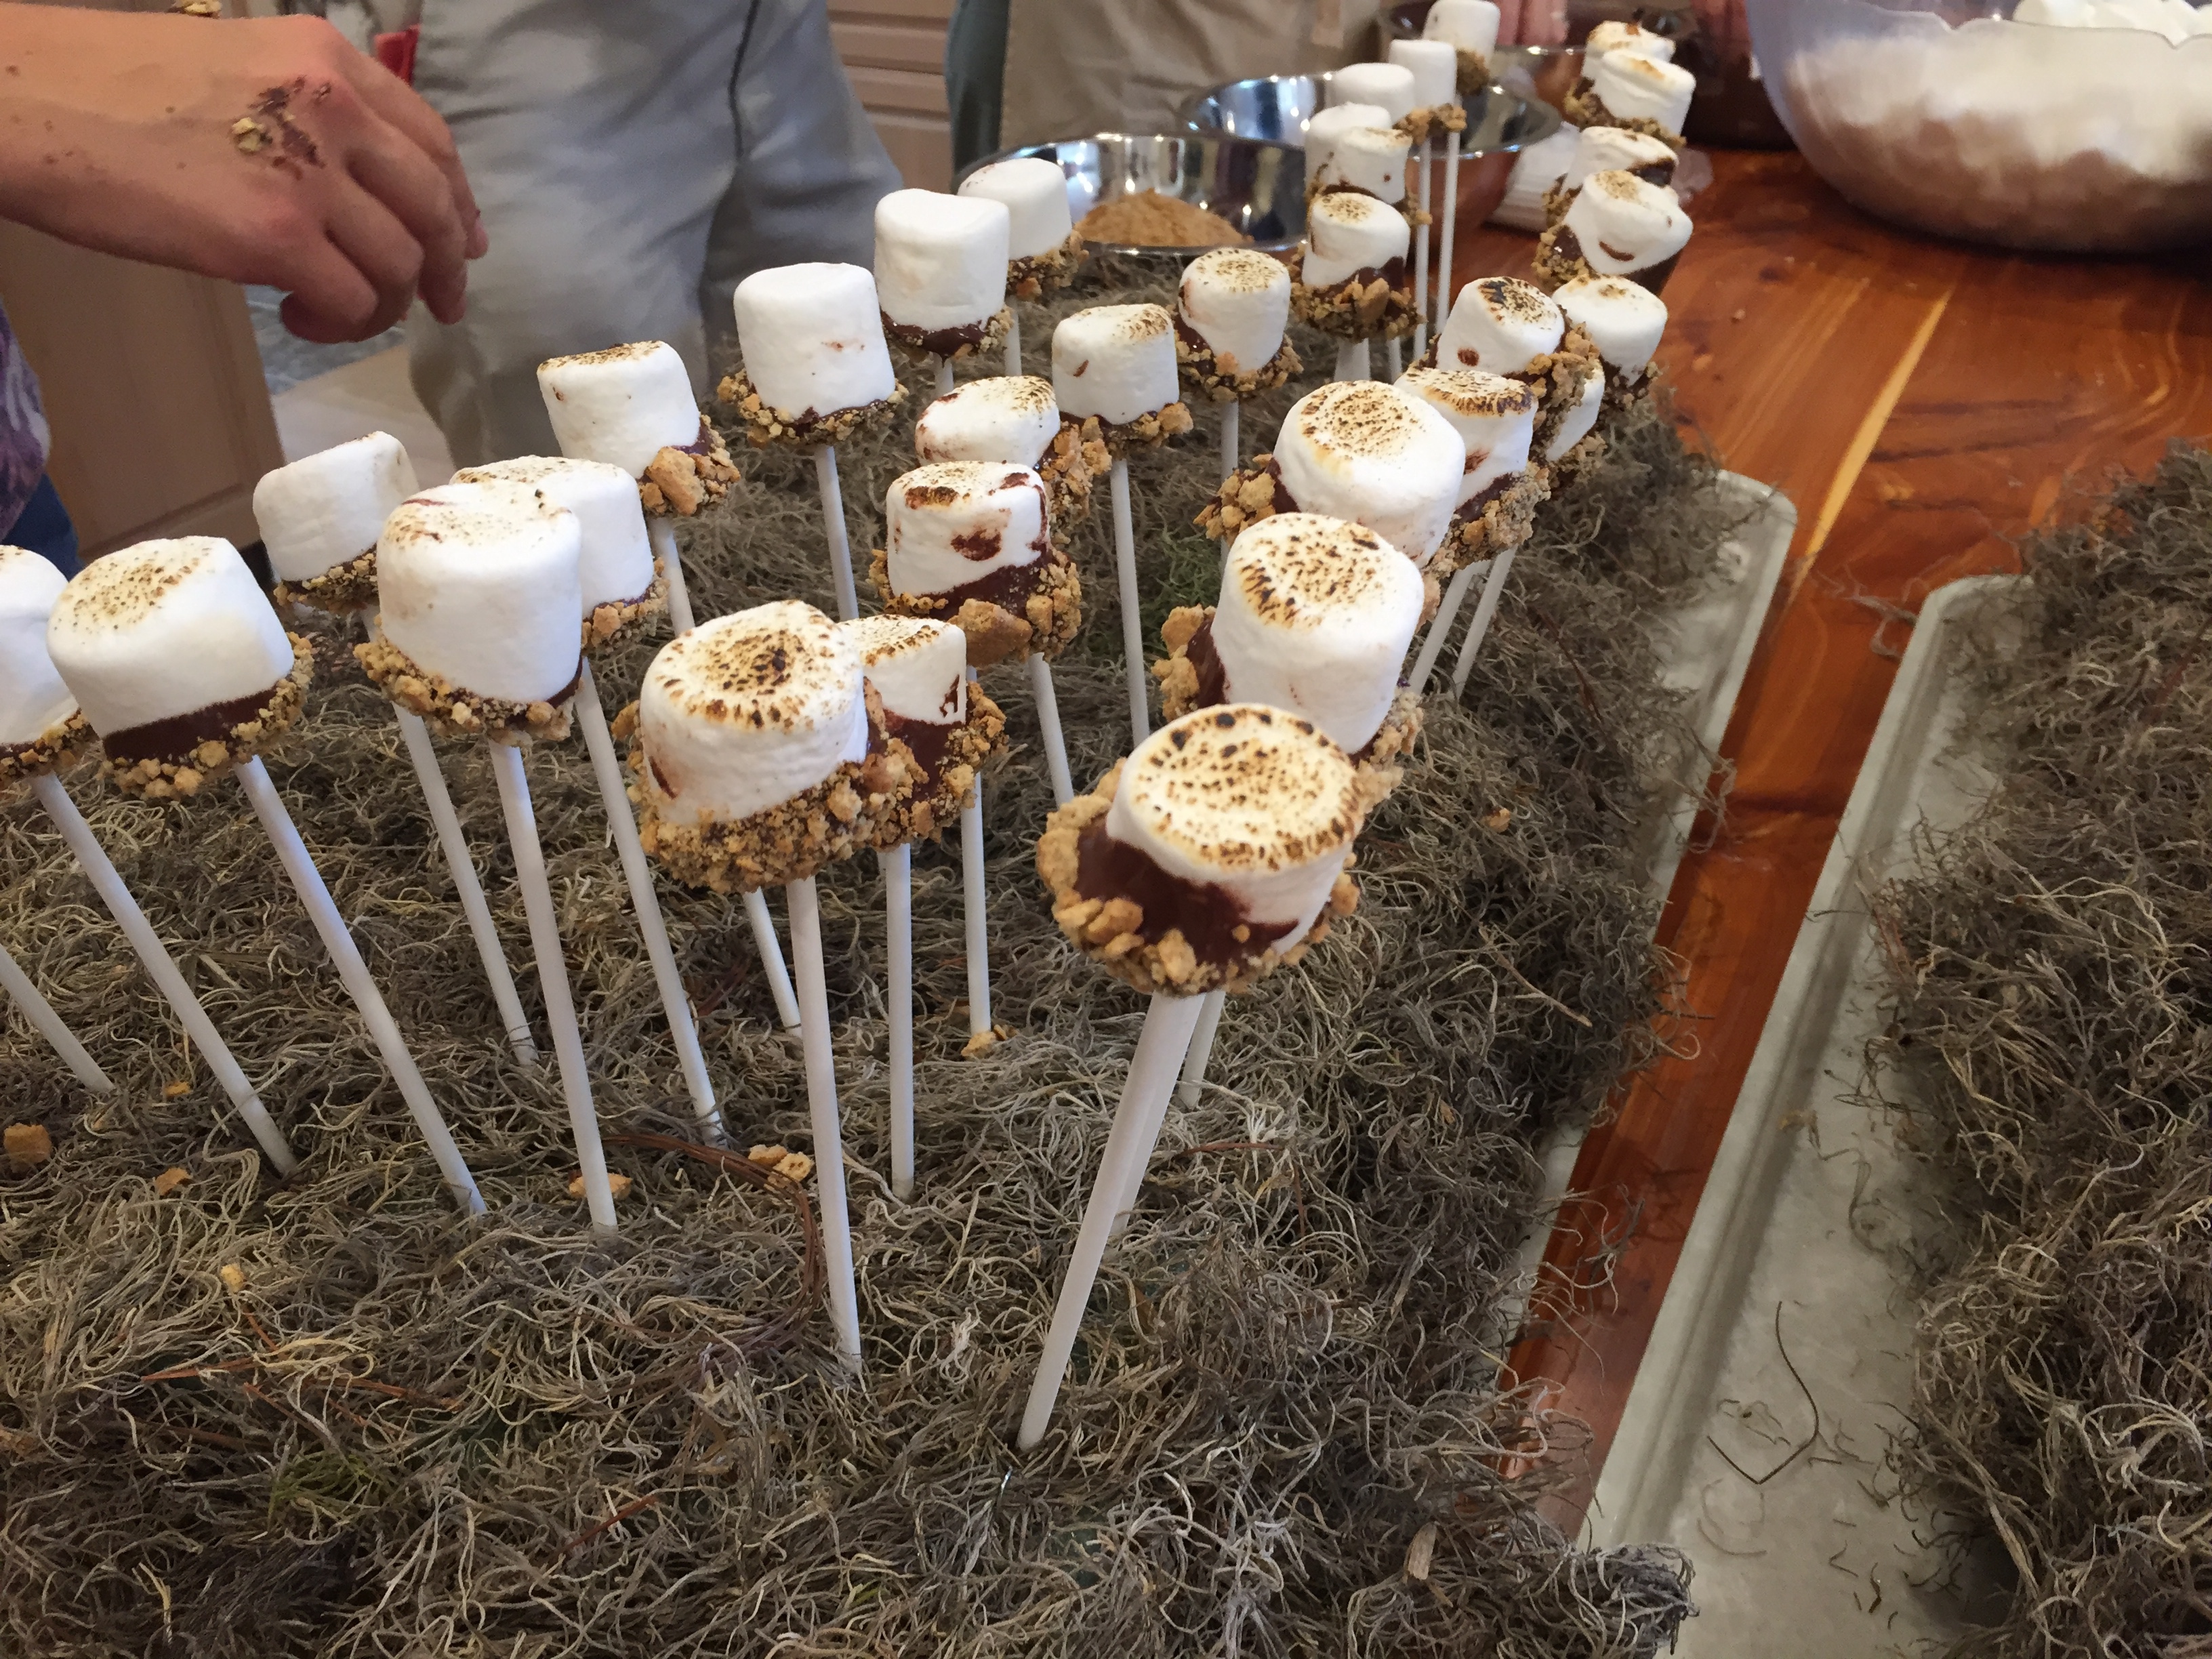
S’mores Pops
Kids love these! They are a fun addition to any activity – especially one with a camping or Western theme. You’ll need a little propane torch to get the marshmallows toasted. Make sure and get them nice and brown for that authentic s’mores taste. I used a 2 inch block of foam from the craft store covered with moss held down by florist picks or wires.
- 16 ounces semi sweet chocolate morsels
- 100 large marshmallows (there are 40 marshmallows per 10 oz bag)
- 75 graham crackers (there are 27 crackers in a 14.4 ounce box)
- 1 Propane Torch
- 100 (8 inch) paper lollipop sticks
- 1 foam stand
- 3 plastic bags
- 1 rolling pin
-
Empty marshmallows into one or several bowls.
-
Place graham crackers in plastic bag. Slightly crush with rolling pin. Empty into one or several bowls.
-
In one or several microwavable bowl(s), microwave chocolate on High 1 minute. Stir and microwave in 30 second increments, stirring after each time until chocolate is melted.
-
Dip each marshmallow halfway into melted chocolate.
-
Next dip marshmallow in the crushed graham crackers.
-
Insert stick into chocolate side of marshmallow.
-
Light propane torch.
-
Holding by s’more pop by stick, direct flame at uncoated marshmallow end. Gently play the flame over the uncoated end. Try not to burn the marshmallow too much.
-
Stick in cooling rack till ready to serve.
An Aloha Dreams Recipe
Marshmallow Cookies ‘N’ Cream Cookies
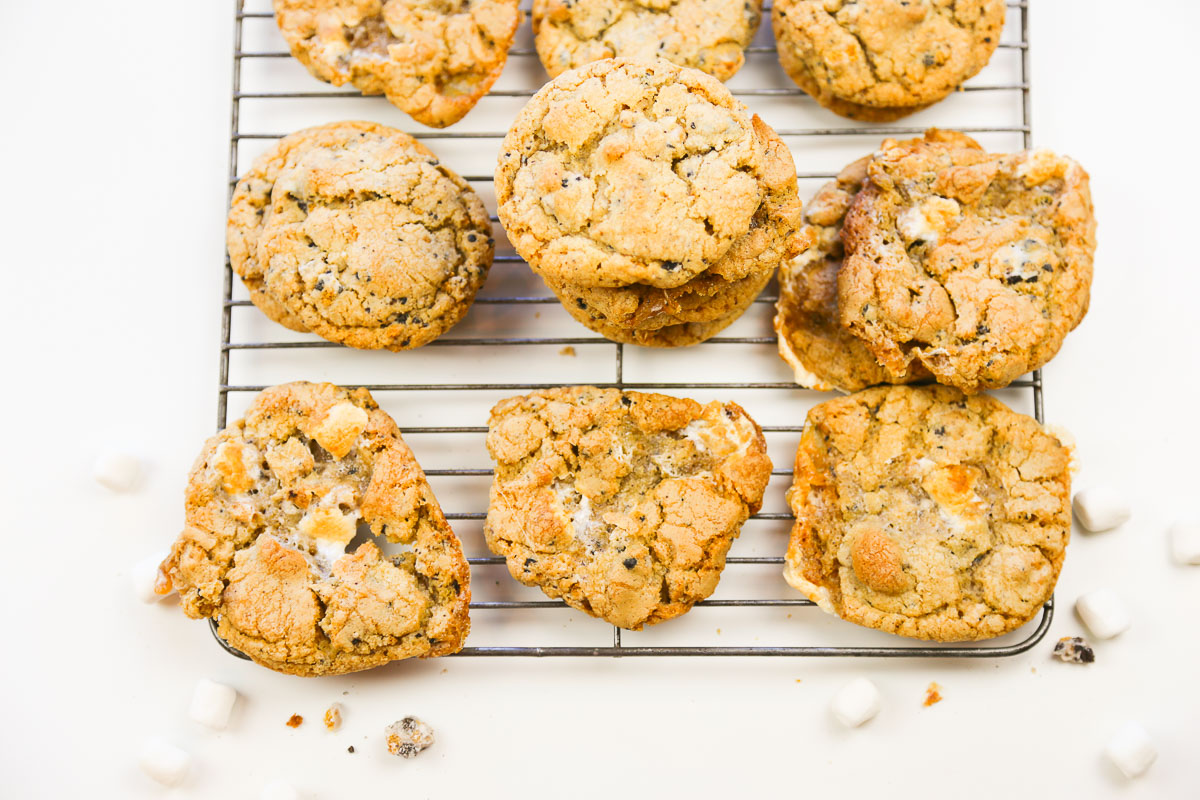
A fantastic, easy crunchy chewy cookie!
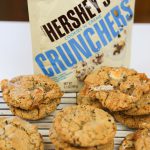
- 2 (6.5 ounce) packages Hershey’s Cookies ‘N’ Cream Crunchers
- 3 cups all-purpose flour (360 grams)
- 1 teaspoon baking soda
- 1/2 teaspoon cream of tartar
- 1 teaspoon salt
- 1 cup unsalted butter at room temperature
- 1 cup brown sugar
- 1 cup granulated sugar
- 2 teaspoons vanilla extract
- 1 teaspoon water
- 2 large eggs
- 1 cup mini marshmallows
-
Set butter out to come to room temperature.
-
Adjust oven racks to the 2 middle positions and preheat oven to 350 degrees F (175 degrees C). Line 2 large baking sheets with parchment paper. Set aside.
-
Put Cookies ‘N’ Cream pieces in a plastic bag, seal well, and smack with rolling pin until the pieces are pea-size. Set aside.
-
In a medium bowl, whisk together flour (spoon into measuring cup, don’t scoop), baking soda, cream of tartar and salt. Set aside.
-
In a different bowl, cream together the butter, white sugar, and brown sugar until smooth, a couple minutes. Add 2 teaspoons vanilla and 1 teaspoon water then beat in the eggs one at a time. Gently stir in flour mixture, and Cookies ‘N’ Cream Crunchers pieces.
-
Drop by large spoon-fulls onto parchment paper.
-
Bake for 10 - 13 minutes, or until edges are nicely browned. Transfer to wire racks to cool completely.
-
Cookies can be stored in an airtight container at room temperature for up to 5 days, and frozen for up to 1 month. Freeze your baked cookies on baking sheets lined with wax or parchment paper first until firmly frozen, then transfer them to a freezer bag or another airtight container. Otherwise, you'll end up with a mess.
-
When thawing frozen baked cookies, take them out of the containers and let sit at room temperature so that condensation doesn't form and make them soggy.
Ultimate Chocolate Chip Cookies

Do NOT scoop your flour (this will lead to a dense, tough cookie). Instead, before measuring, you need to aerate your flour. As it sits in the container it gets compacted. Use a fork to aerate your flour (fluff it up) then spoon it into a measuring cup. Finally, level off the cup with the back of a butter knife. I f you have scooped properly, a cup of flour should weigh 4.5 ounces or 120 grams.
- 1 cup (2 sticks) butter (softened)
- 1 cup granulated white sugar
- 1 cup packed light brown sugar
- 1 teaspoon salt
- 1 teaspoon baking soda
- 1/2 teaspoon cream of tartar
- 2 eggs
- 1 teaspoon vanilla
- 2 teaspoons water
- 3 cups (12.75 ounces or 360 grams) all-purpose flour (Spooned, not scooped)
- 1 cup semisweet chocolate chips
- 1 cup milk chocolate chips
-
Preheat oven to 350 degrees F (175 degrees C).
-
Line 2 cookie sheets with parchment paper.
-
Cream together the butter, white sugar, brown sugar, 1 teaspoon salt, 1 teaspoon baking soda and 1/2 teaspoon cream of tartar until smooth. Beat in 2 eggs one at a time, then stir in 1 teaspoon vanilla and 2 teaspoons water. Stir in flour, 1 cup at a time, then stir in chocolate chips. Drop dough by walnut-sized spoonfuls onto the prepared pans. Flatten balls slightly.
-
Let dough refrigerate for 1 hour.
-
Bake for about 10 - 11 minutes in the preheated oven, or until edges are light golden brown and center is slightly under-done looking.
-
Cool slightly then remove from cookie sheet. Finish cooling on a wire rack.
-
May be stored, covered, in refrigerator for up to 3 days or in freezer in a freezer bag for up to 8 weeks.
Snickerdoodle Cookies
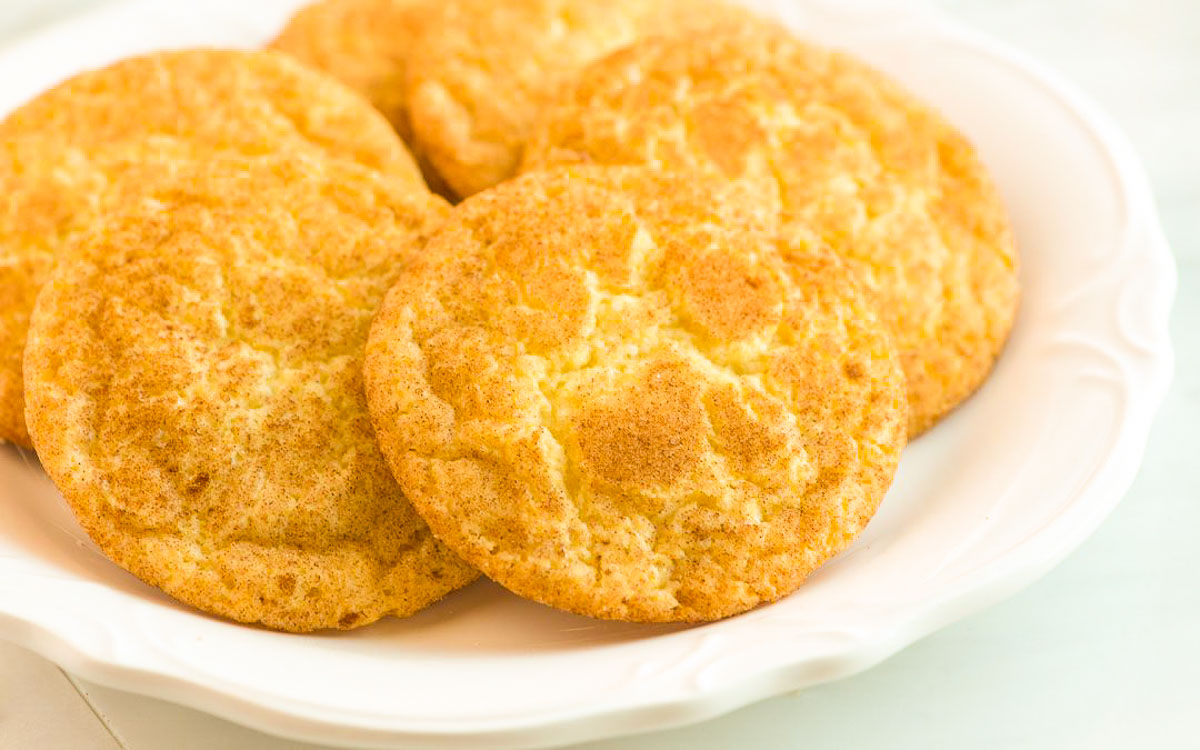
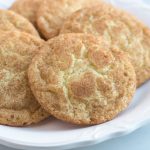
These are wonderful when you make them - and even better the next day! They look puffy in the oven but will settle down once they start cooling. Let them cool before you serve them.
- 1 cup Butter-flavored Crisco shortening (no substitutes)
- 1 teaspoon vanilla
- 1 1/2 cups white sugar
- 2 eggs
- 2 3/4 cups (11.6 ounces or 330 grams) all-purpose flour
- 1 teaspoon baking soda
- 2 teaspoons cream of tartar
- 1/2 teaspoon salt
- 2 tablespoons white sugar
- 2 teaspoons ground cinnamon
-
Preheat oven to 375 degrees F (190 degrees C).
-
Line 2 baking sheets with parchment paper
-
In a medium bowl, with a mixer cream together the shortening, vanilla and 1 1/2 cups sugar. Mix in the eggs. Sift together the flour, baking soda, cream of tartar, and salt. Stir flour mixture into the creamed mixture until well blended. In a small bowl, stir together the 2 tablespoons of sugar, and the cinnamon.
-
Roll dough into walnut sized balls, (or use a scoop to form them) then roll the balls in the cinnamon-sugar mixture, making sure you have a generous amount on each ball. Place balls onto the prepared cookie sheet, about two inches apart.
-
Bake for 9 - 10 minutes in the preheated oven. Edges should be slightly brown. Centers will be puffy initially when removing from the oven. Once slightly cooled remove from sheets to finish cooling on wire racks. Let cool complete before serving.
-
These cookies will keep up to 2 days, stored in an airtight container or plastic freezer bag. (Good luck - these cookies only last HOURS in my house!)
Don't expect these to brown before you take them out of the oven - if they're brown, you overcooked them. Make sure you use butter-flavored Crisco and not real butter. As odd as it may sound, Crisco actually works better than real butter in many cookie and pastry recipes.
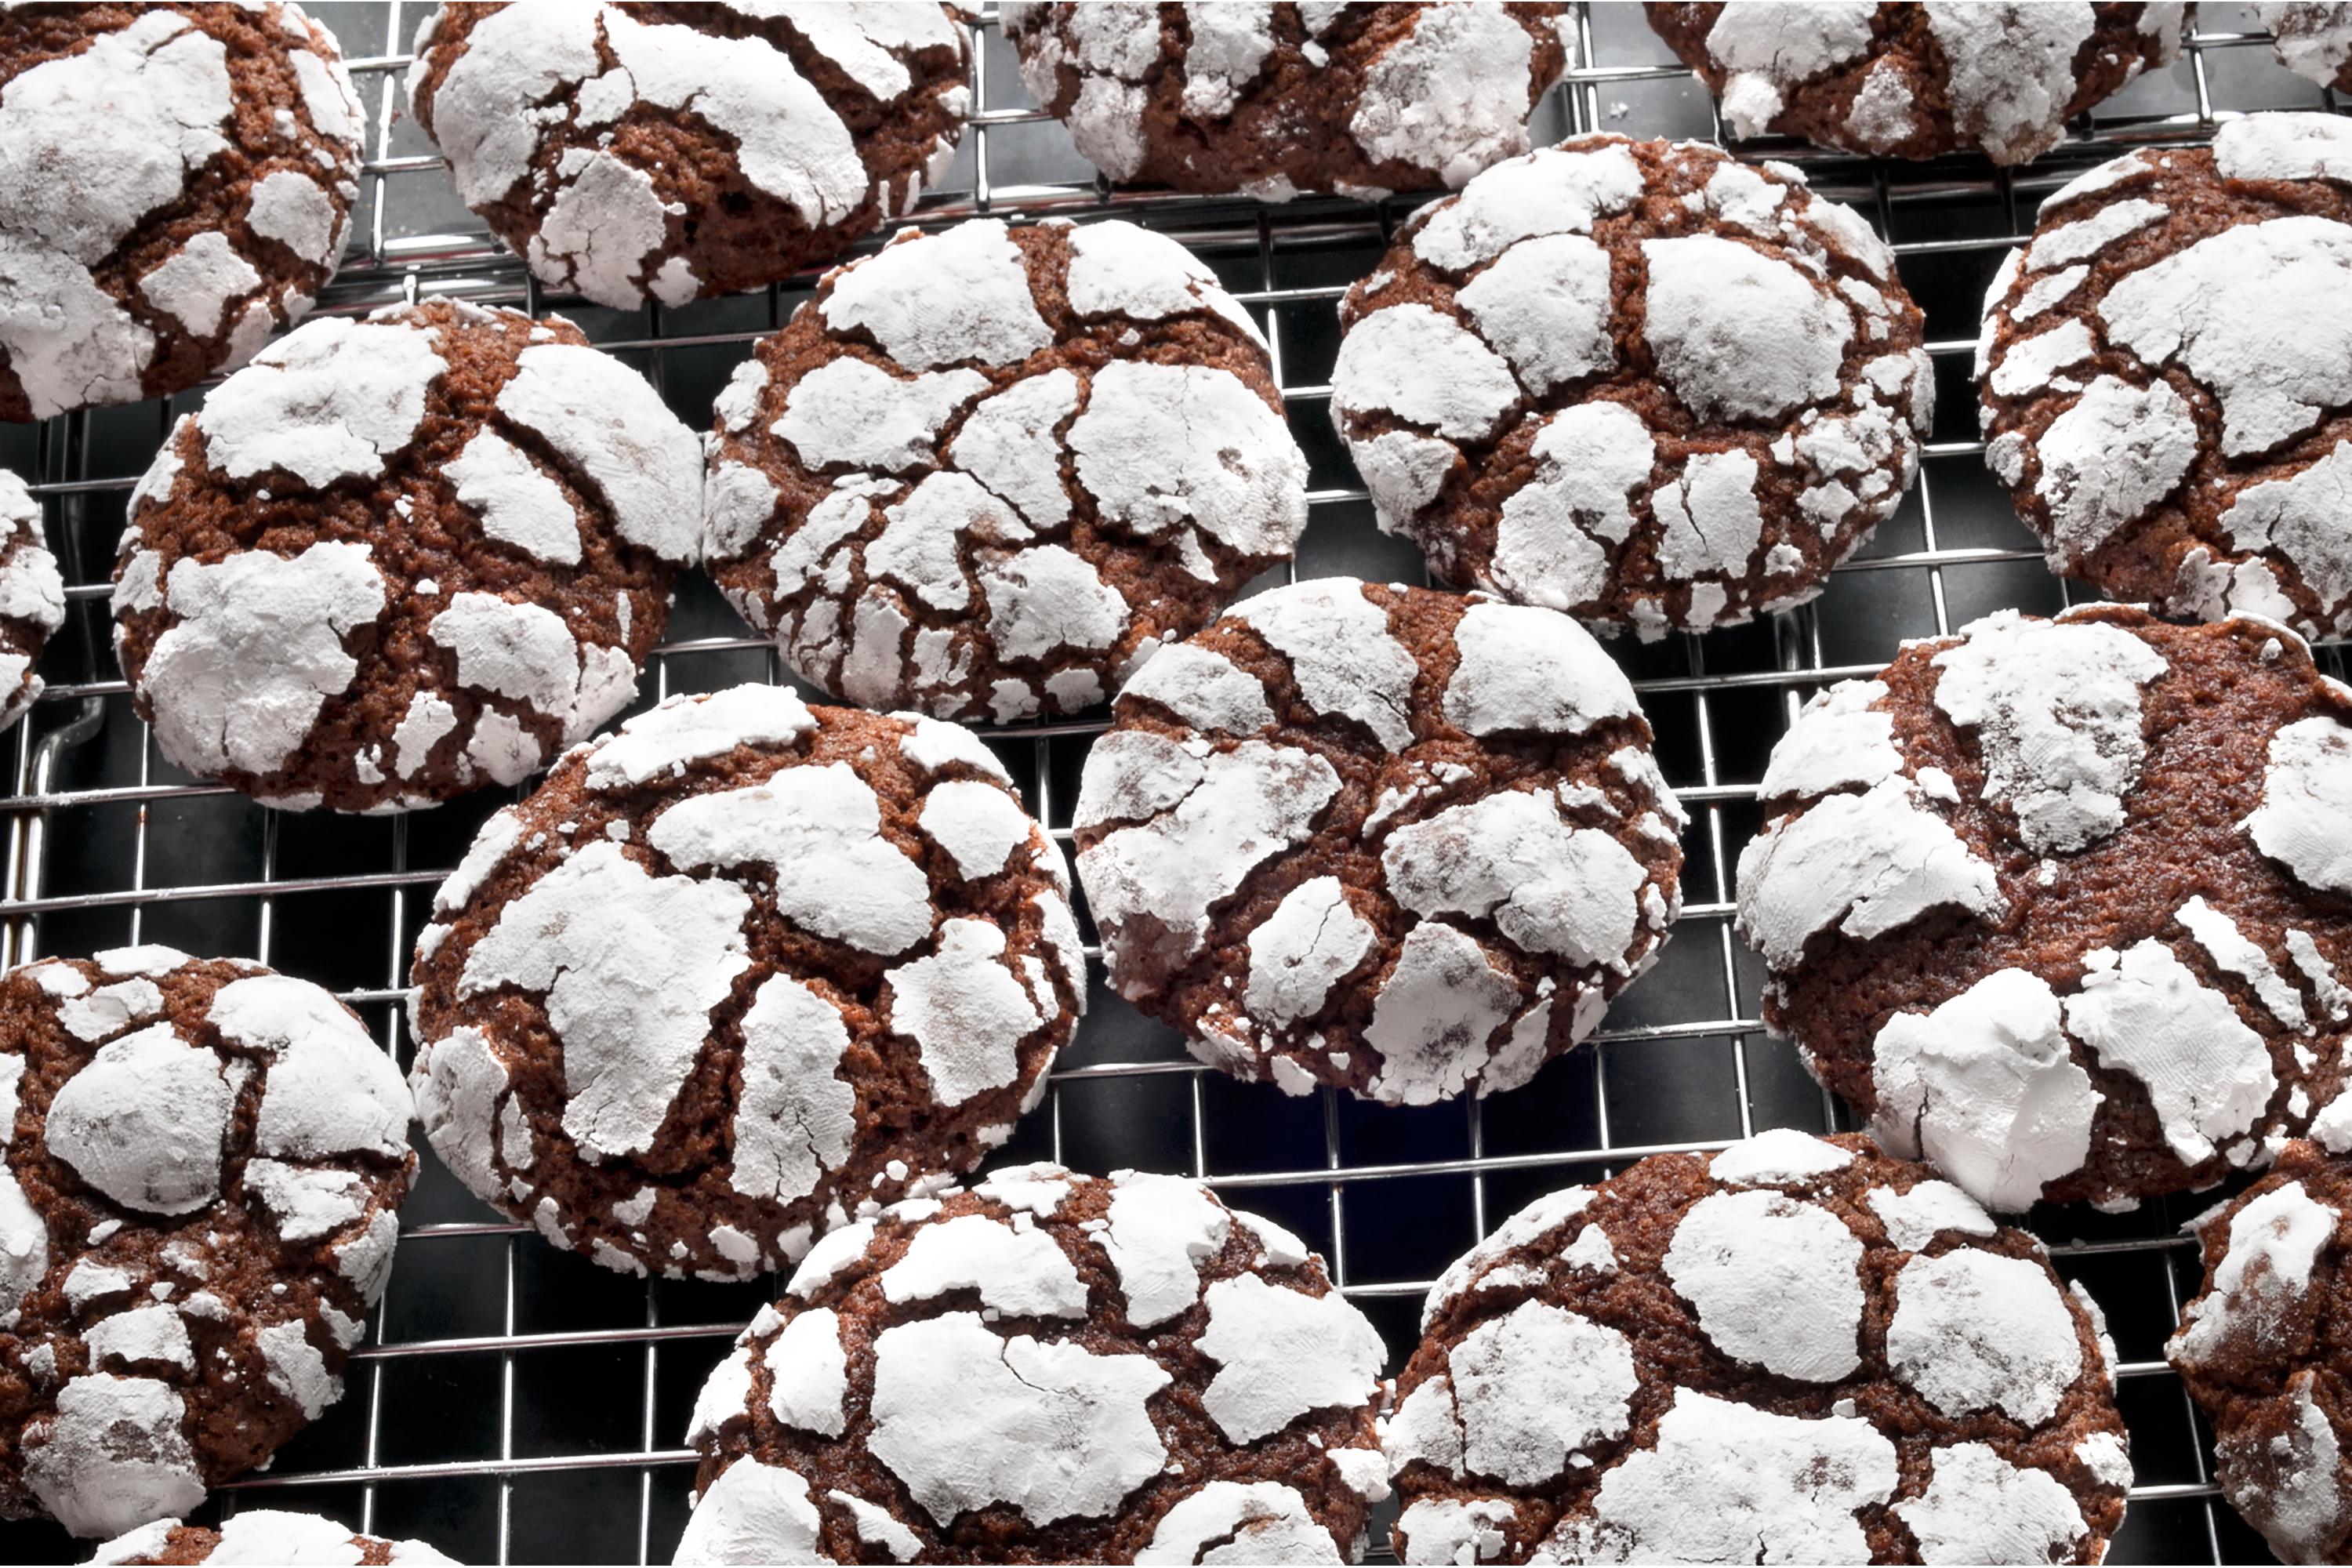
Chunky Chocolate Crinkle Cookies
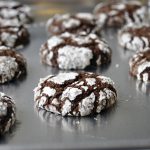
- 1 cup unsweetened cocoa powder
- 2 cups white sugar
- 1/2 cup vegetable oil
- 4 large eggs
- 2 teaspoons vanilla extract
- 2 cups (8.5 ounces or 240 grams) all-purpose flour
- 2 teaspoons baking powder
- ½ teaspoon salt
- 3/4 cup confectioner’s sugar (powdered sugar)
-
In a medium bowl, mix together cocoa, white sugar, and vegetable oil. Beat in eggs one at a time, then stir in the vanilla. In another bowl, combine the flour, baking powder, and salt. Stir the flour mixture into the cocoa mixture. Cover dough, and chill for at least 4 hours or freeze for about 45 minutes.
-
Line 2 large cookie sheets with parchment paper. Preheat oven to 350 degrees F (175 degrees C). Put 3/4 cup powdered sugar in a small saucer and set aside.
-
Form cookies by rolling dough into one inch balls or use a number 50-size scoop. You can also use spoons to scoop the dough up. Drop dough balls DIRECTLY into the powdered sugar. Roll to coat each ball thoroughly in the powdered sugar to ensure good crinkling. Place balls on prepared cookie sheets.
-
Bake in preheated oven for 10 to 12 minutes. Let stand on the cookie sheet for a minute before transferring to wire racks to cool.
-
Cookies can be stored in an airtight container at room temperature for up to 5 days, and frozen for up to 1 month. After baking, freeze cookies on a baking sheet lined with wax or parchment paper first until firmly frozen, then transfer them to a freezer bag or another airtight container. Otherwise, you'll end up with a mess.
When thawing frozen baked cookies, take them out of the containers and let sit at room temperature so that condensation doesn't form and make them soggy.
Strawberries & Cream Cookies
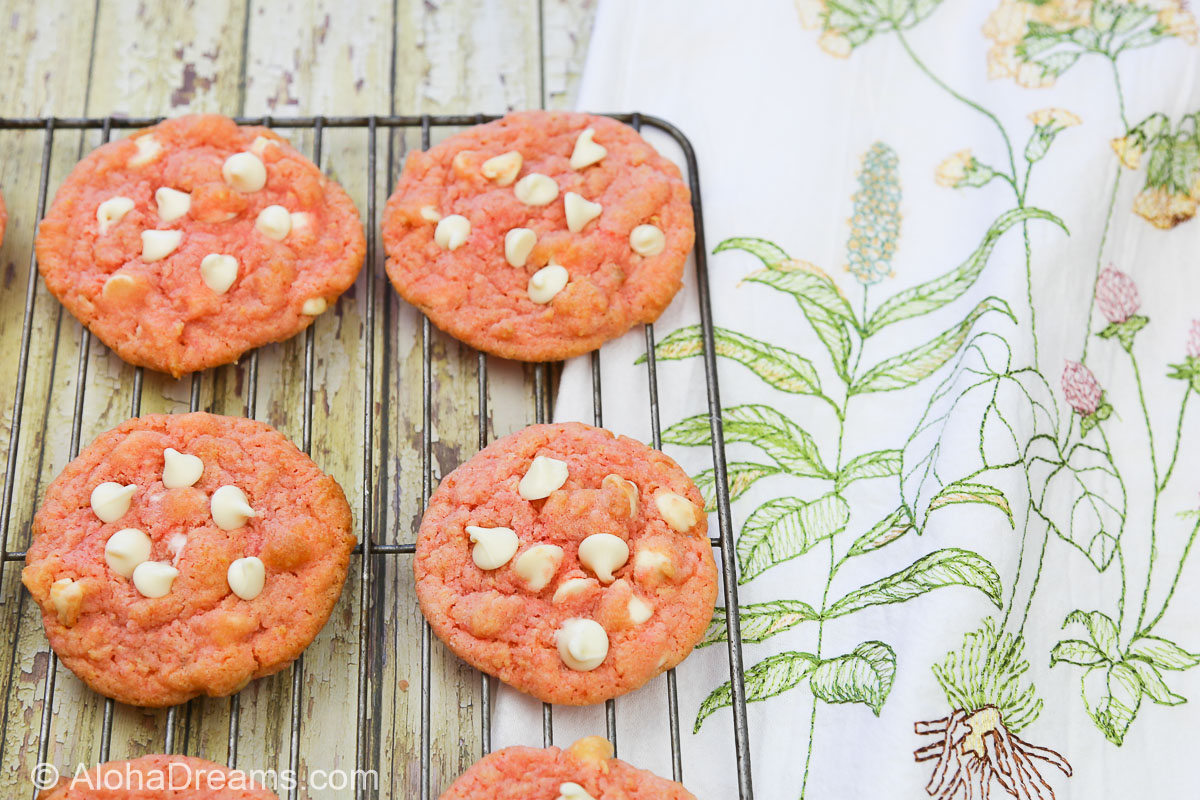
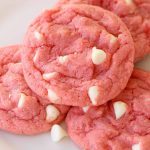
- 1 box Strawberry Supreme Cake Mix
- 1 teaspoon baking powder
- 2 large eggs
- 1/2 teaspoon vanilla extract
- 1/3 cup vegetable oil
- 1 1/4 cups white chocolate chips
-
Preheat oven to 350.
-
Line two baking sheets with parchment paper.
-
In a large bowl, combine cake mix and baking powder. In a separate bowl, whisk together eggs, oil, and vanilla by hand until well combined.
-
Pour egg mixture into bowl with cake mixture. Stir until a dough forms. Be sure to fully combine. Mix in the white chocolate chips.
-
Drop rounded balls of the dough onto your baking sheet. Since they flatten out quite a bit, make sure the balls are taller than wide on your cookie sheet, about 2 inches apart.
-
Bake for 10 minutes. Do not let them brown in the oven. Once slightly cooled remove from sheets to finish cooling on wire racks. Cookies will appear slightly undercooked, but that's ok. They firm up and flatten as they cool. Allow to cool for at least 10 minutes. Enjoy!
-
Cookies will stay fresh, covered, at room temperature for up to 1 week. You can make the cookie dough in advance and hold it in the refrigerator for up to 3 days. Allow dough to come to room temperature before spooning it onto the prepared baking sheet. Alternatively you can freeze your baked cookies up to 3 months. Or freeze your unbaked cookie dough balls for up to 3 months. Bake the frozen cookie dough balls for an extra minute, without thawing.
Vanilla Sugar Crinkle Cookies
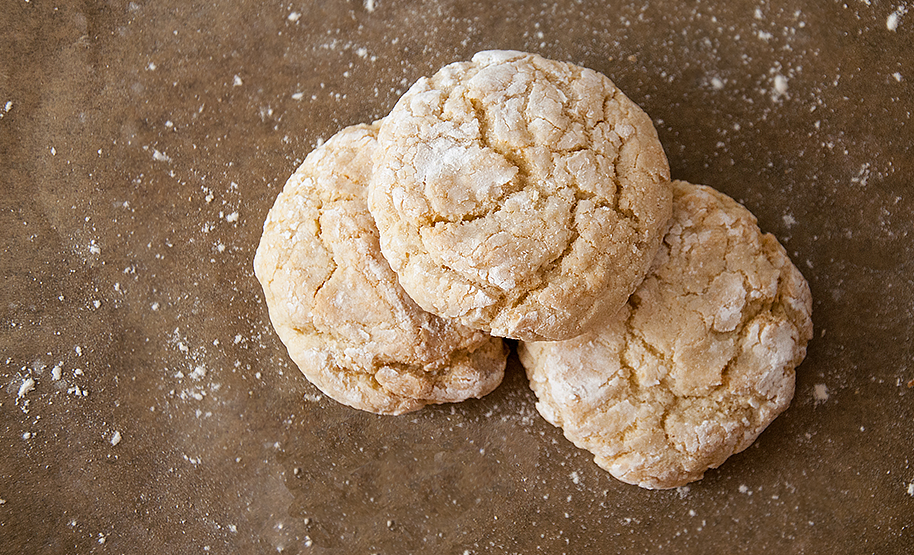
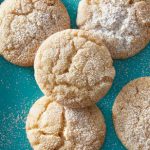
- 3 cups (12.75 ounces or 360 grams) all-purpose flour
- 2 teaspoons baking powder
- ½ teaspoon baking soda
- ½ teaspoon salt
- 1 ½ cups granulated sugar
- 1 cup butter softened
- 2 vanilla beans cut half lengthwise, seeds scraped out
- 2 large eggs
- 1 ½ cup sanding sugar or granulated sugar
- 1 ½ cups powdered sugar
-
Pre-heat oven to 325°Line several baking sheets with parchment paper and set aside.
-
In a small bowl, mix flour, baking powder, baking soda and salt; set aside.
-
In large bowl, beat granulated sugar, softened butter and vanilla bean seeds with an electric mixer on medium speed about 1 minute or until fluffy; scrape side of bowl. Add in eggs, one at a time, beating just until smooth. On low speed, beat flour mixture into sugar mixture until well blended. Cover and let dough stand at room temperature 10 minutes.
-
Shape dough into approximately 60 (1 1/4-inch) balls. In one small bowl, place 1 1/2 cups sanding sugar or granulated sugar and in a second small bowl place 1 1/2 cups powdered sugar. Roll each cookie first in the sanding sugar or granulated sugar, then in the powdered sugar. Place on the prepared cookie sheets approximately 2 inches apart.
-
Bake 12 to 14 minutes or until edges are until light brown. Cool 2 minutes then remove from cookie sheet to cooling rack. After completely cooled, at least 15 minutes, sprinkle with additional powdered sugar.
-
Can be made in advance and stored, layered between wax paper in an airtight container, up to 3 days at room temperature and up to 3 months in the freezer.
Chocolate Brownie Crookies
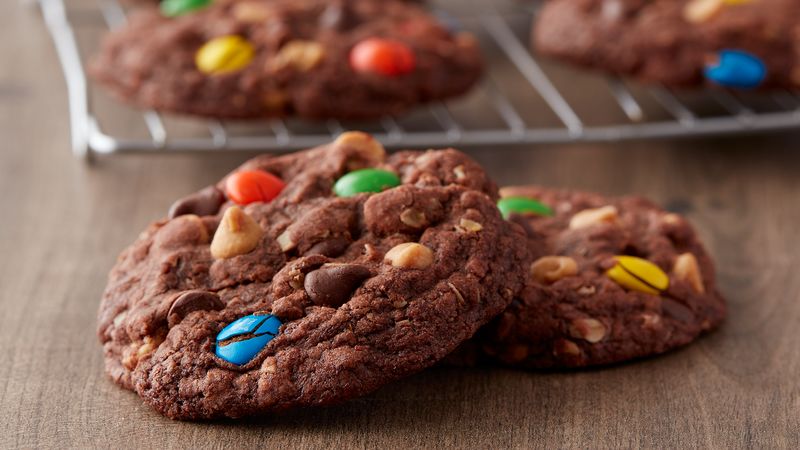

Take them out of the oven when they are dry around edges but still somewhat wet-looking in the middle. They will fall apart if you try to eat them warm (gooey but yummy!), but are nice and soft if saving some for next day.
- 2 (1 lb 2.3 oz) boxes Betty Crocker™ Fudge Brownie Mix
- 1 cup quick-cooking oats
- 1 cup butter (melted)
- 2 tablespoons water
- 2 eggs
- 1 cup toffee chips
- 1 cup semisweet chocolate chips
- 1 1/2 cup M&M's™ chocolate candies
-
Line cookie sheets with cooking parchment paper.
-
In large bowl, stir together brownie mix and oats. Add melted butter, water and egg; stir until well blended. Stir in the toffee and chocolate chips.
-
Shape dough into 1 1/2-inch balls. Place on cookie sheet 3 inches apart. Press each ball slightly to flatten then press the M&Ms™ candies into top of the cookies. Cover cookie sheets with plastic wrap and refrigerate 2 hours.
-
Heat oven to 350°Bake 12 to 14 minutes or until tops of cookies are no longer wet looking. Cookies should be dry around edges but still somewhat wet-looking in the middle Cool 5 minutes; remove from cookie sheets to cooking racks.
-
Can be made in advance and stored, layered between wax paper in an airtight container, up to 3 days at room temperature. Alternatively you can freeze your baked cookies up to 3 months.
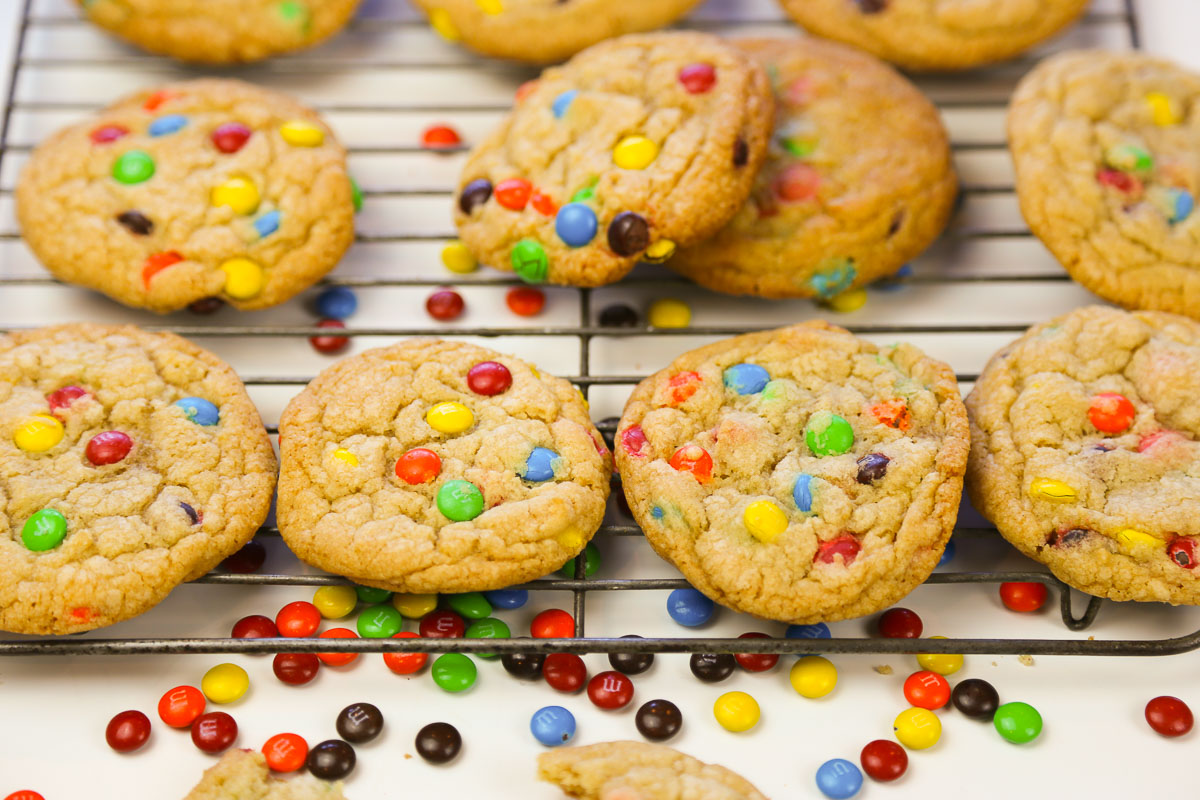
Mini M&M with Toffee Bit Cookies

- 3 cups (12.75 ounces or 360 grams) all-purpose flour
- 1 teaspoon baking soda
- 1/2 teaspoon cream of tartar
- 1 teaspoon salt
- 1 cup unsalted butter - at room temperature (2 sticks)
- 1 cup brown sugar
- 1 cup granulated sugar
- 3 teaspoons vanilla extract
- 2 large eggs
- 1 (10.10 ounce) package m&m's minis (about 1 1/2 cups)
- 1 cup toffee bits
-
Adjust oven racks to the 2 middle positions and preheat oven to 350 degrees F (175 degrees C). Line 2 large baking sheets with parchment paper. Set aside.
-
In a medium bowl, whisk together flour, baking soda, cream of tartar and salt. Spoon your flour into your measuring cup, don’t scoop. Better yet, invest in a scale. Set aside.
-
Cream together the butter, white sugar, and brown sugar until smooth, a couple minutes. Add vanilla and water then beat in the eggs one at a time. Drop by large spoon-fulls onto parchment paper.
-
Bake for about 10 minutes in the preheated oven, or until edges are nicely browned. Transfer to wire racks to cool completely.
-
Cookies can be stored in an airtight container at room temperature for up to 5 days, and frozen for up to 1 month. Freeze your baked cookies on the baking sheets lined with the parchment paper first, until firm, and then transfer them to a freezer bag or another airtight container.
-
When ready to serve take frozen baked cookies out of their containers and place them on a paper towel-lined plate to thaw at room temperature.
Spoon your flour into your cup, don’t scoop. Better yet, invest in a scale.
Drinks for a Crowd
Every event deserves a fabulous punch.
If you’re looking for the perfect party punch, I’ve got you covered with one of my easy party punch recipes.
How much do I need?
Beverage
Depending on the length of the event, I typically plan on an average of 2 (8 ounce) drinks per person. This means you need an average of 16 ounces of beverage per person. If it’s a teen dance and it’s hot you should plan on 2.5 (8 ounce) drinks per person.
Cups & Ice
I typically use the red 18 ounce Member’s Mark Red Plastic Cups at Sam’s. These are the same as the 18 ounce Solo cups at Wal-Mart. This is a very generous size for serving drinks. If you fill an 18 ounce cup full of ice, it will hold 8 ounces of beverage and 8.5 ounces of ice. If you fill it 1/2 full of ice it will hold 12 ounces of beverage and 4.5 ounces of ice.
Based on my experience, you should plan on buying 2 – 3 cups per person.
If you’re serving large groups of 100 or more, I’d recommend at least 2 (5 gallon) drink dispensers for your chilled beverage. If you have time, you can have folks pre-fill the drink cups.
It’s also been my experience that people often under-estimate the amount of ice required for an event. If you’re providing ice, I’d plan on about 8 ounces of ice per serving. This means you need an average of 16 ounces (2 drinks each with 8 ounces of ice) of ice per person. So – that means 1 (20 pound) bag of ice will serve 20 people. if you are serving 100 people you will need 5 (20 pound) bags of ice to serve in the drinks.
Fabulous Tiki Punch for 75
This Polynesian punch is a fabulous choice for a large group punch. Quick, easy and delicious, Tiki Punch is about to become your go-to summer party punch.
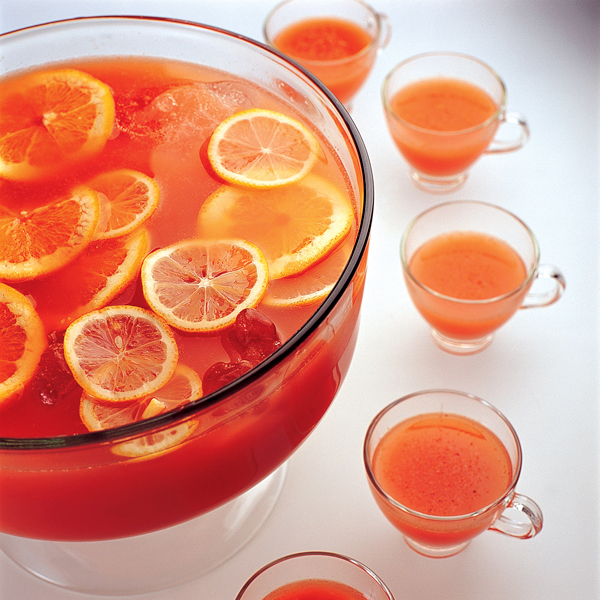
Serves: 4.6 gallons (572 ounces) 75 servings of 8 ounces
- 2 gallons Juicy Red Hawaiian Punch
- 2 (12 ounce) cans frozen Pink Lemonade concentrate
- 2 (46 ounce) cans pineapple juice
- 1 gallon orange juice - you can use a Tropical blend if desired
- 1 liters lemon lime soda
- 1 - 2 cups sugar (to taste)
- 1 (25.4 ounce) bottle sparkling white grape juic
- 5 gallon drink dispenser
- 2 (20 pound) bags ice
-
Put all items in a large cooler with ice 8 hours prior to serving
-
When ready to serve, pour all ingredients in a 5 gallon drink dispenser and add ice as needed.
An Aloha Dreams Recipe
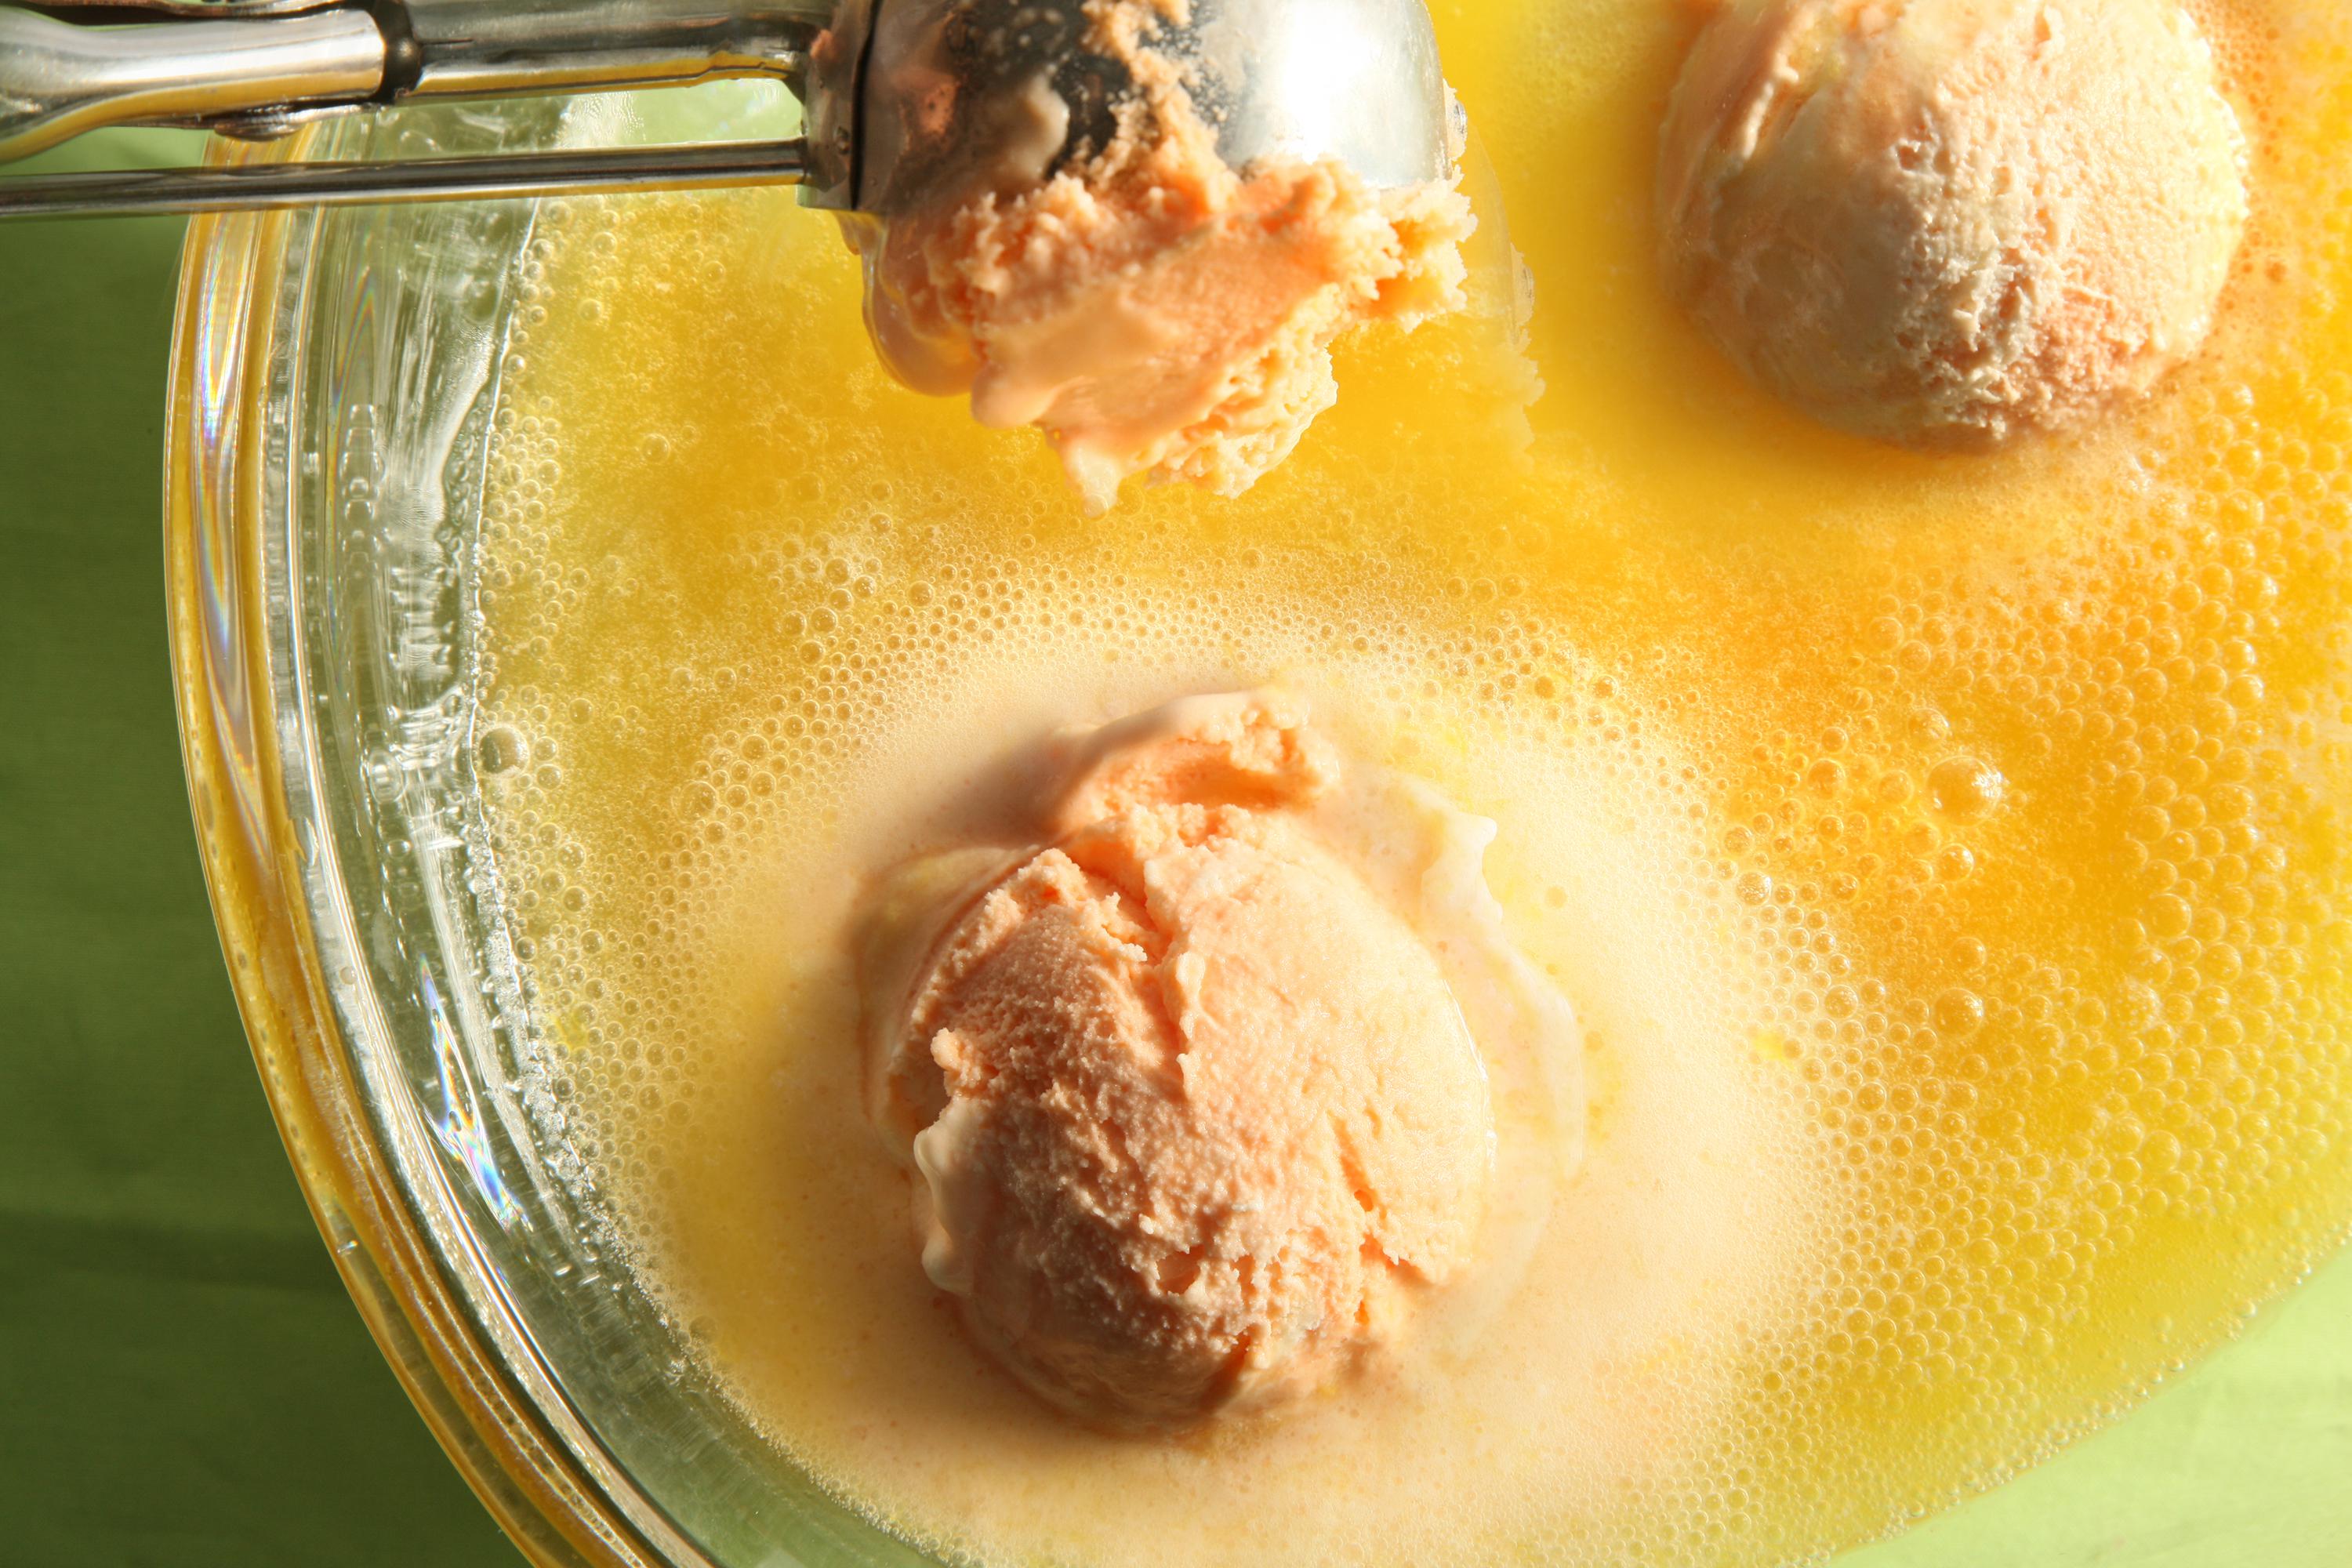
Pele’s Punch for 80

- 4 (46 ounce) cans pineapple juice
- 4 (2 liter) bottles Hawaiian Punch Fruit Juicy Red Fruit Punch
- 1 (2 liter) bottle Ginger Ale
- 2 gallons orange sherbet ice cream
- 5 gallon drink dispenser
-
At least 8 hours in advance, put the pineapple juice, Hawaiian Punch and Ginger Ale in the refrigerator or a cooler with ice to chill.
-
When ready to serve combine all ingredients in a large 5 gallon drink dispenser.
-
Stir to combine the juices and ginger ale.
-
The sherbet will melt over time and continue to flavor and chill the punch.
An Aloha Dreams Recipe
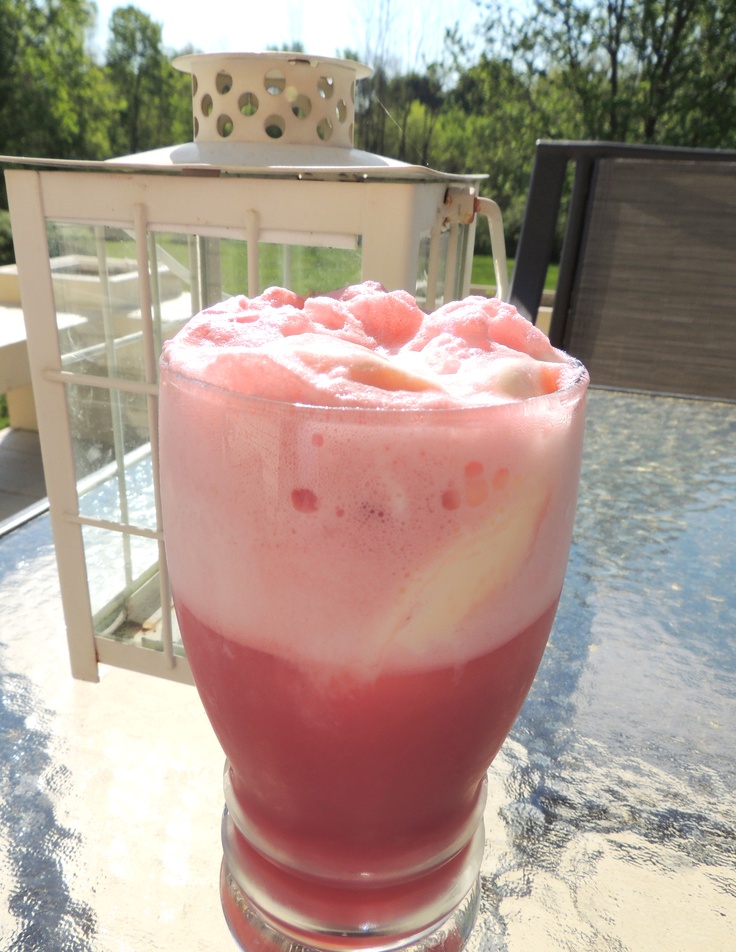
Strawberry Lemonade Punch for 70
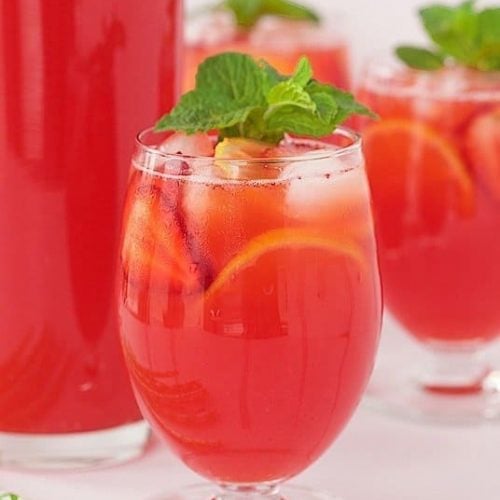
- 4 (16 ounce) package frozen strawberries
- 6 (12 ounce) can Minute Maid Lemonade Frozen Concentrate {12 oz.}, thawed
- 2 cups sugar
- 6 (2 liter) bottles lemon lime drink
- 5 gallon drink dispenser
- 1 (20 pound ) bag ice
-
Put lemon lime drink in a large cooler with ice 8 hours prior to serving
-
30 minutes before serving, set strawberries and lemonade concentrate out to partially thaw.
-
Blend partially thawed strawberries, lemonade concentrate and sugar in blender, until well blended.
-
Pour mixture into a 5 gallon drink dispenser.
-
Slowly add in chilled Sprite and stir well and add ice.
An Aloha Dreams Recipe
Orange Dreamsicle Punch for 65
Fast and easy, this versatile punch is perfect for not only youth activities, but bridal showers and baby showers. Everyone loves the creamy-citrusy orange dreamsicle taste! I’ve even made this for a Halloween party I hosted and called it “Witches Brew”
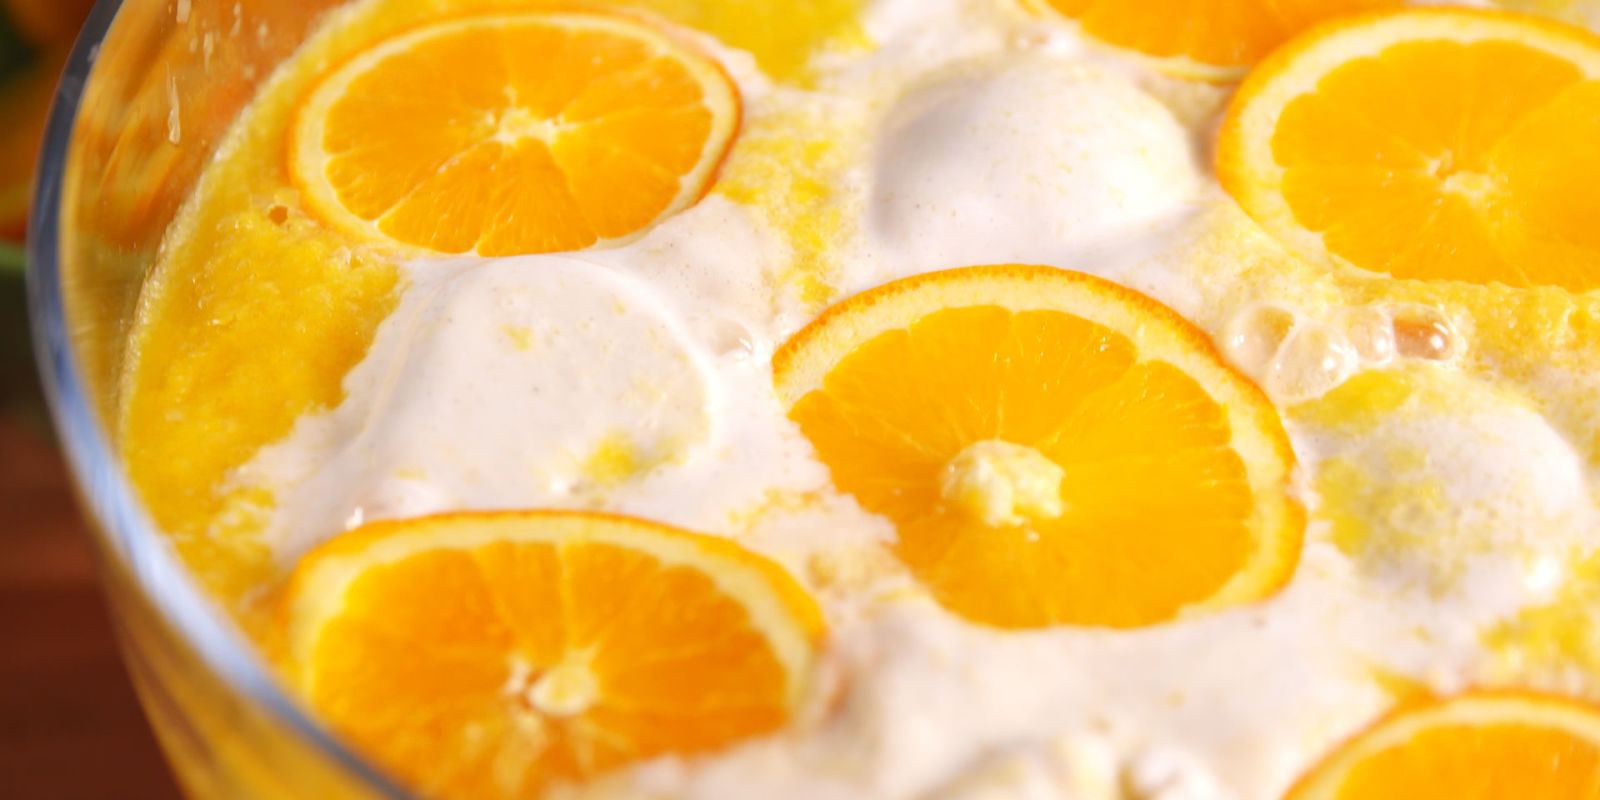
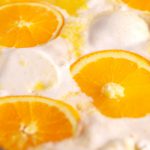
- 2 (2 liter) bottles ginger ale
- 2 (2 liter) bottle s Fanta Orange soda
- 1 gallon orange sherbet
- 1 gallon vanilla ice cream
- 5 gallon drink dispenser
-
Put soda in a large cooler with ice 8 hours prior to serving. Keep ice cream frozen.
-
20 minutes prior to serving, set the ice cream out to soften.
-
When ready to serve, add all ingredients to a 5 gallon drink dispenser.
An Aloha Dreams Recipe
Surf’s Up Punch for 75
This is The Big Kahuna of party punches. It’s bursting with the bold taste of natural fruit juices and Hawaiian beaches. It’s a delicious and fun drink that kids and teens will love. It’s the perfect party punch for your next Luau or youth activity.
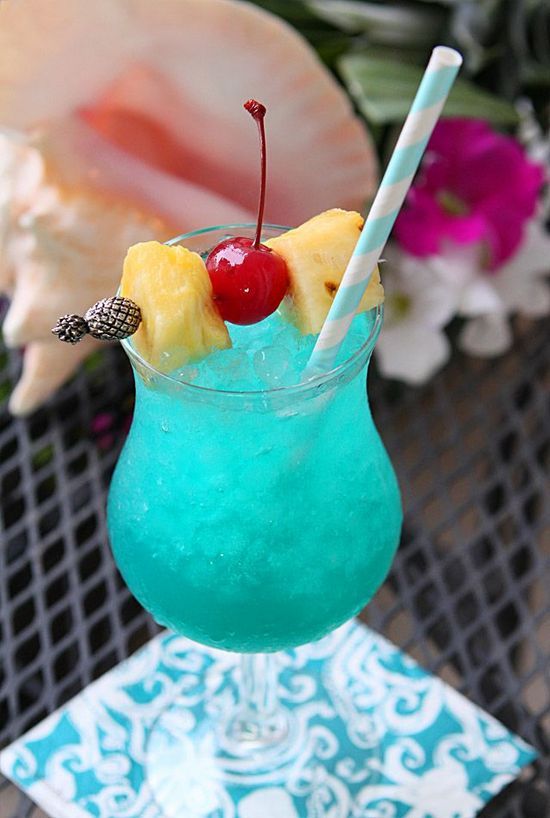
- 4 (2 liter) bottles lemon lime soda
- 4 (46 ounce) cans pineapple juice
- 2 (2 liter) bottles Hawaiian Punch Polar Punch (the blue stuff)
- 5 gallon drink dispenser
- 1 (20 pound) bag ice
-
At least 8 hours in advance, put the lemon lime soda, pineapple juice, and Hawaiian Punch in the refrigerator or a cooler with ice to chill.
-
When ready to serve combine all ingredients in a large 5 gallon drink dispenser. Stir to combine the juices and ginger ale. Add ice.
An Aloha Dreams Recipe
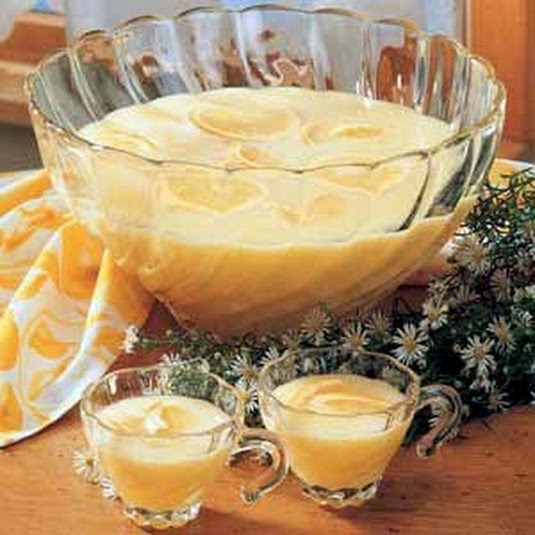
Cherry Vanilla Party Punch for 65
Perfect for a Valentine’s Day punch – or any other time. Great for a Retro Party punch too. It tastes just like creamy cherry sherbet ice cream and makes a super delicious punch! Everyone will fall in love with it.

Serves: 4 gallons (518 ounces) 65 servings of 8 ounces
- 2 (2 liter) bottles Cherry 7-Up
- 2 (64 ounce) bottles Welch’s White Grape Cherry Juice
- 2 (1 gallon) containers vanilla ice cream
- 5 gallon drink dispenser
-
Put soda in a large cooler with ice 8 hours prior to serving. Keep ice cream frozen.
-
20 minutes prior to serving, set the ice cream out to soften.
-
When ready to serve, add all ingredients to a 5 gallon drink dispenser.
Sparkling Peach Party Punch for 65
Vibrant, refreshing with the perfect amount of creaminess! An excellent punch for baby showers or bridal showers. This is a delicious punch AND a real crowd pleaser
Adopted from the: The Frugal Girls
Serves: 4 gallons (514 ounces) 65 servings of 8 ounces
- 2 (16 ounce) packages frozen peaches
- 8 (11.5 ounce) cans Kern’s Peach Nectar
- 2 (2 liter) bottles lemon lime soda
- 1 cup sugar
- 1 gallon vanilla ice cream
- 1 (5 gallon) drink dispenser
-
20 minutes prior to serving, set the ice cream and peaches out to soften and thaw.
-
Blend peaches with sugar, and 2 cans of peach nectar, until well blended.
-
Pour mixture into 5 gallon drink dispenser
-
Then pour in remaining 5 cans of peach nectar and stir well.
-
Slowly pour in chilled 2-liter of Sprite, and stir. Add ice cream.
Snowball Party Punch for 35
Skip the snowball fight and throw a party with this icy cold Snowball Punch! This gorgeous blue Snowball Party Punch recipe is perfect you’re having a winter activity or even need punch for a baby shower. It will have your guests coming back for more! It’s super easy to make, and ridiculously delicious! And isn’t the pretty blue color wonderful?
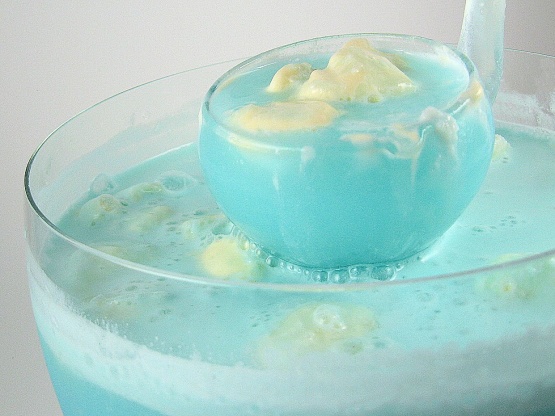
Adopted from: The Frugal Girls
Serves: 2 gallons (279 ounces) 35 servings of 8 ounces
This punch is far too pretty to serve in a 5 gallon drink dispenser. To get the full snowball effect serve in a large punch bowl with scoops of "snowball" ice cream floating on top.
- 1 (128 ounce bottles) Polar Blast Blue Hawaiian Punch
- 1 (2 liter bottles) lemon lime soda
- 2 (12 ounce cans) pineapple Juice
- 1/2 gallon vanilla ice cream
- 1 large punch bowl
-
At least 8 hours in advance, put the punch, lemon lime soda and pineapple juice in the refrigerator or a cooler with ice to chill
-
When ready to serve combine all ingredients in a large punch bowl.
-
Add scoops of vanilla ice cream right before serving.
Explore Aloha Dreams


EXPLORE
If you're planning a vacation to Hawaii, I've got you covered on the very best places to go! From many amazing restaurants to incredible adventures in the surf and on land, this is your go-to source for unique and exciting things to do on the Big Island of Hawaii. Or just take a Virtual Vacation!! Let's go!
SAY YES!
If you've been asked to cook for a large group activity, be it a Girl's Camp or a Graduation Party, say Yes! I'm here to help. From Menus to Game Plans to Recipes, I'll help you keep on schedule and turn out amazingly delicious food if you're cooking for a crowd! My recipes are tested and trusted. Let's cook!
AHONUI
Ever wished you could build your dream home? Like amazing house design and home building ideas? Me too! Join me as I design and build a home on the Big Island of Hawaii. Follow along while I design each room. Enjoy a front row seat for the entire amazing construction process. Let's play!
PARTY
Would you like to throw a Luau, but not sure where to start? Want to know how to build a tiki bar and roast a pig? Here's everything you need to have a luau. How about a Christmas Feast or even a fabulous dinner for your neighborhood supper club? You've come to the right place. Let's party!