No Results Found
The page you requested could not be found. Try refining your search, or use the navigation above to locate the post.
 Aloha Dreams


Great for a group! Not to mention a perfect summer accompaniment to BBQ! In each bite you get a bit of crunchy cookie, soft cream cheese frosting and luscious fruit. There’s a reason it’s retained its popularity over the years.
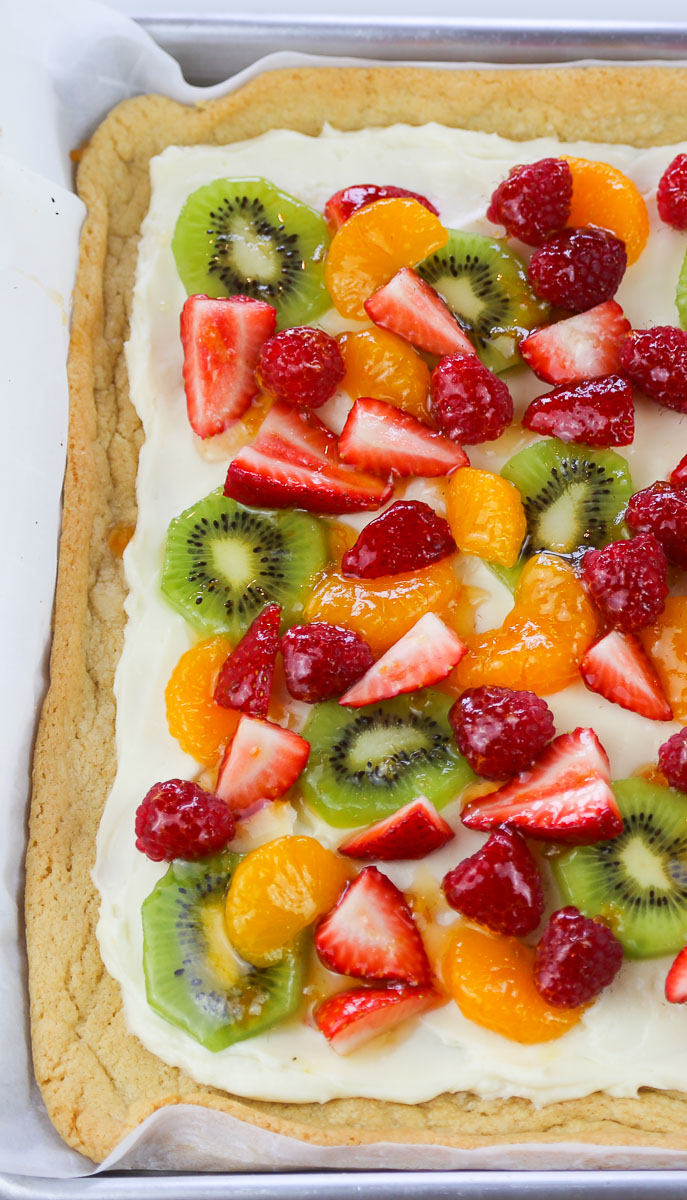
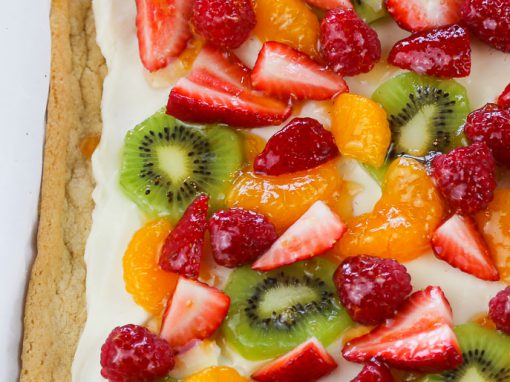
Fruit Pizza is a terrific choice when you’re wanting something light, pretty, quick and easy for a crowd. One (13” x 18”) half-sheet pan, cut into 4 rows by 6 rows, can serve 24 people.
Even with the frosting buffering them, a crunchy cookie and juicy fruit are not the best of friends for long term storage. Your pizza will be at its best if you assemble it within 4 hours prior to serving. But all is not lost in the make ahead department. Assign the sheet pan cookies out to be pre-baked and frosted up to 24 hours in advance. You can also batch assign or pre-prep the kiwi and strawberries. Then just assemble several hours before serving. With all the ingredients pre-prepped, you can easily bring one together in less than 10 minutes.
If time permits, and you’re feelin’ the urge, you can make it look like this.
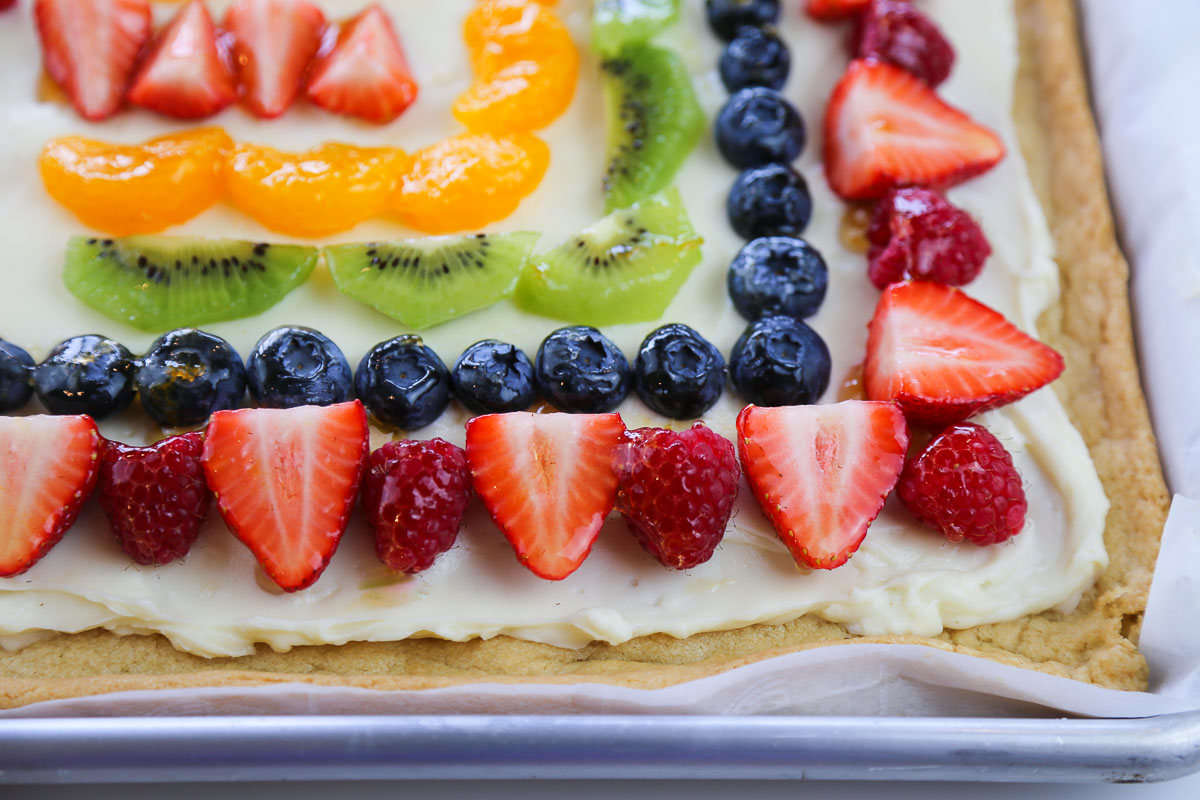
But it takes FAR less time, and I think it looks EVEN PRETTIER, jumbled like this.
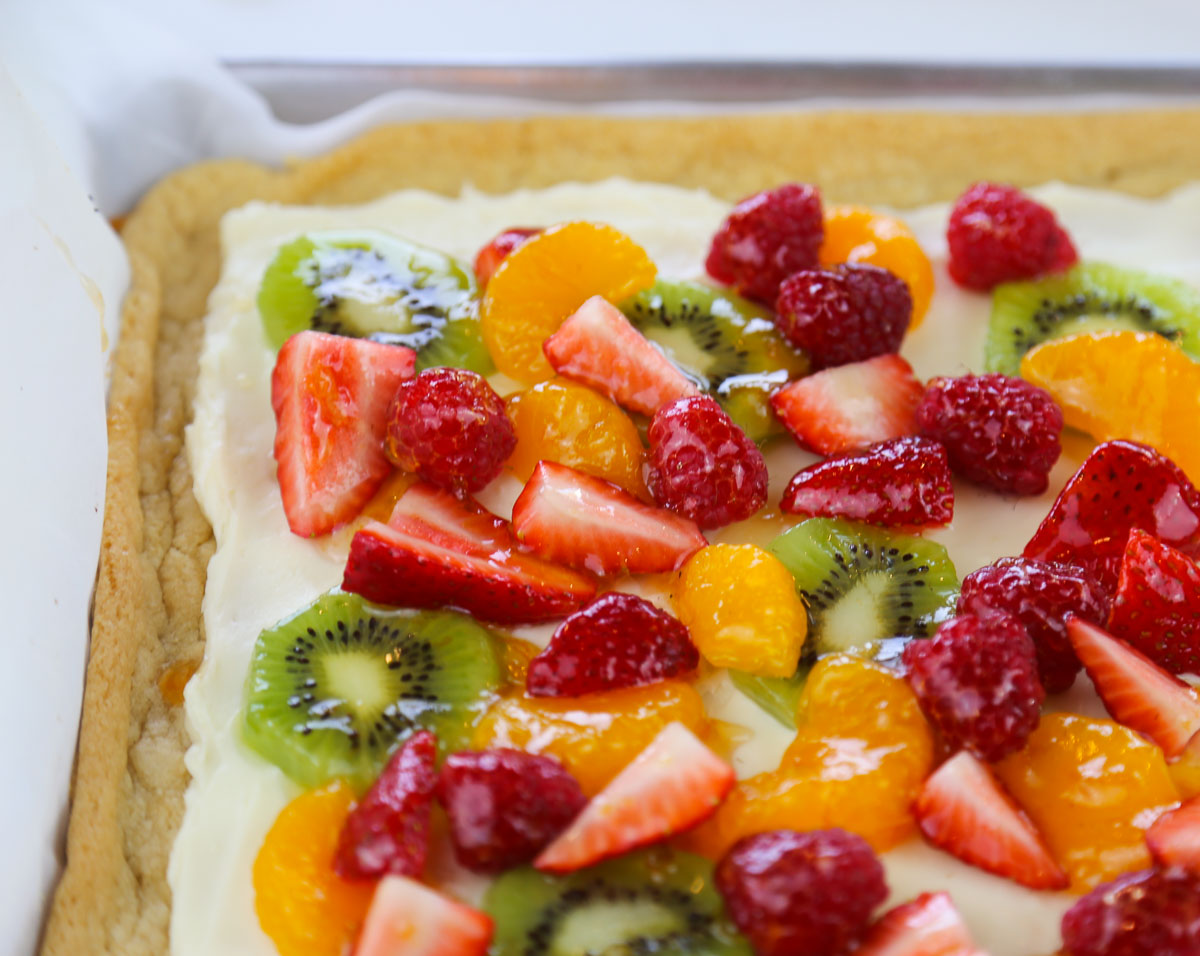
By the way, frosting and decorating is a great job for youth volunteers. Just tell ‘em to use the jumbled fruit decorating method or they’ll be at it for hours!
Ever wonder how the fruit tarts in the pastry shops glisten like little jewels? Well, they often use a clear, gel-based liquid to give them that shine. We can go one better with a tasty jelly bath for our fruit. Note: don’t use jam or preserves. You don’t want the extra bits in jam or preserves.
This one is fun to make and even more fun to eat! Let’s get cookin’.

Fruit Pizza is a terrific choice when you’re wanting something light, pretty, quick and easy for a crowd.
1 hour before cooking: set cookie dough and cream cheese out to come to room temperature.
Place 1 rack in the middle of the oven and pre-heat the oven to 350 degrees F.
Line a 13 x 19 Half-Sheet Baking Pan with parchment paper.
Break up dough and press evenly in bottom of pan to form crust. It should be no more than 1/4 inch thick. Bake 20 - 22 minutes or until golden brown. It will puff alarmingly as it’s baking. Ignore that. It will be fine.
When done, remove pan from oven to sit on a cooling rack until completely cool, about 30 minutes.
While the cookie is baking/cooling you can make the frosting.
In a medium bowl, beat together cream cheese, powdered sugar and vanilla with electric mixer on medium speed until fluffy. Spread frosting over cooled crust.
While the cookie is baking/cooling you can prep the fruit. Peel and slice the kiwi. Cut the tops off the strawberries and quarter or halve the berries.
Gently place all fruit topping in a medium bowl. Microwave apple jelly for 20 seconds. Stir jelly until smooth. Pour jelly evenly over fruit. Gently toss to coat all fruit. Scatter fruit over frosting.
Refrigerate until chilled, at least 1 hour and up to 4-5 hours. To serve, cut into 4 rows x 6 row squares. Cover and refrigerate any remaining pizza.
Variations:
• Add grated orange zest to the frosting for a fun citrus kick.
• Pineapple, mango and kiwi slices topped with shredded coconut and macadamia nuts make a festive tropical pizza.
• You can also drizzle melted white or semi-sweet chocolate over the pizza to take it up another notch.
The page you requested could not be found. Try refining your search, or use the navigation above to locate the post.

I'm so glad you dropped by. I'm Betsy. Here you'll find my favorite fabulous, trusted recipes - everything from delicious, quick meals for your family to wonderful classics made easy.
I'm also here to help you with large group recipes from 20 to 200. So next opportunity you get to cook for a large group - Say 'Yes!' Then relax. I've got your back.
Ever wished you could build your dream home? How about building your dream home in a tropical paradise? Join me, room by room, as we design and build a fabulous dream home in Hawaii!


Ask any group of teens what they would like to eat and odds are you’re going to hear “tacos!” and “pizza!” Unsurprisingly, that response is pretty much the same regardless of the time of day the question is asked or the meal. In fact, you’ll hear it from a lot of adults too. So let’s give ’em what they want!
These delicious breakfast tacos are not just scrambled eggs and bacon served on a tortilla. They’re filled with all the good breakfast things: savory sausage, fluffy, cheesy scrambled eggs, crunchy hash browns and an out of this world Avocado Chili Cream sauce.

These breakfast tacos are endlessly customizable and best of all, unless you’re looking for a breakfast-on-the-run, they’re much easier to serve than a breakfast burritos since they don’t require any assembly.
Featuring fluffy, cheesy scrambled eggs, sausage and crunchy hash browns, it’s the Avocado Chili Cream sauce that takes them over the top! The easy to make hash browns turn out light, crispy, crunchy and delicious! Believe me, you’ll want to try this for your next large group cooking adventure. Don’t let the length of this recipe stop you. There’s less than 30 minutes of prep work followed by 15 minutes of skillet time while the hash browns and eggs are happily cooking in the oven.
Who says you can’t have tacos for breakfast. Heck, if pizza gets to break the rules, then so should tacos!

While the sausage, eggs and hash browns are cooking you’ll also warm your corn tortillas in the oven and then keep them toasty in the slow cooker. You may be asking, ‘Do I really need to warm the tortillas? Does it really make that much of a difference?’
Yes!
A warm corn tortilla brings a lot to the party. Heating it releases its savory flavor, highlighting the earthy sweetness of the corn and the tangy taste of lime. In fact, if you have the griddle space, a quick (30 second) group-toast on the griddle would be even better before you pop them in the oven. More over, a heated tortilla is more flexible and much less likely to crack as your guests are eating them.

Following is my recipe for 24 people, eating 2 tacos each (48 tacos total). So if you’re feeding 100, make 4 batches of this recipe (hash browns, sausage, eggs and sauce.) It’s as easy as 1,2,3.

This is my recipe for 24 people, eating 2 tacos each (48 tacos total). So if you’re feeding 100, make 4 batches of this recipe (hash browns, sausage, eggs and sauce.) The great news is, unlike breakfast burritos, you don’t have to stuff these.
Go for it.
NOTE: This sauce benefits from an overnight stay in the refrigerator. Cover well and refrigerate overnight or up to two days.
NOTE: Don’t cook more than 24 eggs in each pan or the cooking time will be significantly impacted (ask me how I found out the very hard way.) Cooking 3 – 4 dozen eggs in a larger roasting pan is an entirely different endeavor.)
Grease the bottom and sides of a 9 x 13 inch baking dish with 2 tablespoons of butter. Use all of it for flavor.
In a large bowl, whisk eggs and mix in 1 cup of milk, 8 ounces of cheese and 1 tablespoon Lawry’s seasoned salt. Pour into the greased baking dish.
Continue to bake until eggs are set, stirring every 2 minutes (it will probably take an 5 - 6 additional minutes.) Plan 30 – 35 minutes baking time total. NOTE: If you are baking more than two 9 x 13 dishes of eggs in the same oven at one time, plan on an additional 5 – 15 minutes total depending on your oven and the number of batches. I would not do more than 4 batches in 1 oven.
To serve, crumble hash browns into a large serving bowl.
To serve, set out the following items on the serving table in this order:
Plates
Tortilla shells
Hash browns
Cheesy scrambled eggs
Sausage
Avocado Chili Cream sauce in several squeeze bottles (Label these so your guests know what good stuff is inside!)
Utensils and Napkins
The page you requested could not be found. Try refining your search, or use the navigation above to locate the post.
The page you requested could not be found. Try refining your search, or use the navigation above to locate the post.
The page you requested could not be found. Try refining your search, or use the navigation above to locate the post.
I'm so glad you dropped by. I'm Betsy. Here you'll find my favorite fabulous, trusted recipes - everything from delicious, quick meals for your family to wonderful classics made easy.
I'm also here to help you with large group recipes from 20 to 200. So next opportunity you get to cook for a large group - Say 'Yes!' Then relax. I've got your back.
Ever wished you could build your dream home? How about building your dream home in a tropical paradise? Join me, room by room, as we design and build a fabulous dream home in Hawaii!
 Aloha Dreams
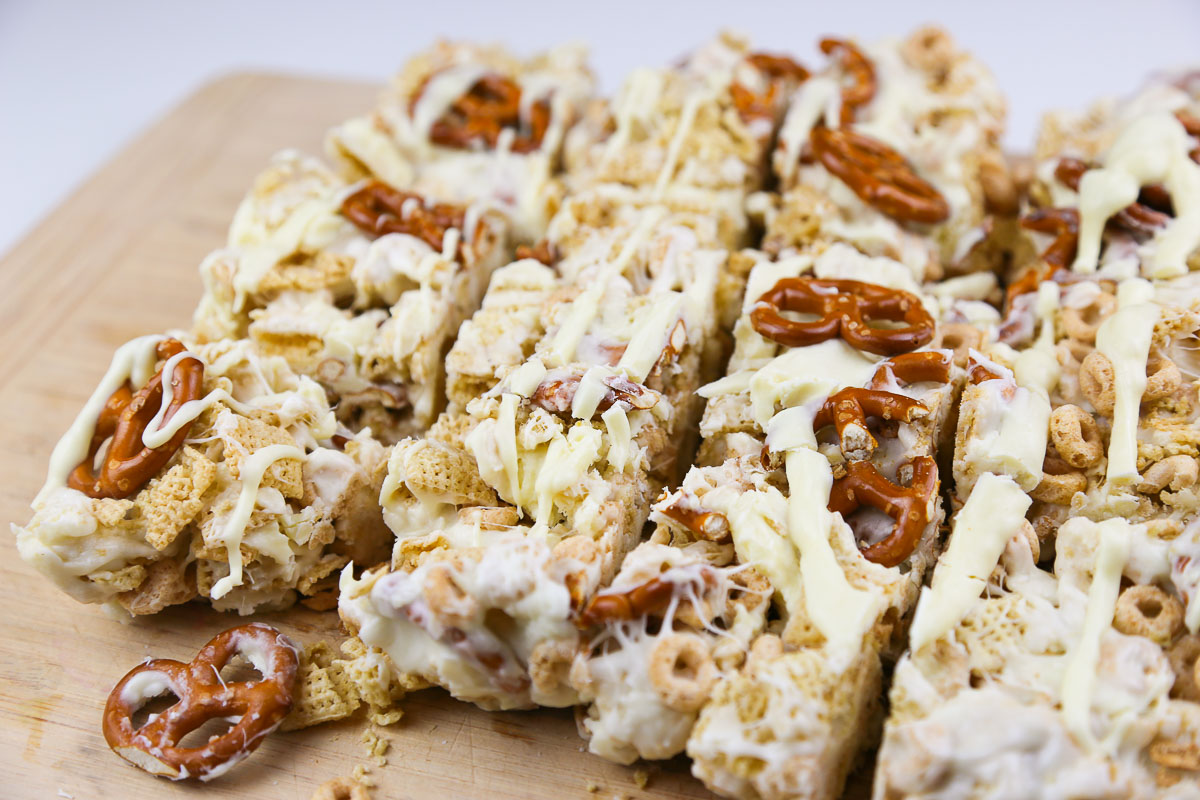
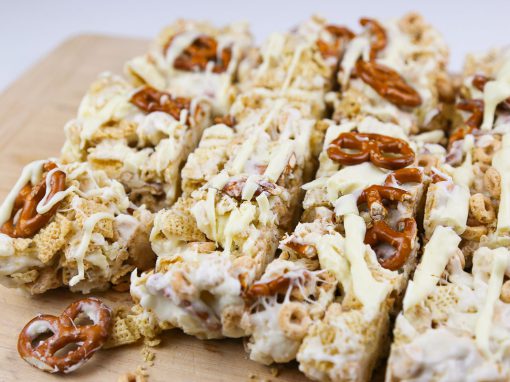
A hint of salty and plenty of sweet, these no bake bars are a great cooking for a crowd recipe. They come together quick, and can be made the day before giving you a terrific stress free dessert! Last time I set them out, they lasted minutes.

These Sweet and Salty No Bake Marshmallow Bars are about to become your new favorite quick and easy dessert.

A little salty and plenty of white chocolate sweet, these no bake bars are a great no-bake make ahead treat!
Place the butter in a very large microwave-safe bowl and microwave for 30 seconds or until melted. Add 11 ounces of the white chocolate, ¼ teaspoon table salt and all the marshmallows. Stir to coat and microwave for 1 – 1 1/2 minutes. Stirring every 30 seconds until melted.
MAKE AHEAD NOTE: Store in a tightly sealed container at room temperature for up to 1 day.
The page you requested could not be found. Try refining your search, or use the navigation above to locate the post.
I'm so glad you dropped by. I'm Betsy. Here you'll find my favorite fabulous, trusted recipes - everything from delicious, quick meals for your family to wonderful classics made easy.
I'm also here to help you with large group recipes from 20 to 200. So next opportunity you get to cook for a large group - Say 'Yes!' Then relax. I've got your back.
Ever wished you could build your dream home? How about building your dream home in a tropical paradise? Join me, room by room, as we design and build a fabulous dream home in Hawaii!
 Aloha Dreams

NOTE: This is the third of a series of posts on designing and building a dream home. We just happen to be doing it in paradise. If you’re interested in home design, or just enjoy amazing home design pictures, follow us room by room in the Ahonui section of Aloha Dreams as we design and build our house. The posts can be accessed in chronological order at the bottom of the page.
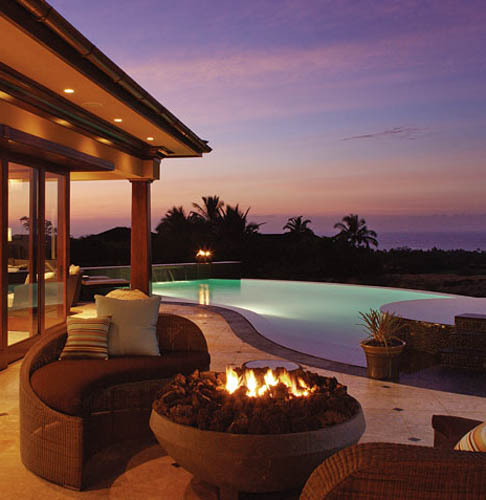
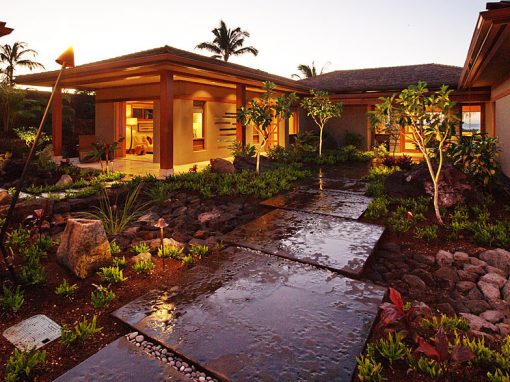
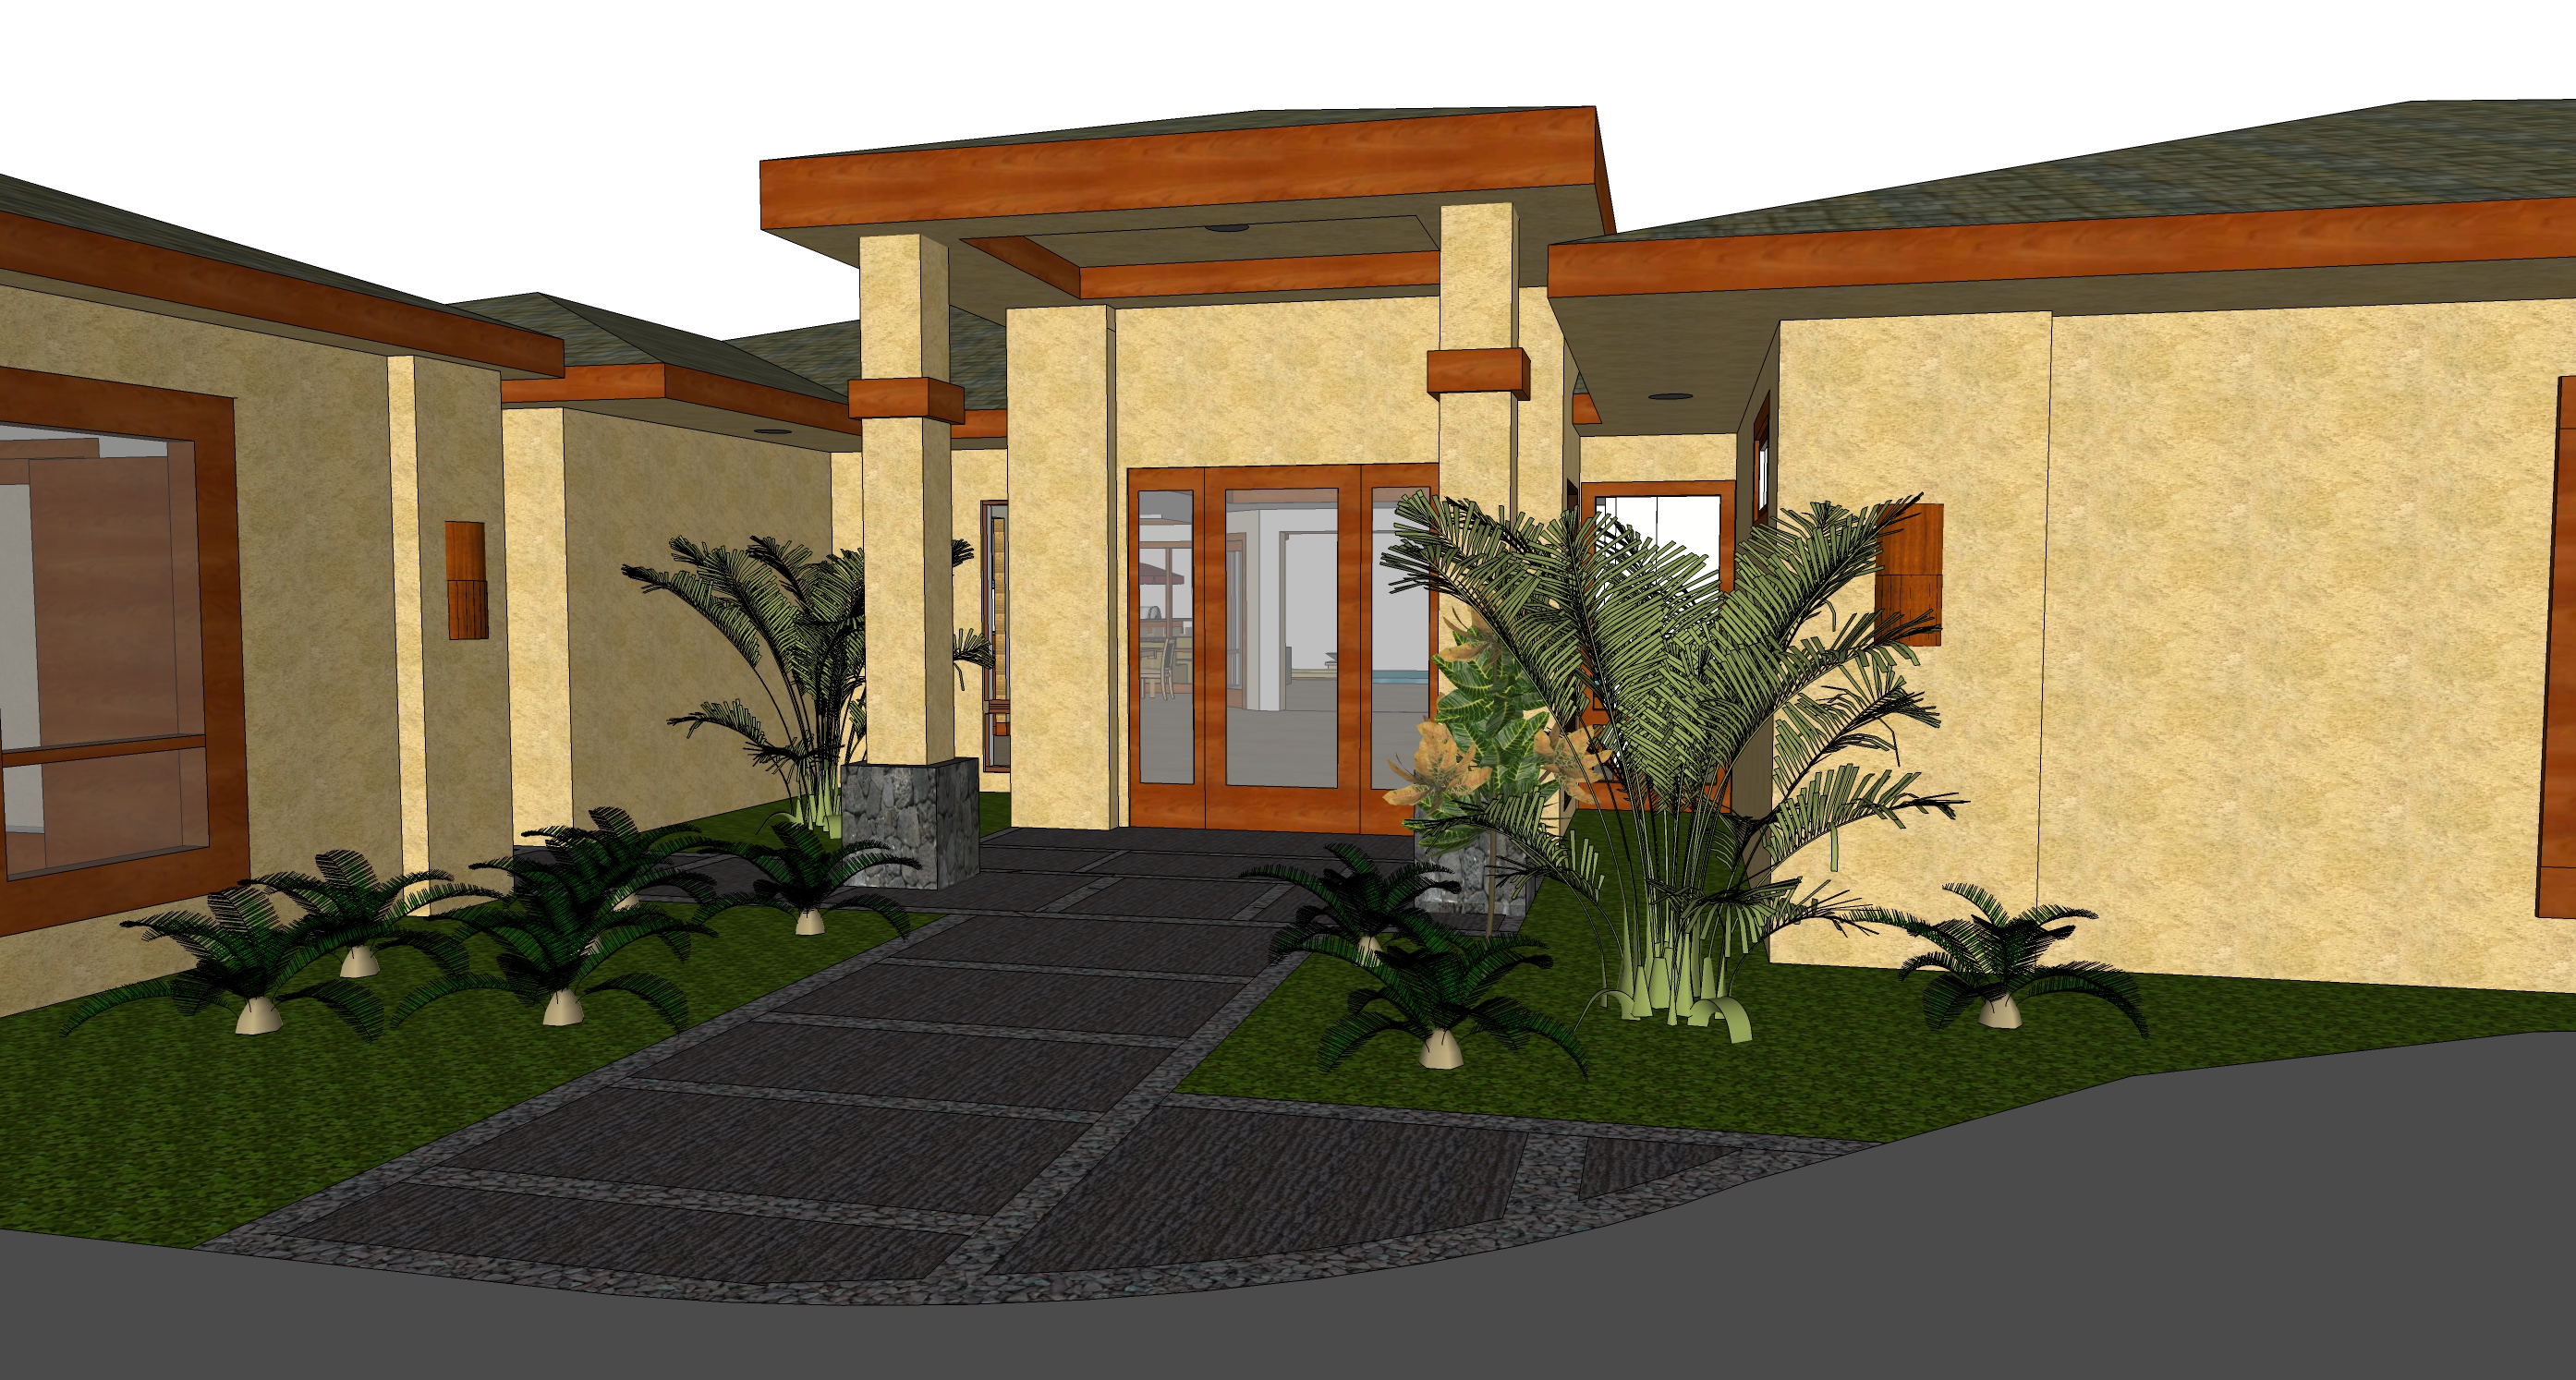
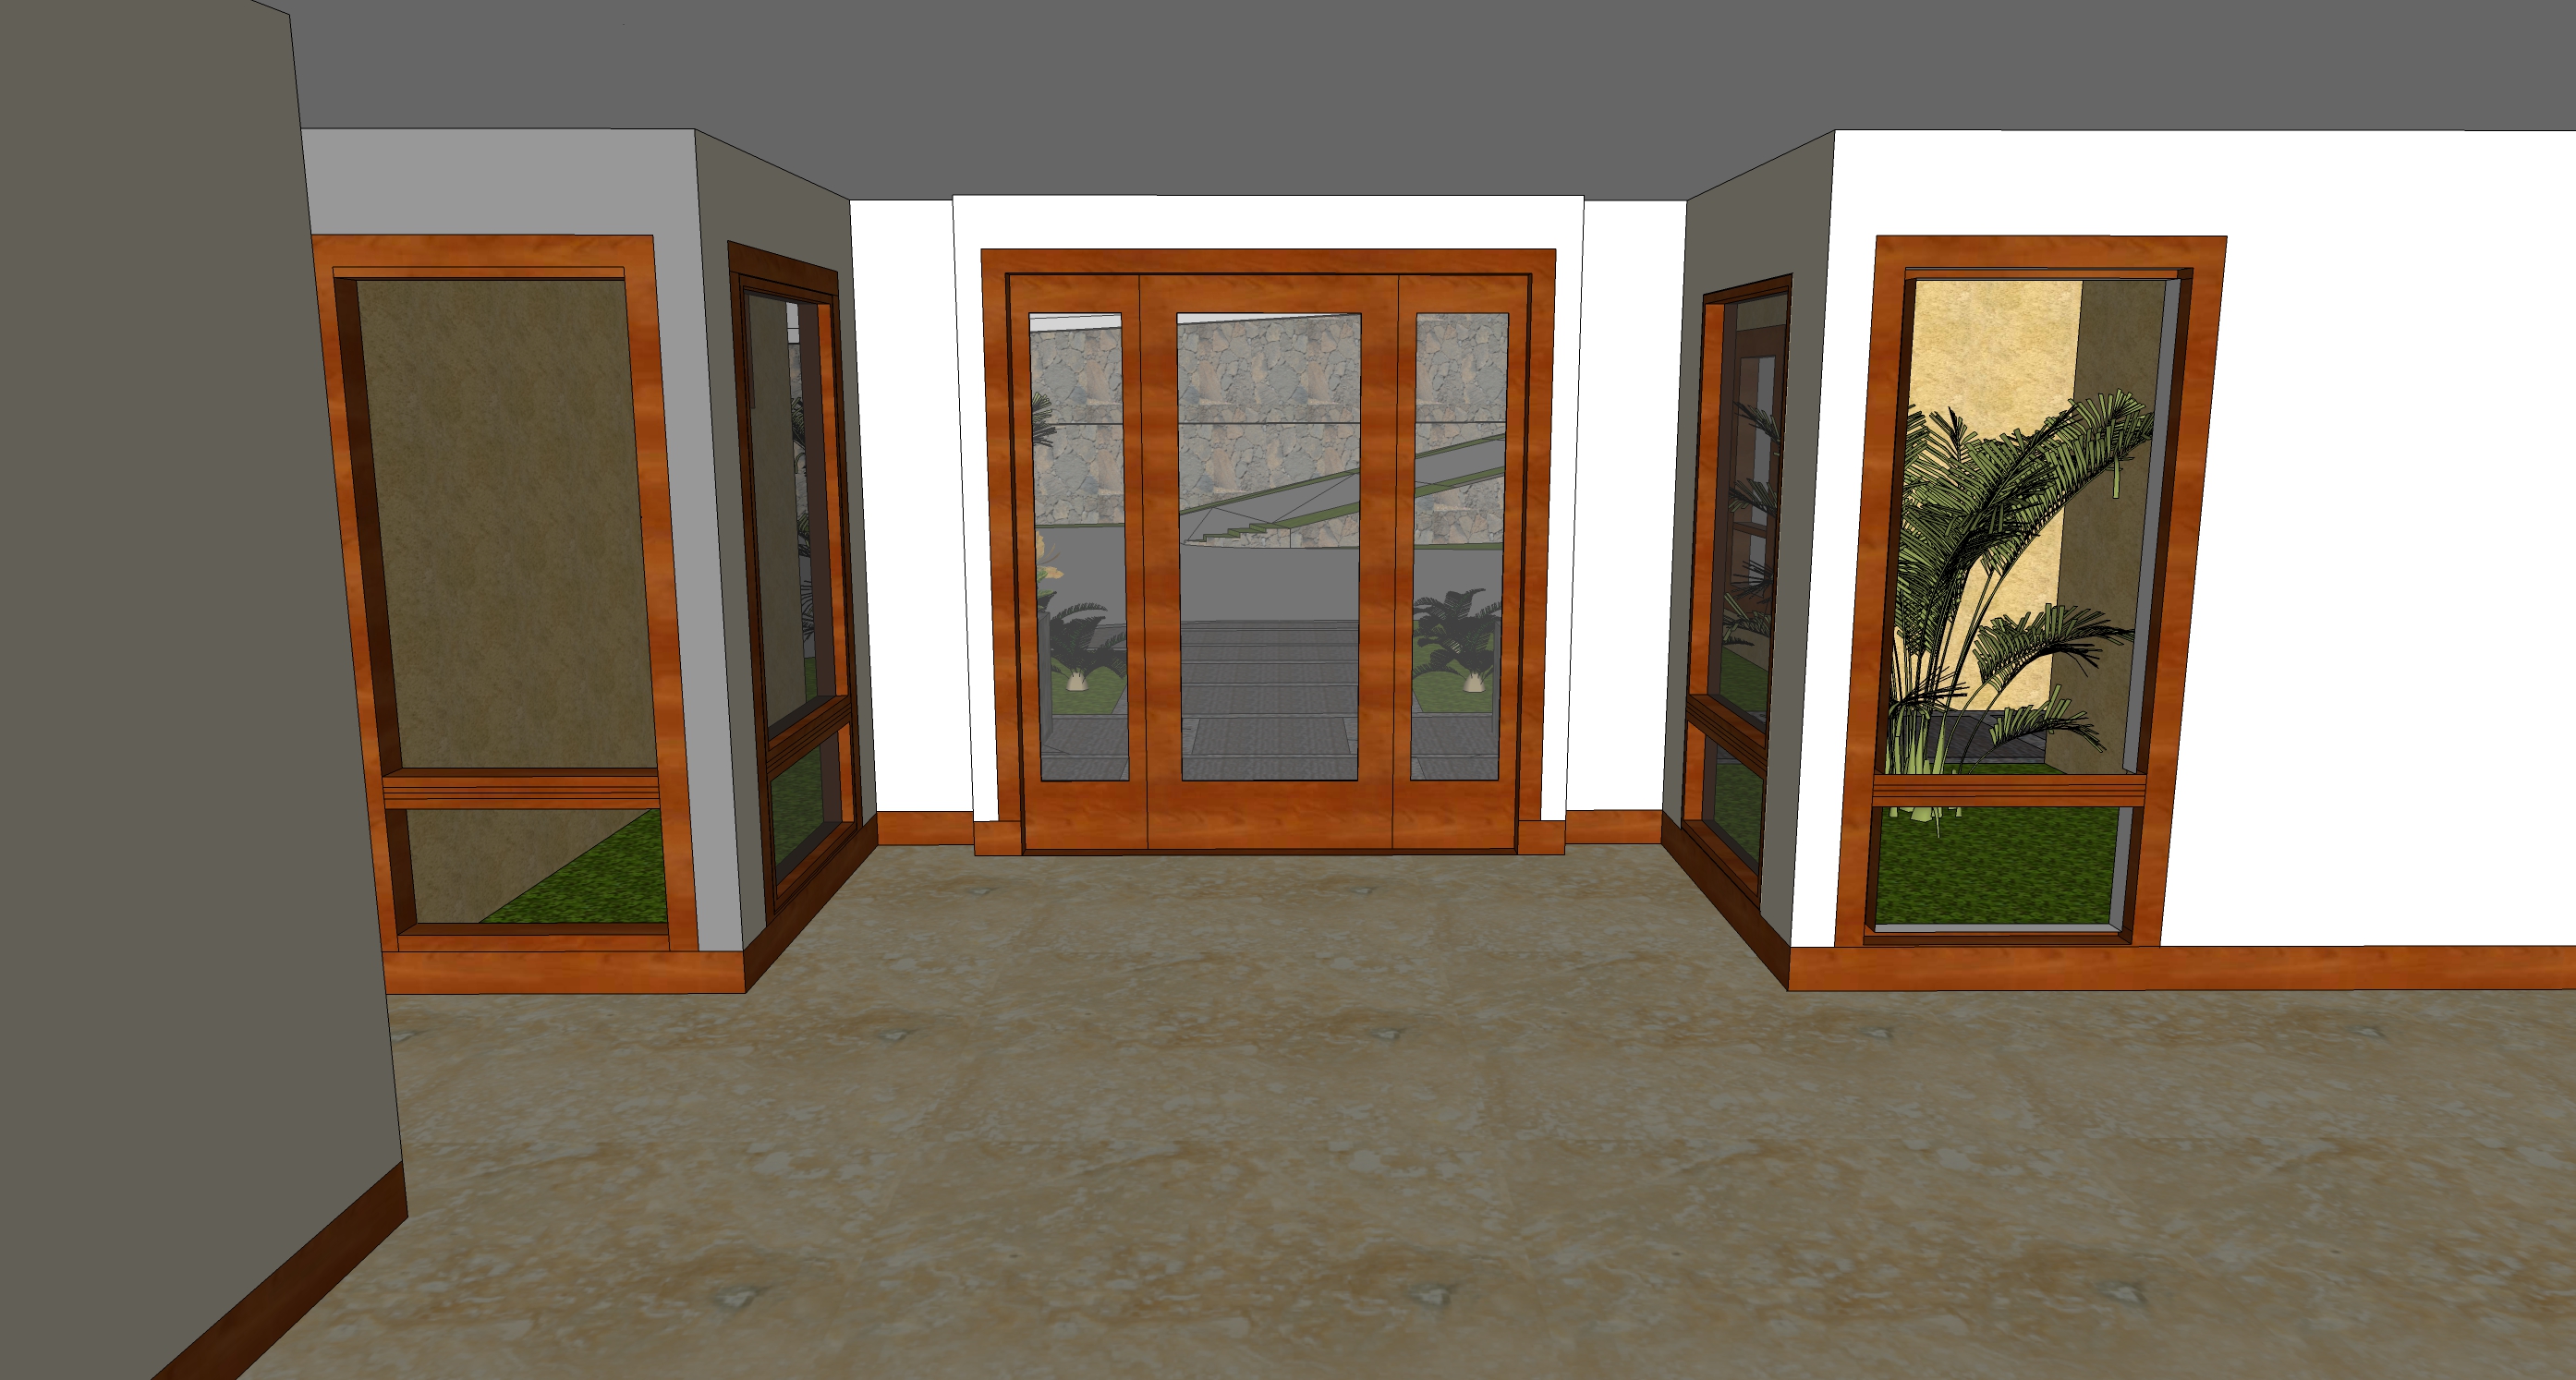
Our guests will get a initial sense of the place as they arrive at the gate. Then more of the picture will unfold as they drive down the drive way and ‘arrive’ in front of Hale Ahonui. Our front walkway and entry are the final, and perhaps most important, ‘first impression’. It’s when they begin walking up to the front door that we really need to set the mood. After all, we’re in Hawaii baby!
So let’s establish a sense of place. We don’t have the $33 million required to arrange that initial picture, but I think we can still do something pretty cool. For starters, we need to make the transition from a semi-arid grassland (complete with cattle and of course our piggy family) beyond the footprint of the house to a lush landscape. It would be jarring to just do it abruptly, but the perimeter walkway around the house can serve as our demarcation zone. We don’t want Easter Island figures or general Hawaiian kitsch, but we do want to make sure our guests know they’re not in Kansas anymore. A good way to provide that all-important sense of place is with local foliage. Something along the lines of this perhaps?

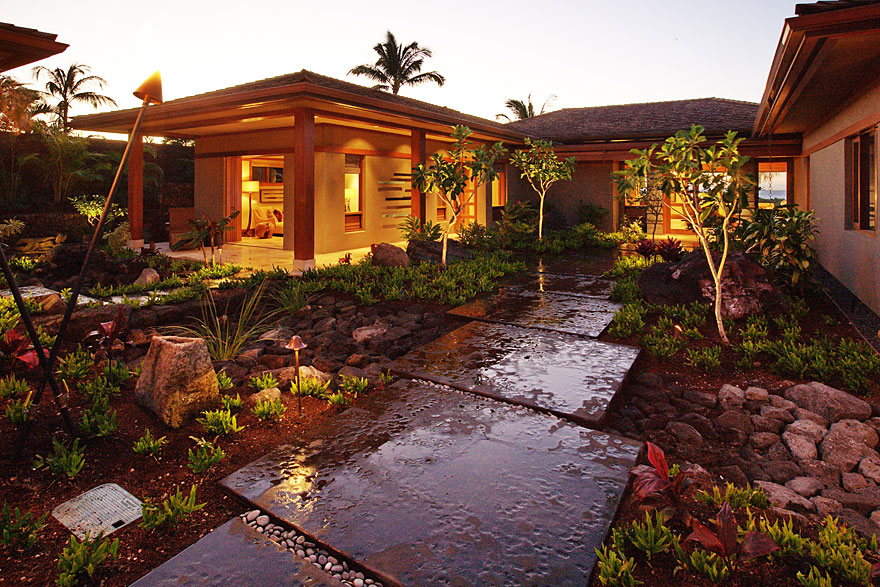


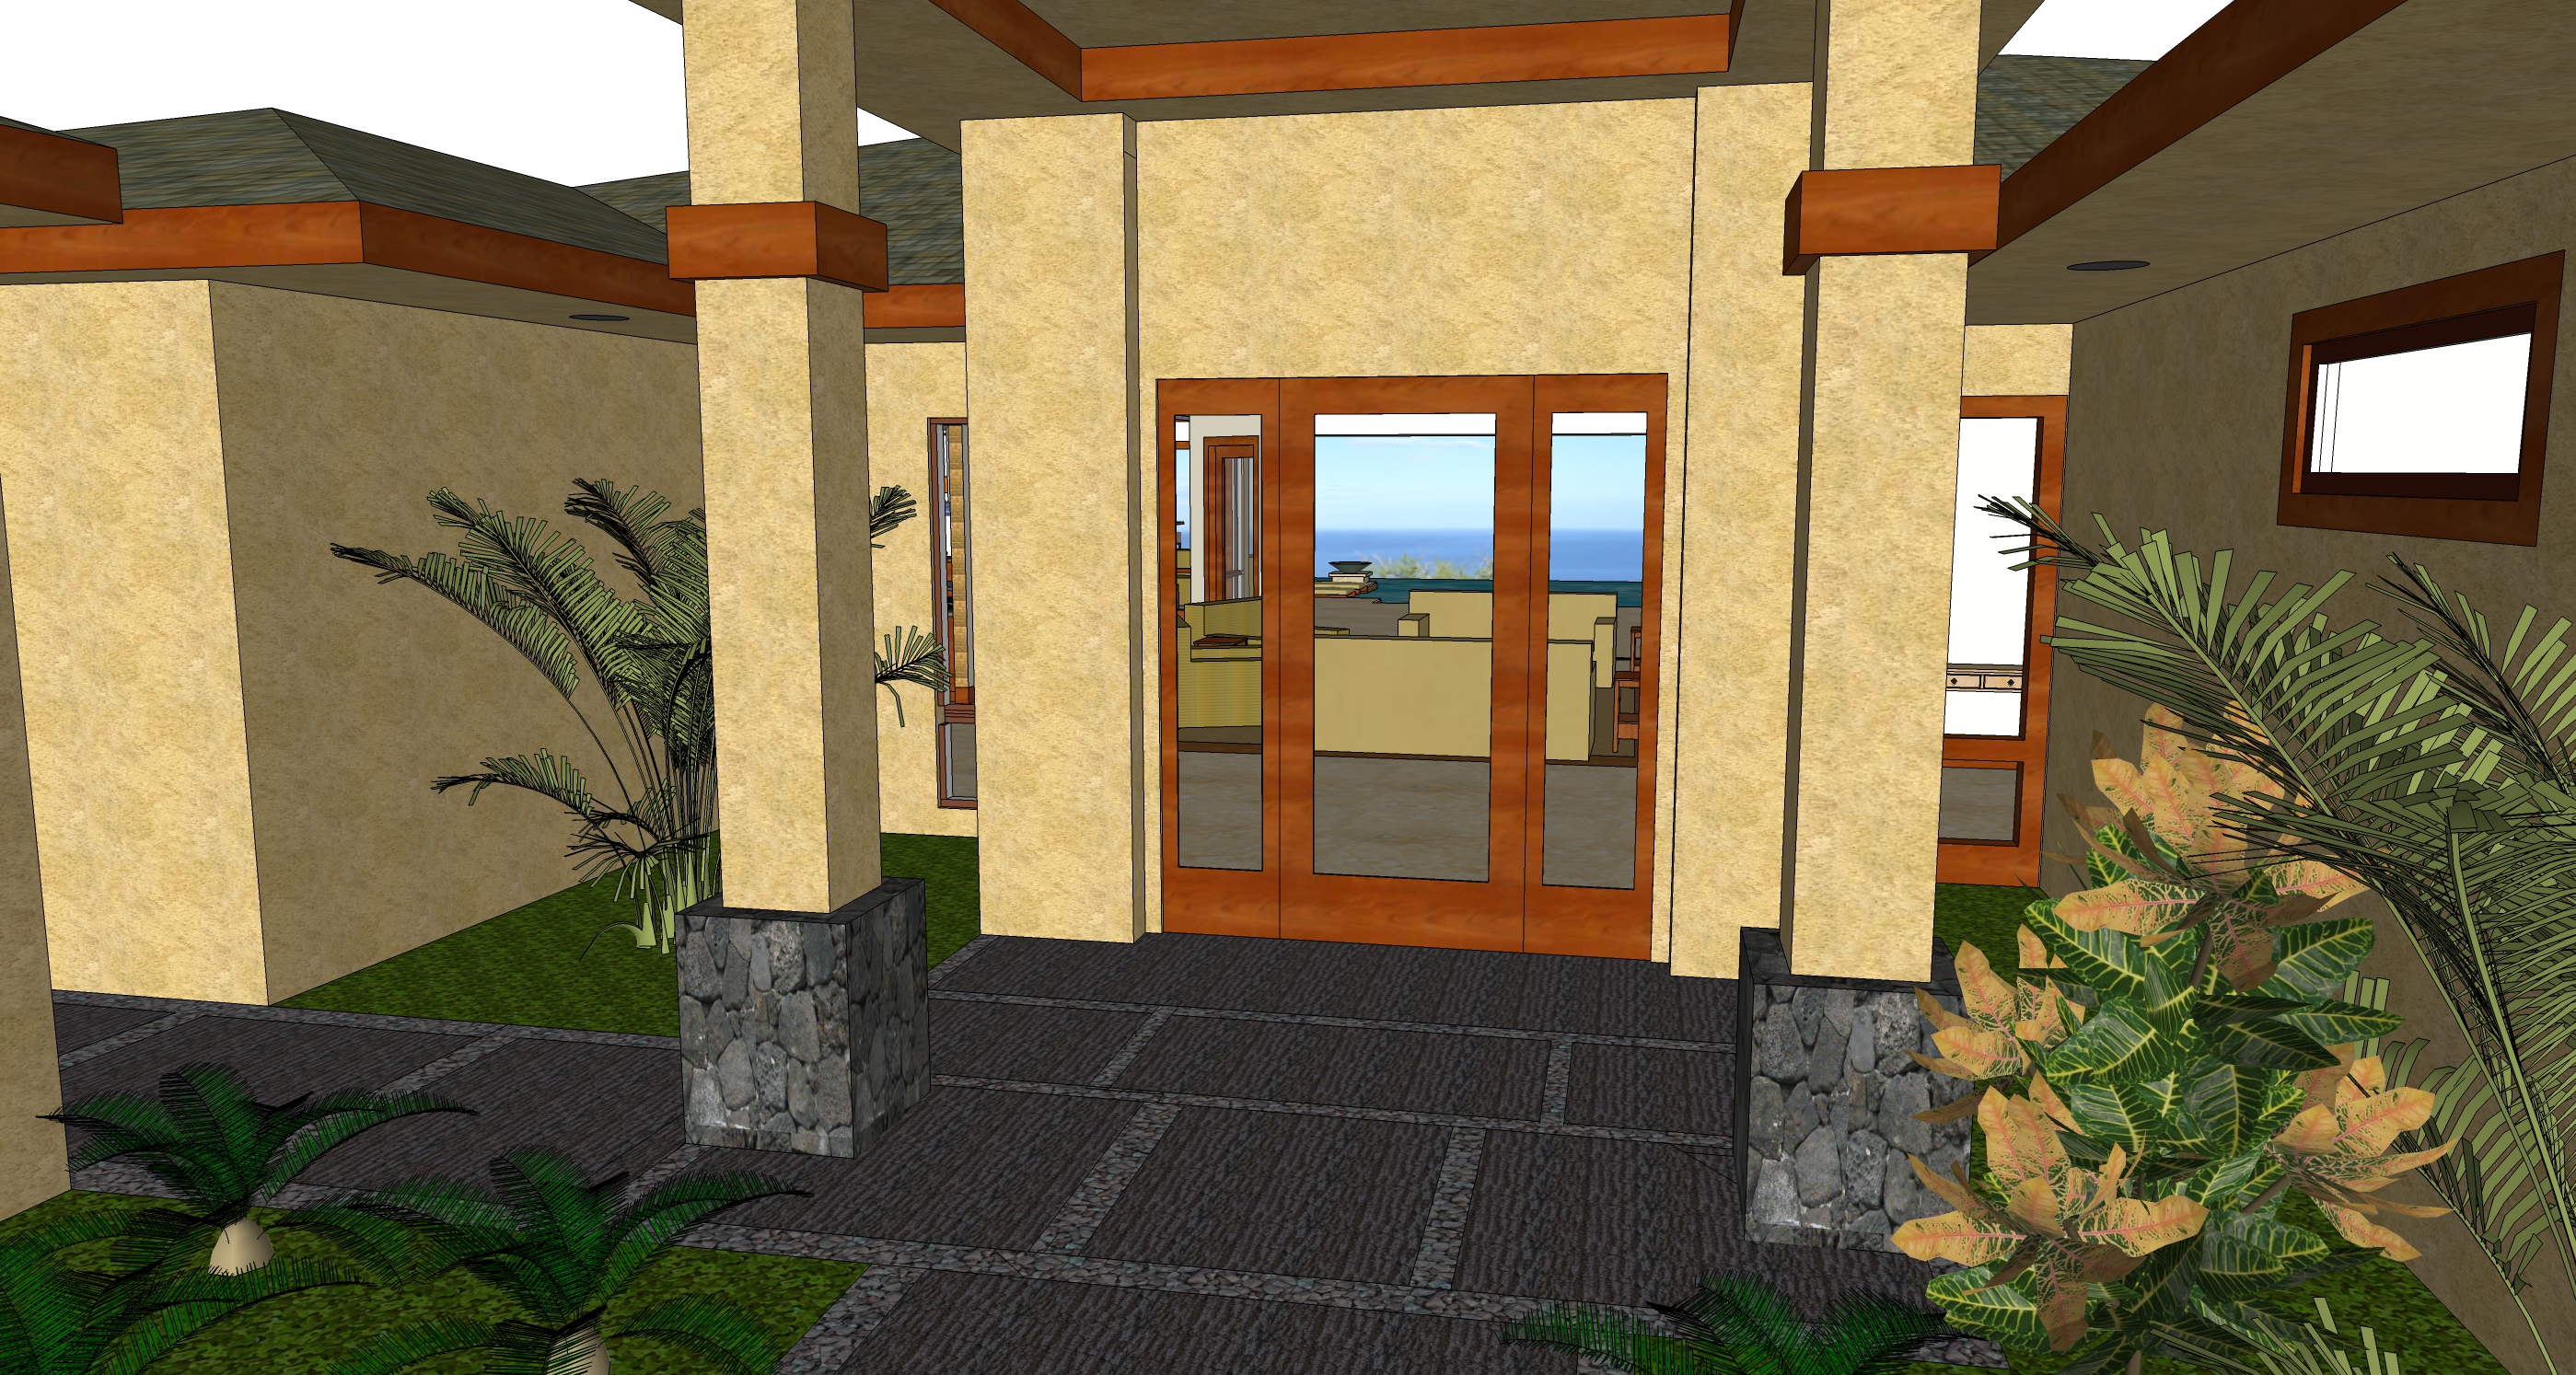
Let’s talk about the actual entry for a minute. We definitely want a portico. In case that term is new to you, a portico is an open structure with a roof supported by columns. It serves as an entrance to a home or building. It provides your guests with a place to stand protected from the elements while they wait for you to open the door. It also has another purpose. It provides a nice, gradual psychological transition from ‘outside’ to ‘inside’. Homes just feel more welcoming and cozy, less abrupt, with that transition space. That’s one of the reasons folks feel drawn to front porches and lanais. How about this?
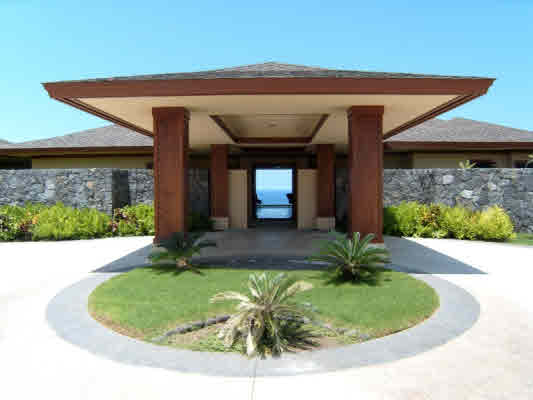
It’s actually a porte-cochere (a portico designed to admit a car). It’s nice, but it’s too big for our purposes. We won’t have room for an actual porte-cochere. We’ll need to scale it back a bit.
Do you like this one? It incorporates the lovely zen walk way and we can add in more foliage. I really like the way the wood provides a sense of warmth. The door is understated and elegant letting the setting take center stage. Here’s an interesting note: the trade winds on the Big Island provide a welcoming breeze to cool the house, but two doors on the windward side can be an issue. According to builders we’ve spoken to, the wind can sometimes whistle between the doors. Maybe we’ll stick with one.
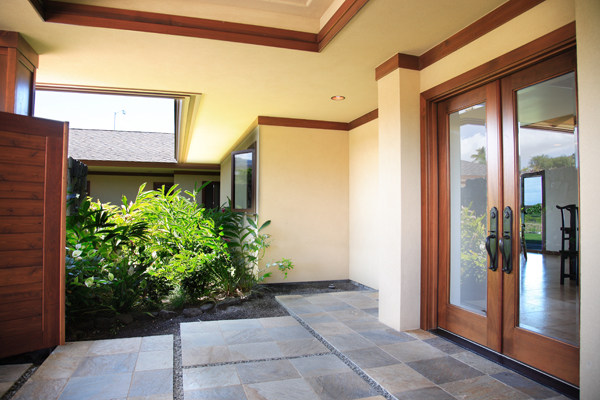
Before we step into the house let’s talk design principles. The purpose of the foyer is to welcome our guests and bridge the space from outside to inside. Foyers also provide the first impression of the inside of the home. Have you ever noticed it doesn’t feel quite right when the front door opens abruptly into the middle of a living room. We need not only a physical, but a psychological transition from the outside.
To accomplish these things, we should consider the following.
We employed this principle outside and we want to continue it here. To help with this we’ll have plenty of windows to bring the beautiful courtyard landscaping in. There won’t be a lot of furniture in our entry way so this will also provide additional visual interest to our guests as they leave.
It’s at this stage we have to ask ourselves whether we would like to see all the way through the house to the ocean view. This can be dramatic, and more importantly, convey the significance of the view in our overall design. Because of that, it is here I think we want to deviate from the brilliant Disney ‘hidden view’ design guideline. In Hawaii the homes are open. The transition between inside and outside is very blurred. With temperatures in the balmy 70’s and 80’s, who can blame them! Let’s showcase the ocean view from the front door and entry way. We want a WOW! in every room. Our ocean view should more than do it in this one.
The entry is the most public space in a house. Just like we want a gradual transition from the outside to the inside, there should always be a gradual transition from the most public space (the entry) to the most private spaces (bedrooms and bathrooms). Anything else feels jarring, although people may not realize the immediate source. For this reason, entry ways open into living rooms. Let’s keep the more private spaces unseen from the entry. (And under no circumstances do we want a view into any bathrooms.) Because we want an open plan design, the kitchen will be slightly visible from the entry, but only barely.
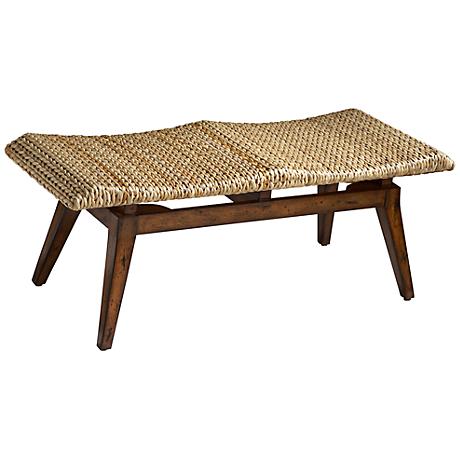
Once inside the entry way we need to consider the function of the space. It is here we will be greeting people, welcoming them to the house and saying good bye. In Hawaii folks remove their shoes when entering a home. It’s a nice custom. We never insist that anyone visiting our home take off their shoes – though a large percentage of our friends and family automatically do. We’ll need room for at least six people to take off and put on their shoes. A bench would be a nice touch, don’t you think? How about this one?

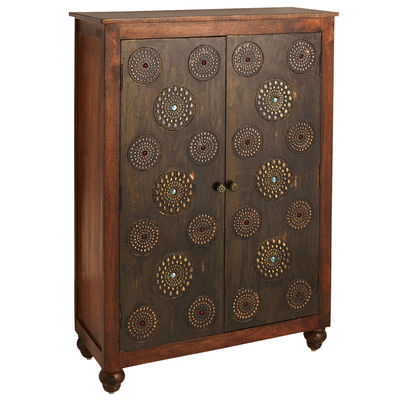
We’re going to have a lot of shoes piled up in the entry way. Do we want a chest to put them in? I don’t want to be obsessive about it, but they might look better tucked away. Besides it would give us a great excuse to buy a wonderful Asian inspired chest like this one. (Just sayin’)
…. what do you think about this for the front of our home?

Welcome!
Join me as we walk towards the door. Can you see the ocean? I am using a Google program called Sketchup to design Hale Ahonui. Have you ever used Sketchup? If not, and if you like to draw or design, you owe it to yourself to download it. I use the Pro version, but the basic is wonderful and very addictive. You can draw a house plan in 2-dimension and simply expand it into a 3-D view like those below. You can do cross sections, elevations, and square footage calculations for budgeting. It is the bomb!
And once you’re in, this is the view of the foyer (No cool furniture yet. We’ll need to do something about that!) and the front door.
I hope you’ll join me again next month as we design a fabulous living room for our Dream Home in Paradise. Meanwhile…

The page you requested could not be found. Try refining your search, or use the navigation above to locate the post.
I'm so glad you dropped by. I'm Betsy. Here you'll find my favorite fabulous, trusted recipes - everything from delicious, quick meals for your family to wonderful classics made easy.
I'm also here to help you with large group recipes from 20 to 200. So next opportunity you get to cook for a large group - Say 'Yes!' Then relax. I've got your back.
Ever wished you could build your dream home? How about building your dream home in a tropical paradise? Join me, room by room, as we design and build a fabulous dream home in Hawaii!
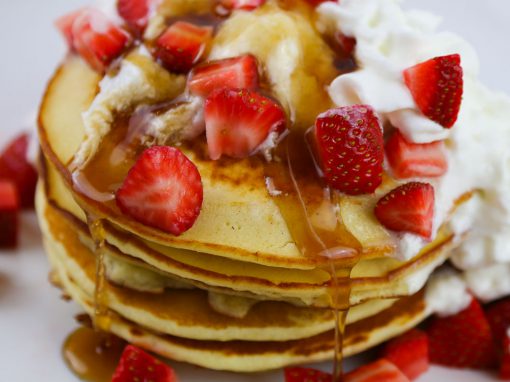

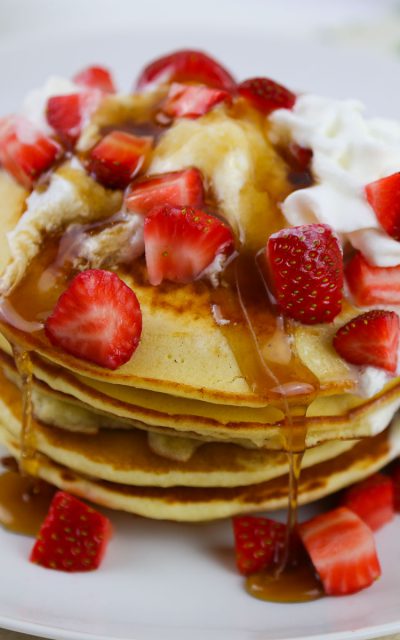
You know all those lengthy recipes for buttermilk pancakes? Well, fuggedaboudit. If you’re cooking breakfast for a crowd, this is every bit as good and way easier!
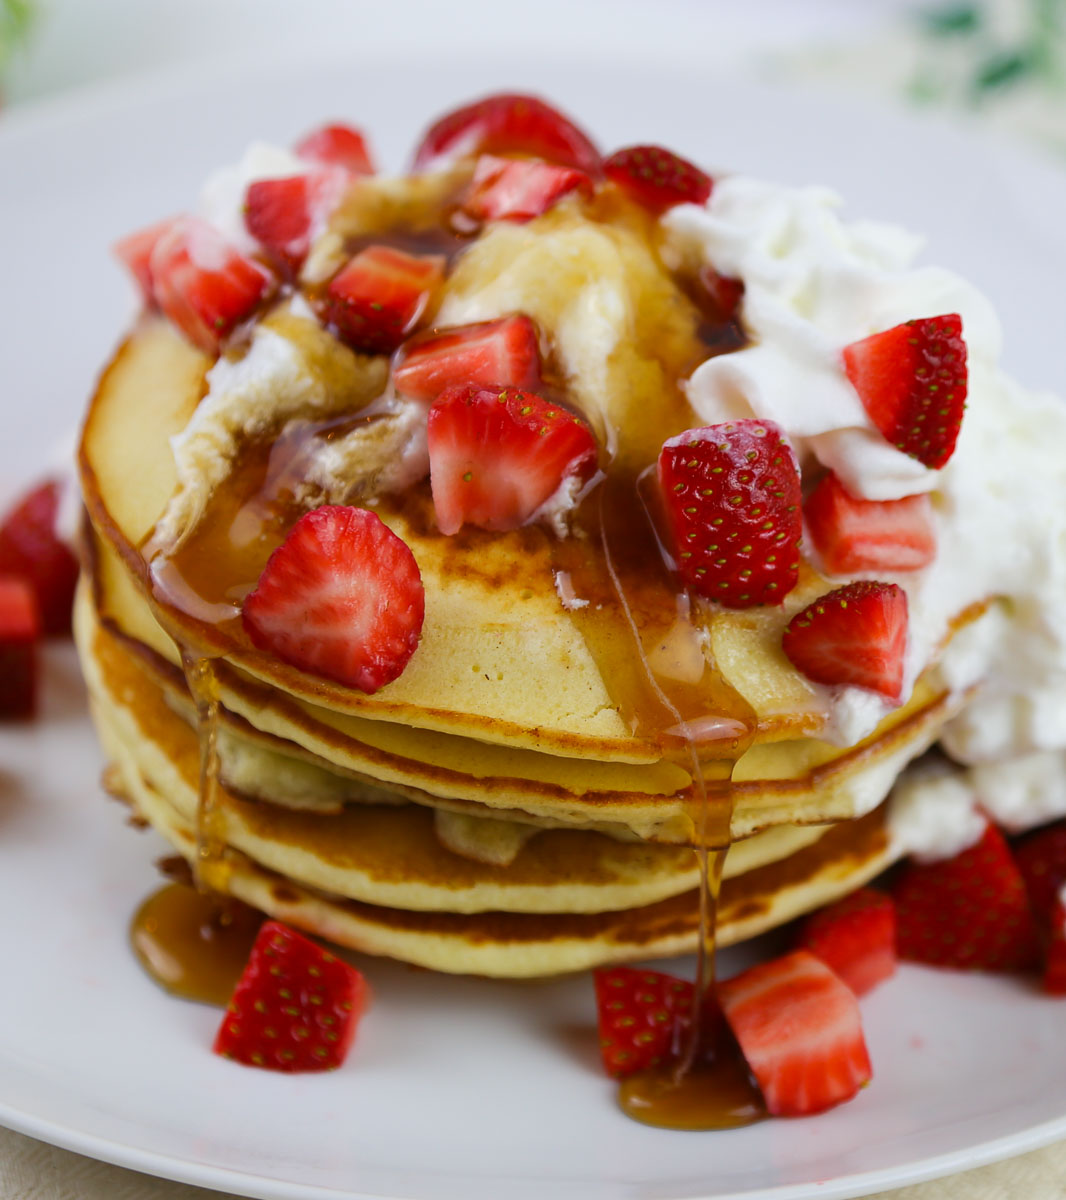
Just head on over to Sam’s (pre-placing your order on the Internet is the only way to go!) and pick yourself up a box of Krusteaz Buttermilk Pancake Mix. No wonder their buttermilk pancakes are so popular. Light and fluffy with a touch of creamy buttermilk, the only thing better for breakfast is to top ’em with strawberries and whipped cream and drench ’em in syrup. If you’re cooking for more than 10 people, pick yourself up a pancake batter dispenser (1 per cook) while you’re at it. You’ll thank me. Now go for it!

Serving Size: 3 Pancakes per person
1 cook - can cook about 115 pancakes in 1 hour – 1 ½ hours with several large griddles and the mandatory pancake batter dispensers.
2 cooks - can cook about 115 pancakes in 30 – 45 minutes with several large griddles and 2 mandatory pancake batter dispensers.
Wash the berries, trim off the top and dice into 1/2 inch cubes.
Heat griddles to 375 degrees F (medium heat). Lightly grease griddle. Measure water into a large bowl. Add pancake mix and gently combine with wire whisk until the dry mix is just moistened. Batter should be slightly lumpy. Do not over-mix.
Let batter stand 2 minutes.
Pour (or dispense with pancake dispenser) slightly less than ¼ cup batter per pancake onto griddle.
Cook pancakes 1 – 1 ¼ minutes per side, or until golden brown, turning only once.
Cooking Time:
1 cook: Can cook about 115 pancakes in 1 hour – 1 ½ hours with several large griddles and a pancake batter dispenser.
2 cooks: Can cook about 115 pancakes in 30 – 45 minutes with several large griddles and 2 pancake batter dispensers.
Additional Fun Toppings for 45:
Mini-chocolate chips (2 bags)
Chocolate syrup (2 large)
Bananas (2 pounds)
Sprinkles (1 large bag)
| Serving: 3 (4”) Pancakes per person | 45 135 (4”) pancakes total | 90 270 (4”) pancakes total | 135 405 (4”) pancakes total | 180 540 (4”) pancakes total | 225 675 (4”) pancakes total |
|---|---|---|---|---|---|
| Krusteaz Buttermilk Pancake Mix | ½ of a (10 pound) bag (5 pounds total) | 1 (10 pound) bag | 1 1/2 (10 pound) bags (15 pounds total) | 2 (10 pound) bags (20 pounds total) | 2 1/2 (10 pound) bags (25 pounds total) |
| Syrup | 1/2 gallon | 1 gallons | 2 gallons | 3 gallons | 4 gallons |
| Oil for Griddle Depends on the griddle size - but get a couple bottles of Crisco | |||||
| Land O' Lakes Butter Continentials (200 count). Butter for Serving - It's a bit more money - but TRUST ME it's worth the serving time savings | 2 pounds Salted Butter | 1 box (200 count) (use the leftovers for corn on the cob) | 1 box (200 count) (use the leftovers for corn on the cob) | 1 box (200 count) | 2 boxes (200 count each) (use the leftovers for corn on the cob) |
| Strawberries – 2 ounces/person (8 servings per pound) (16 servings per 2 pounds) | 5 pounds (Serve leftover berries at lunch) | 10 pounds (Serve leftover berries at lunch) | 15 pounds (Serve leftover berries at lunch) | 20 pounds (Serve leftover berries at lunch) | 25 pounds (Serve leftover berries at lunch) |
| Whipped Topping | 1 can | 2 cans | 3 cans | 4 cans | 5 cans |
I'm so glad you dropped by. I'm Betsy. Here you'll find my favorite fabulous, trusted recipes - everything from delicious, quick meals for your family to wonderful classics made easy.
I'm also here to help you with large group recipes from 20 to 200. So next opportunity you get to cook for a large group - Say 'Yes!' Then relax. I've got your back.
Ever wished you could build your dream home? How about building your dream home in a tropical paradise? Join me, room by room, as we design and build a fabulous dream home in Hawaii!
Never miss a single Fabulous Recipe!
Sign UP today and ENJOY free Recipes & Party Ideas in your inbox.
(No spam - I promise!)