No Results Found
The page you requested could not be found. Try refining your search, or use the navigation above to locate the post.


Are you ready for some FUN?
Queue some mellow Hawaiian tunes and pass the Kahlua pork!
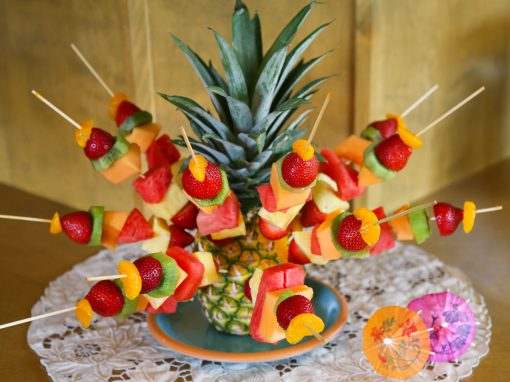
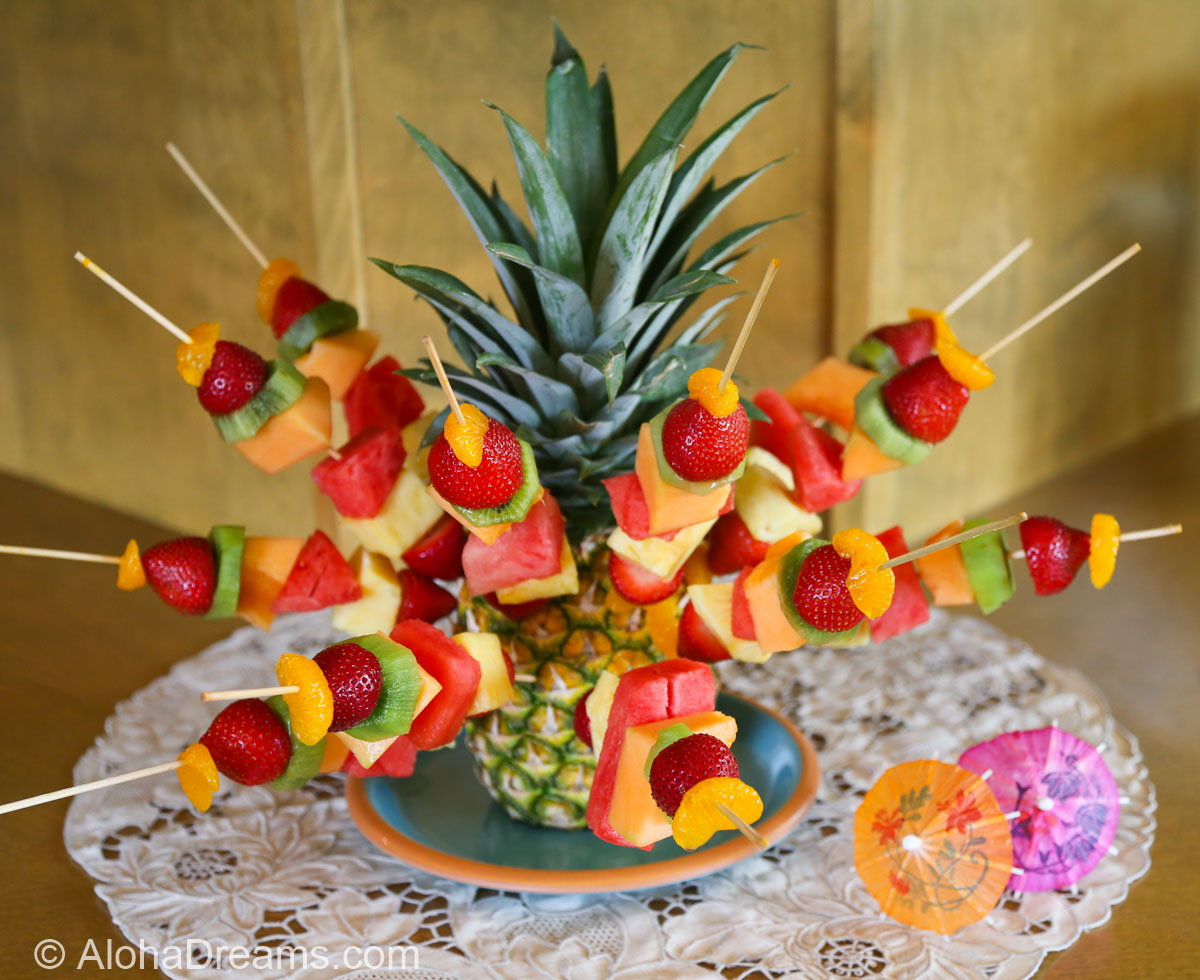
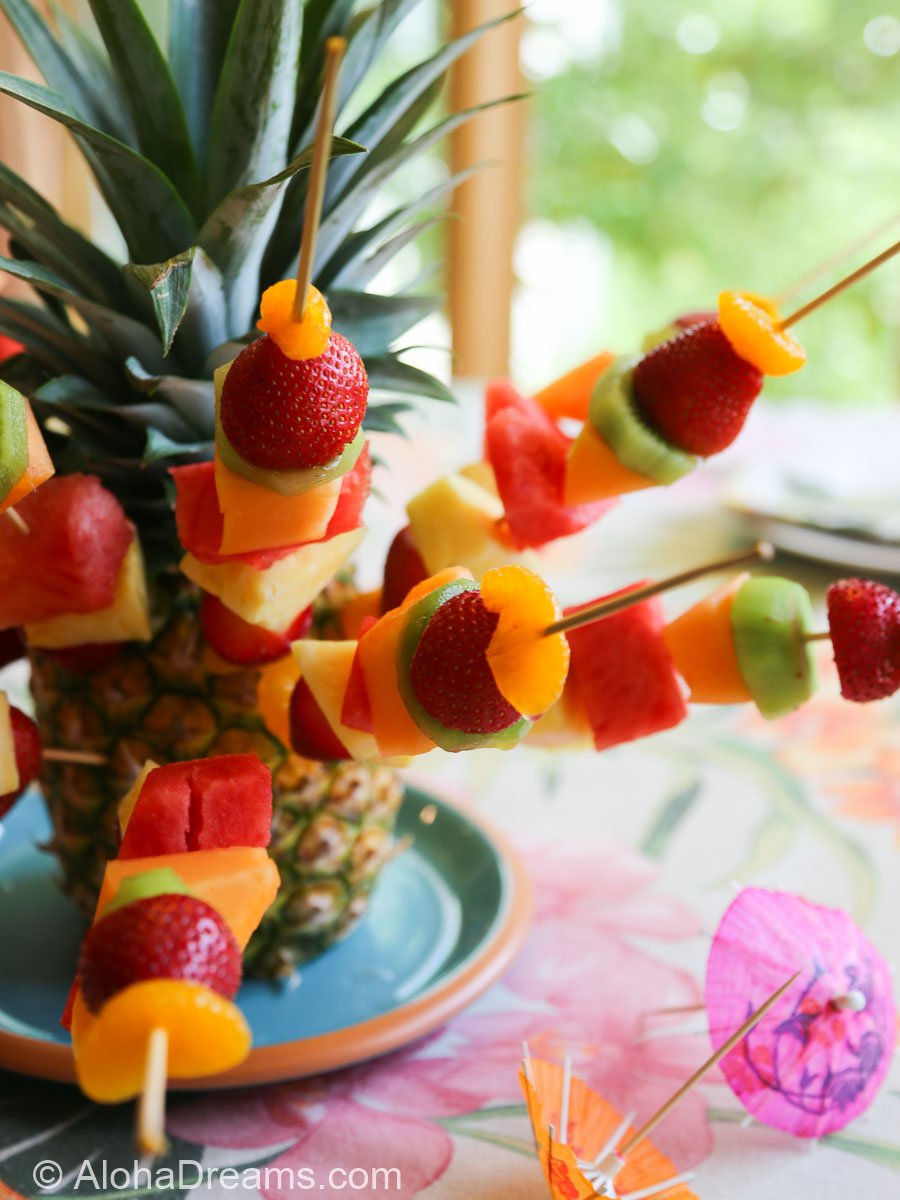
These fruit kabobs in a pineapple are a great option anytime you want to serve fruit in a fresh, fun new way. One of the more popular dishes at our last luau, your guests will love it. Use a wide variety of fruit, in a festive range of colors including:
Cantaloupe
Pineapple
Watermelon
Strawberries
Kiwl or Honey Dew Melon
Mandarin Oranges
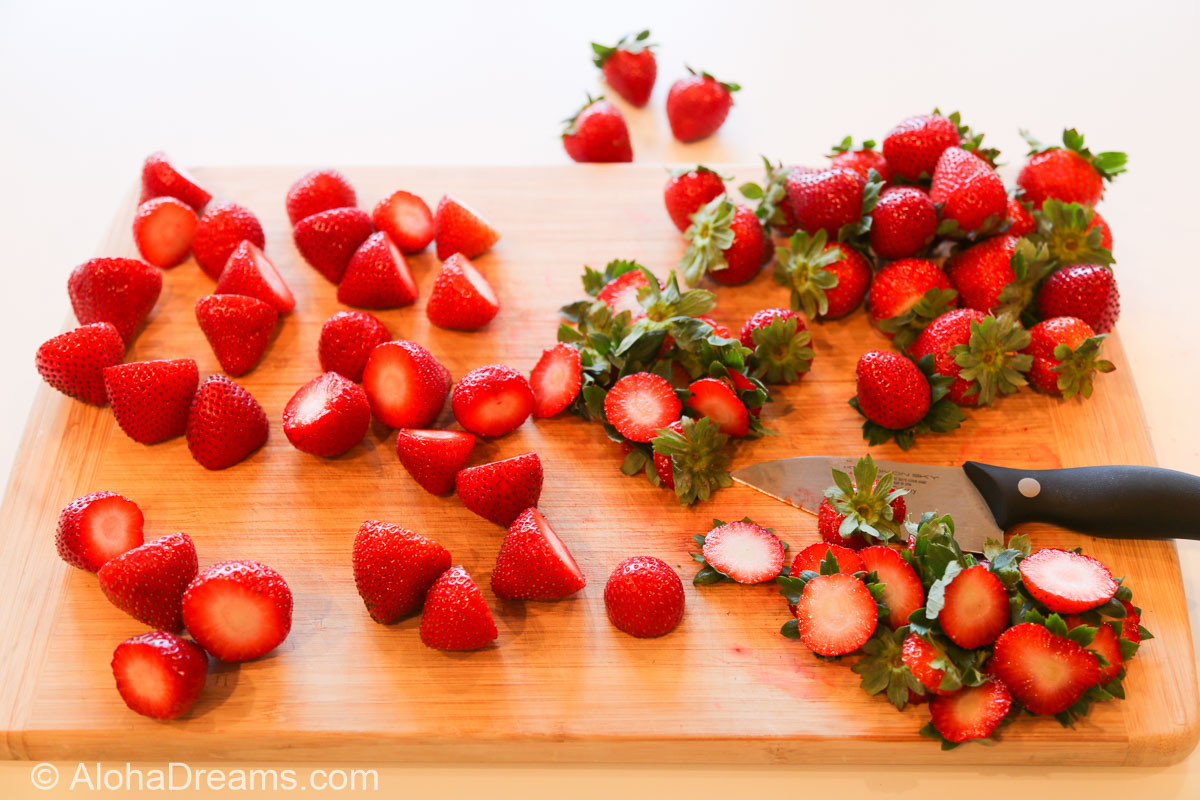
And it couldn’t be easier. Start by cutting off the tops of your strawberries, like this.
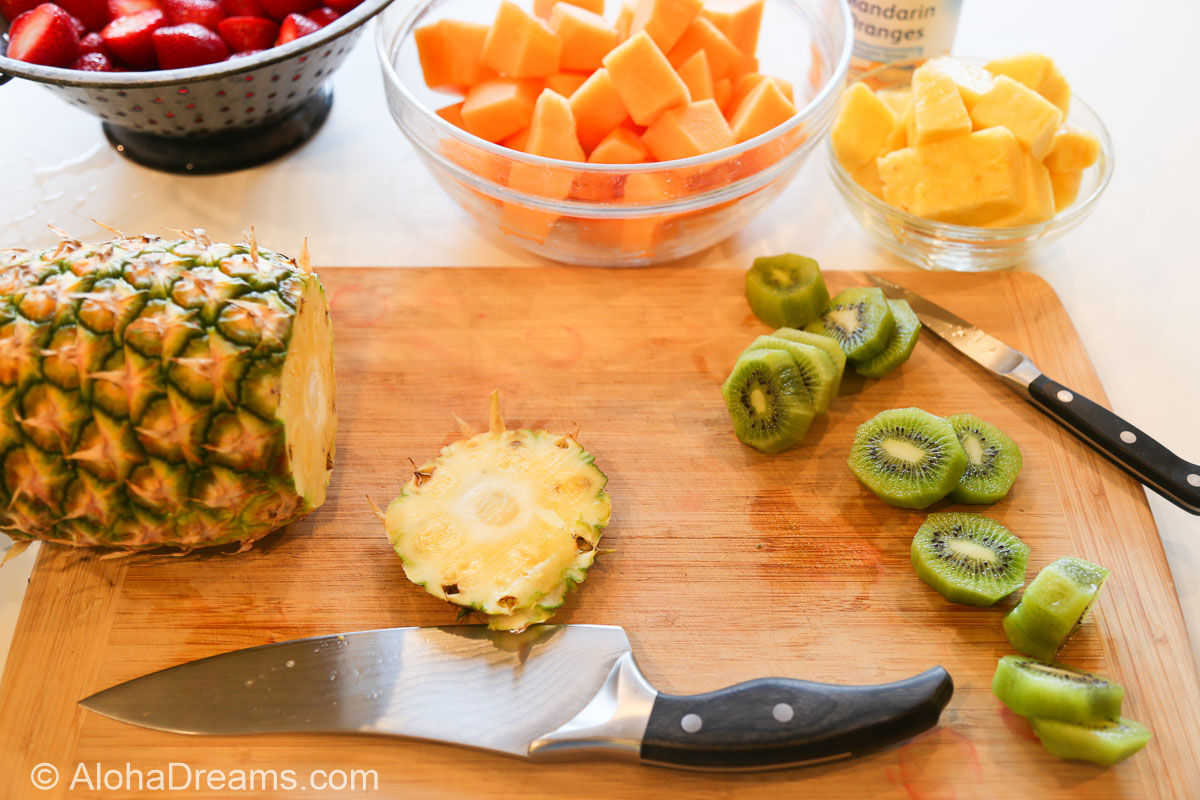
Next, cut your fruit into 1 inch bite-size pieces and place in bowls. Then slice off the bottom of a pineapple so it will stand upright solidly, like this.
Finally, simply thread your fruit onto the skewers and insert into the pineapple at an angle all around the pineapple in 4 rows. I made this pineapple with 12 skewers for an Eclipse party we recently held.
It tastes every bit as great as it looks.

An AlohaDreams.com recipe.
Cut the fruit into 1-inch, or bite-size, chunks. Trim the leaves off the strawberries, but do not core them.
Skewer the fruit on the skewers, alternating fruit types and colors on each stick.
Make sure to insert the skewers into the pineapple angled up, so the fruit don't slip off the end.
Pineapple Kabobs can be made earlier in the day for serving the same day. For best results, I would not make them the day prior

I'm so glad you dropped by. I'm Betsy. Here you'll find my favorite fabulous, trusted recipes - everything from delicious, quick meals for your family to wonderful classics made easy.
I'm also here to help you with large group recipes from 20 to 200. So next opportunity you get to cook for a large group - Say 'Yes!' Then relax. I've got your back.
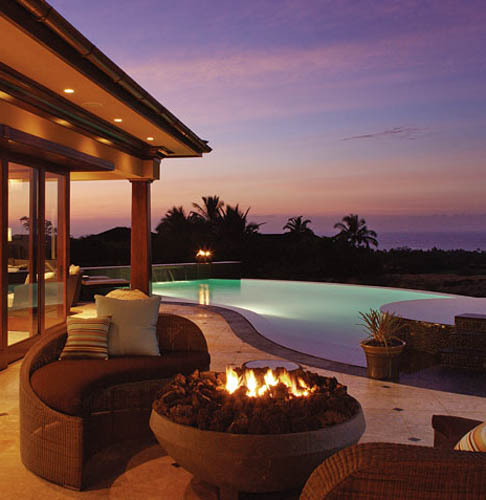
Ever wished you could build your dream home? How about building your dream home in a tropical paradise? Join me, room by room, as we design and build a fabulous dream home in Hawaii!


If you're planning a vacation to Hawaii, I've got you covered on the very best places to go! From many amazing restaurants to incredible adventures in the surf and on land, this is your go-to source for unique and exciting things to do on the Big Island of Hawaii. Or just take a Virtual Vacation!! Let's go!
If you've been asked to cook for a large group activity, be it a Girl's Camp or a Graduation Party, say Yes! I'm here to help. From Menus to Game Plans to Recipes, I'll help you keep on schedule and turn out amazingly delicious food if you're cooking for a crowd! My recipes are tested and trusted. Let's cook!
Ever wished you could build your dream home? Like amazing house design and home building ideas? Me too! Join me as I design and build a home on the Big Island of Hawaii. Follow along while I design each room. Enjoy a front row seat for the entire amazing construction process. Let's play!
Would you like to throw a Luau, but not sure where to start? Want to know how to build a tiki bar and roast a pig? Here's everything you need to have a luau. How about a Christmas Feast or even a fabulous dinner for your neighborhood supper club? You've come to the right place. Let's party!
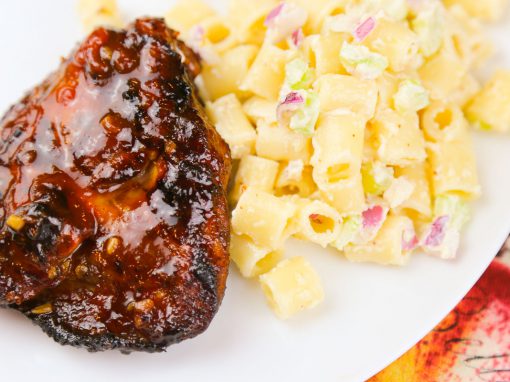
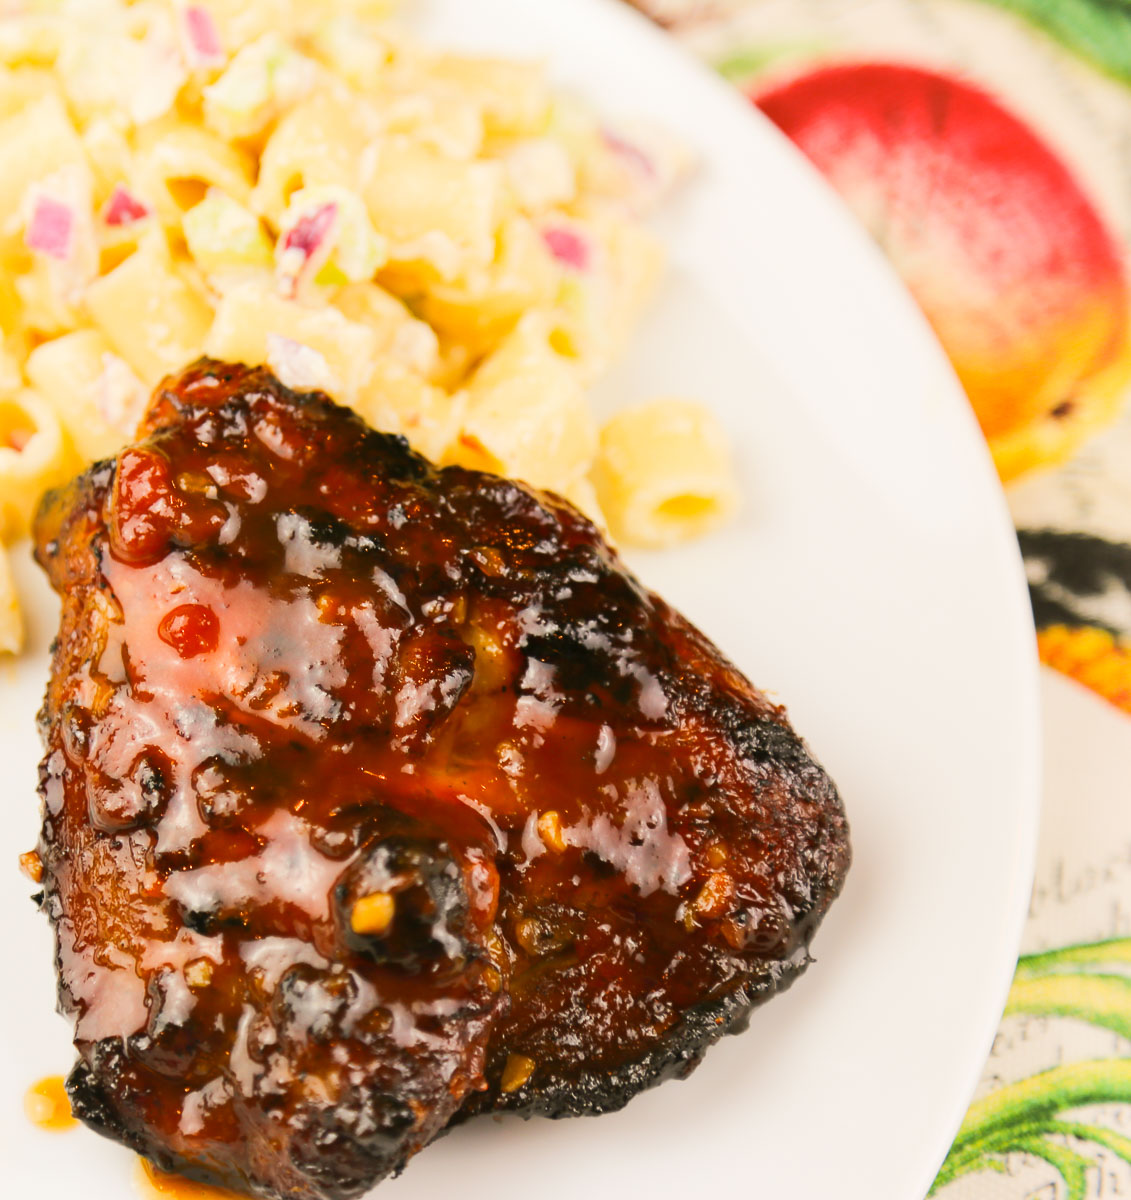
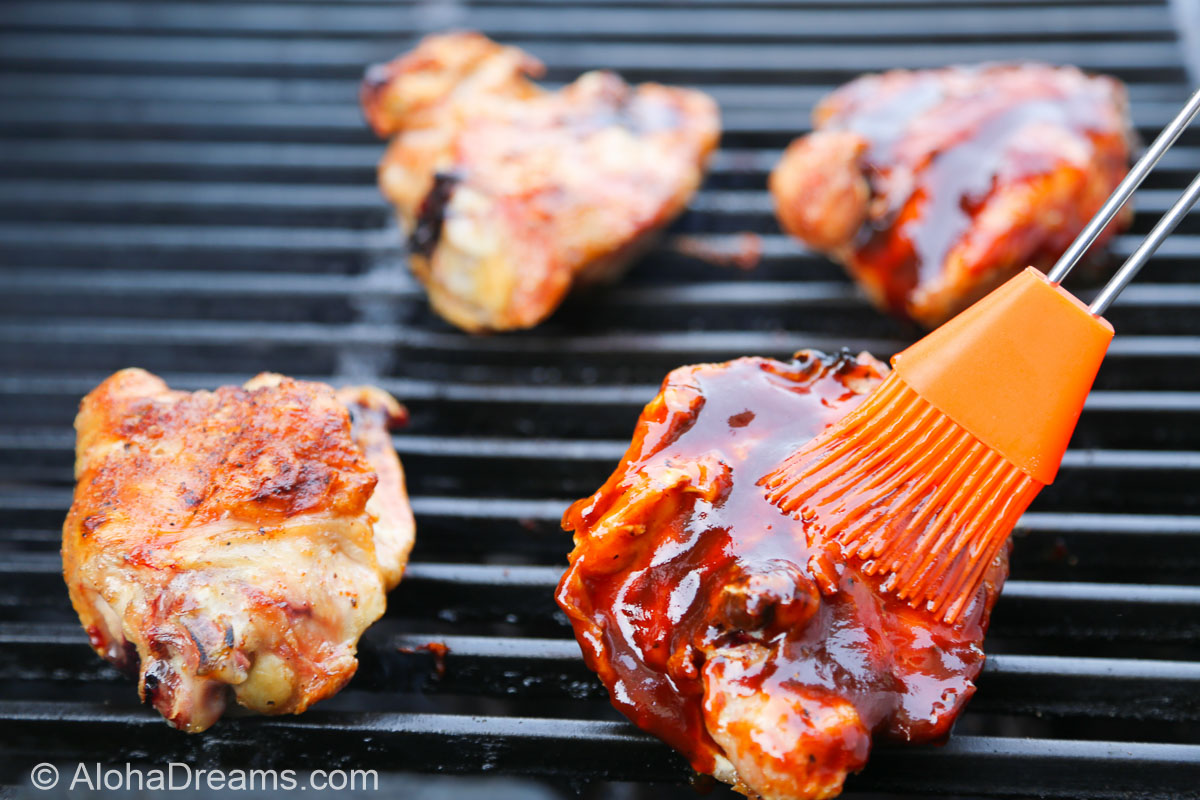
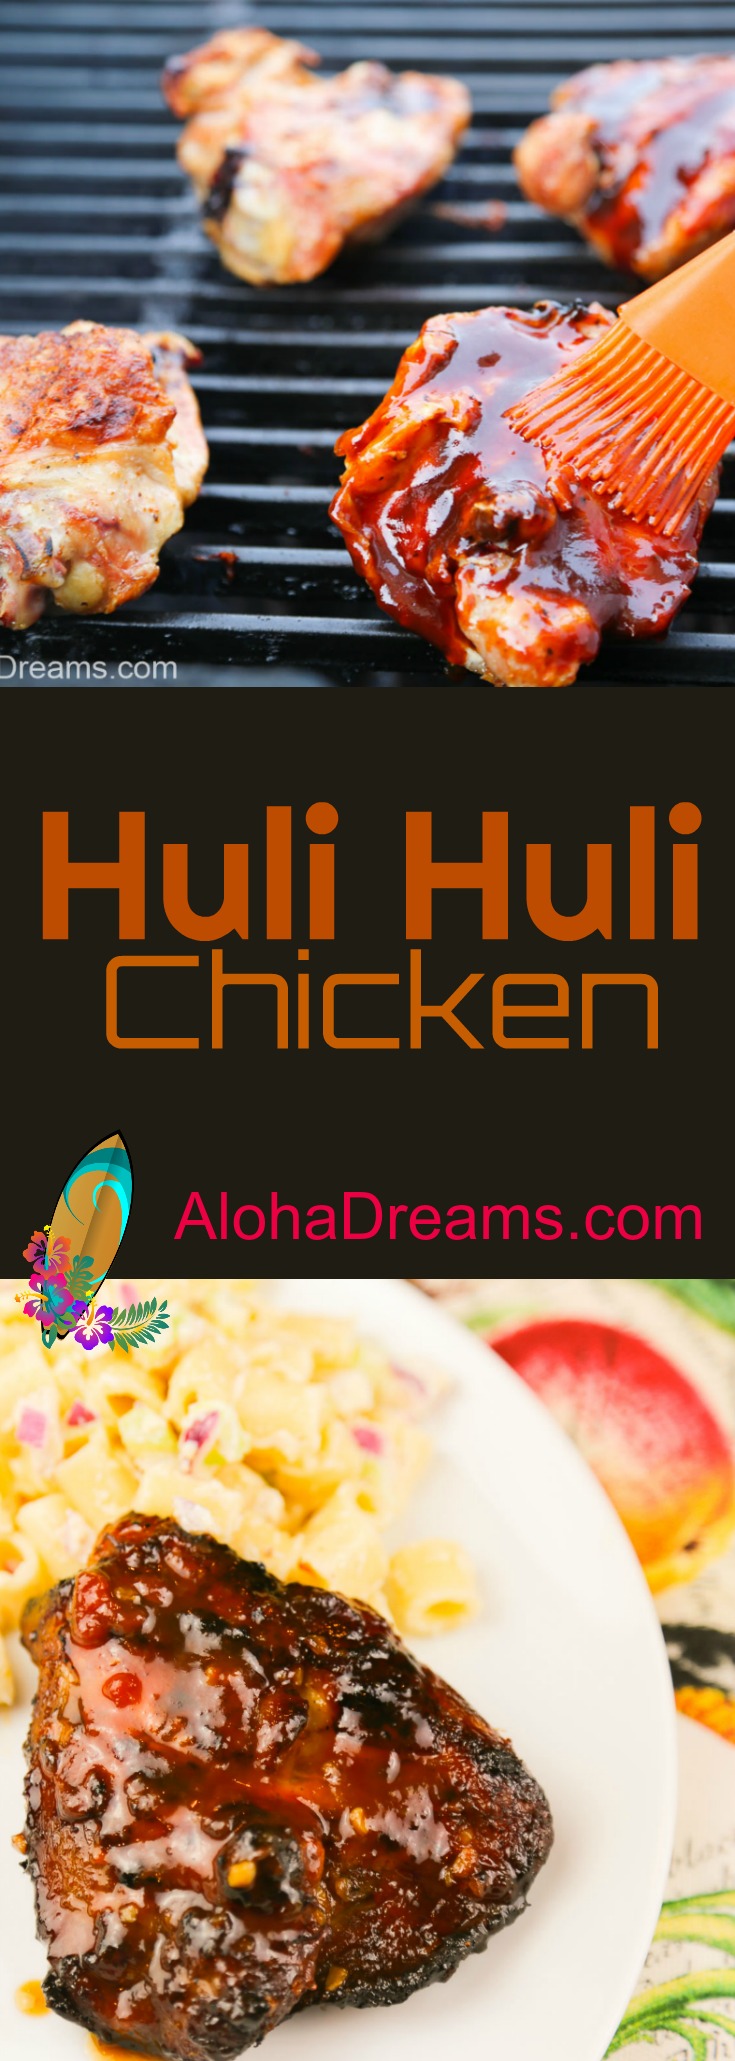
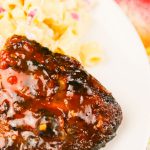
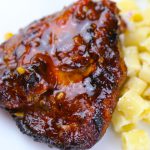
This is without a doubt one of the Best. Chicken. Recipes. Ever.
We fixed this for our luau last year. I figured out of the 140 guests there had to be some folks who didn’t like roast pig. I couldn’t imagine who, but I knew there had to be someone. So we made 70 pieces of Huli Huli chicken to supplement the roast pig. Turns out no one doesn’t like roast pig. But NO ONE wanted to skip the chicken either.
I. Ran. Out.
I NEVER run out of food. Never.
Well, I ran out of Huli Huli chicken. In the midst of all this luau goodness, EVERYONE WANTED THE HULI HULI CHICKEN.
Did I mention this is a great recipe. You have to try this one before the summer’s over. Find any excuse, but make this chicken. You’ll love it.
Huli-Huli Chicken is a quintessential Hawaiian dish. It was created in 1955 by Ernest Morgado of Pacific Poultry. Ernest barbecued his version of teriyaki chicken for a farmers gathering.
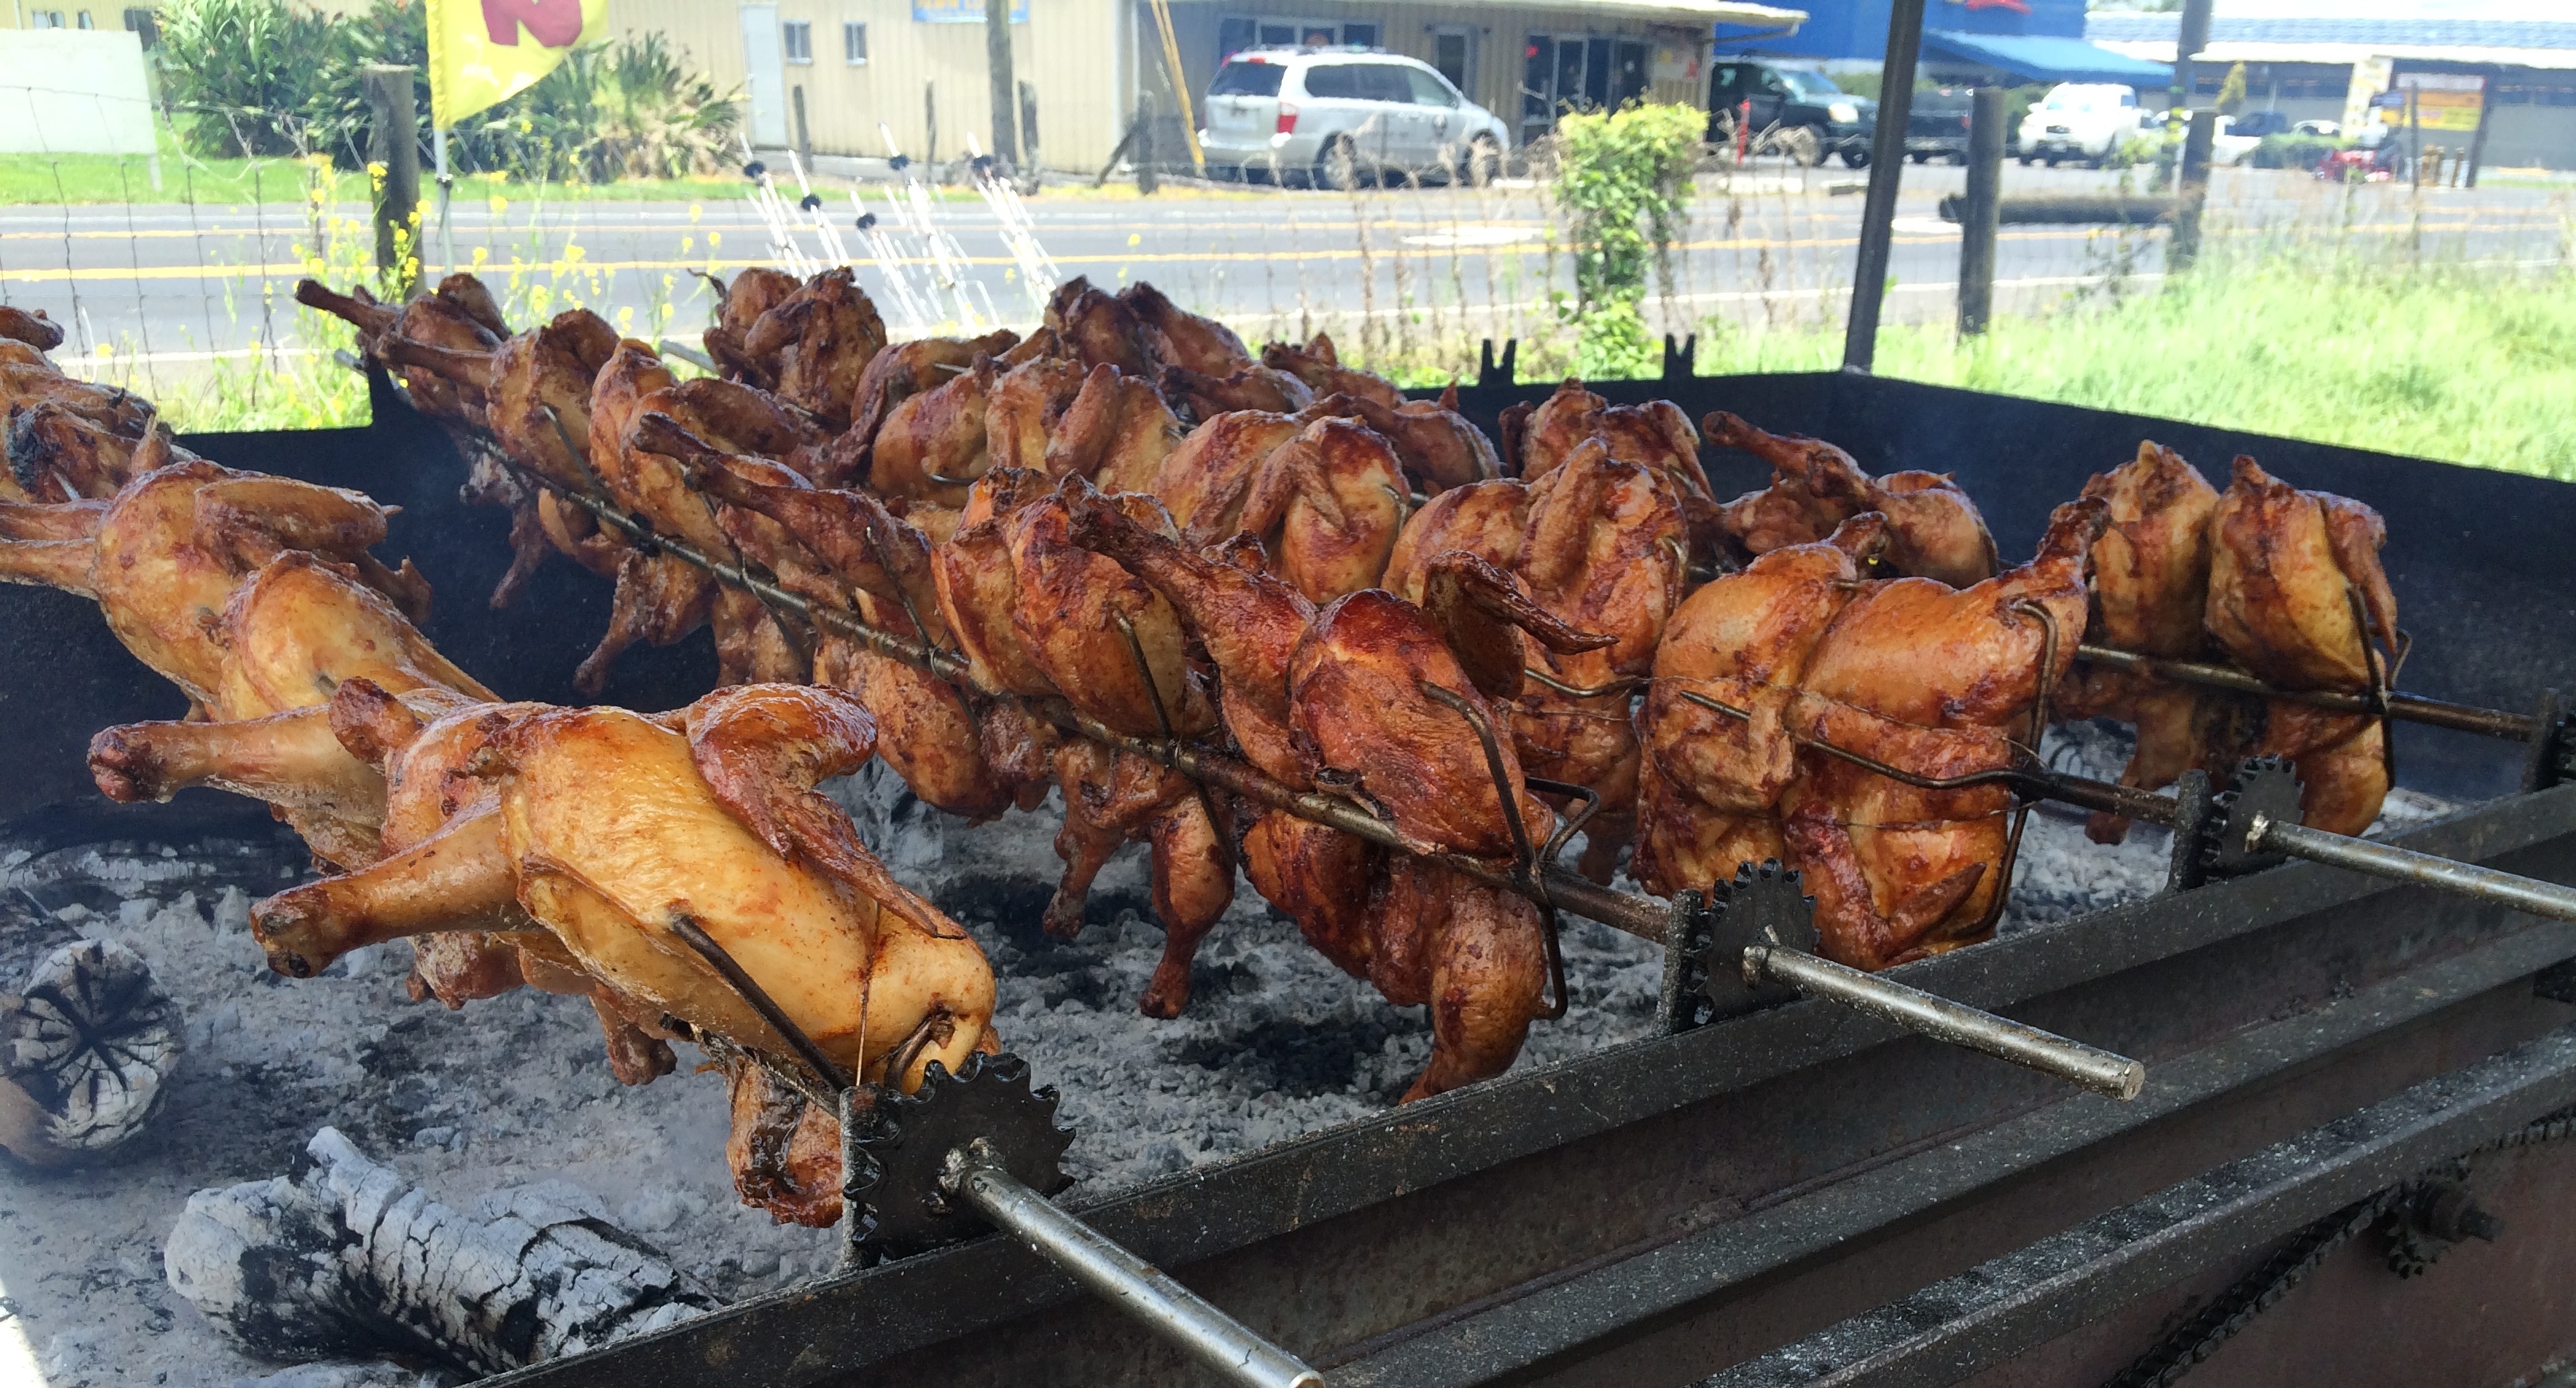
The chicken was such a hit, its popularity spread and it eventually became a favorite food for Hawaiian fundraisers. It’s still often used by schools, softball teams and hula halau (hula groups) to raise money. Huli Huli chicken is typically cooked between two grills or on a large rotisserie. The grills are flipped over repeatedly to allow the chicken to cook evenly on all sides. And since huli is the Hawaiian word for turn, it became known as Huli-Huli Chicken.
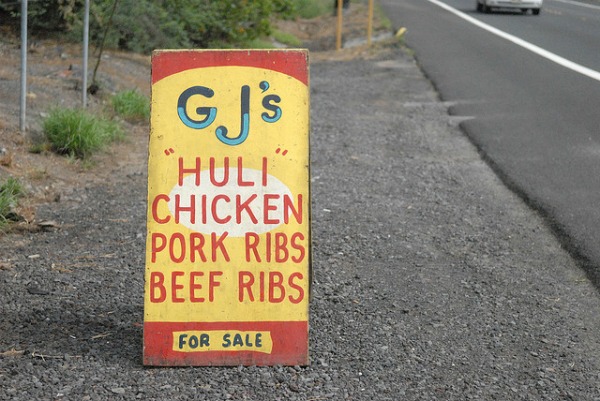
If you’re ever on the Big Island, you owe it to yourself to check out GJ’s roadside Huli Huli chicken stand. I promise you the smell alone will pull you over. You can read all about GJ’s Huli Huli chicken here. It’s amazingly good.
There are several secrets to great Huli-Huli chicken. First of all you need to marinate your chicken for at least an hour and preferable longer, but don’t exceed 8 hours or it will be too salty. Secondly, use thighs – they are much less likely to dry out than breasts and they are more flavorful. Third, apply the glaze right before you remove the chicken from the grill. There is a lot of sugar in the glaze and if you apply it any sooner, the chicken can easily burn.
To make cooking your chicken, steaks or any meat on your grill or oven a worry-free event, consider using one of these cool tools:

It will only take you seconds to get this sleek Bluetooth thermometer up and running. It reports accurate readings on your smart phone up to 100 - 150 feet from its base. From the moment your meat is placed in the oven (or grill) to the second it reaches the perfect temperature, the iGrill has your back. Insert the temperature probe(s) into your meat and track the doneness of your food from your smart phone on the Weber iGrill app, without having to lift the lid. It comes with 2 probes and you can order 2 more, for a total of 4! And you can use it for everything including chicken, steak, burgers, pork roasts. You'll love it for baking chicken because you'll know exactly when the chicken is done so it doesn’t get dried out. It's the reason my dishes come out at just the right degree of done-ness time after time!
Fourth, don’t forget to huli the chicken. And if you have an mesquite chips, now’s the time to bring them to the party. In Hawaii they use kiawe (pron. key-AH-vey) wood, a tree from the mesquite family. These are kiawe trees. Don’t sweat it if you don’t have mesquite chips, it will be WONDERFUL even still.
Finally, feel free to invite us over.
You can make the chicken to this point up to 2 hours before serving. Transfer to a large disposable aluminum serving tray, cover with foil and hold in a 200 degree (warm) oven.
NOTE: Do not exceed approximately 36 - 40 thighs on a standard size gas grill. Many more than that and they will render so much fat that you can easily have a grill fire. Not good.
Like all my chicken grilling recipes, this recipe calls for basting right before you remove the chicken from the grill. That's especially important in this case because the sugar in the glaze will burn easily if you apply it any sooner than that. Adapted from Cooks Country (a WONDERFUL magazine).
In a large bowl, combine water and soy sauce. Set aside. In a large skillet, heat oil over medium-high heat until shimmering. Add garlic and ginger and cook until fragrant, about 30 seconds. Stir into water/soy sauce mixture. Add chicken and refrigerate, covered, for at least 1 hour and up to 8 hours. Go for the full 8 hours if at all possible, but no more than that or the chicken will get too salty.
For a kettle grill: open bottom vents on grill. Light about 75 coals. When coals are covered with fine gray ash, spread evenly over bottom of grill. Set cooking grate in place and heat, about 5 minutes. For gas grill: heat all burners to medium-low. Scrape and oil cooking grate.
Remove chicken from brine and pat dry with paper towels. Arrange chicken skin-side up on grill. Grill, covered, until chicken is well browned on bottom and meat registers 120 degrees, about 25 to 30 minutes. Flip chicken skin-side down and continue to grill, covered, until skin is well browned and crisp. The meat should register 170 to 175 degrees, about 20 to 25 minutes longer. Apply glaze several minutes before removing chicken from grill.
You can make the chicken to this point up to 2 hours before serving. Transfer to a large disposable aluminum serving tray, cover with foil and hold in a 200 degree (warm) oven.
I'm so glad you dropped by. I'm Betsy. Here you'll find my favorite fabulous, trusted recipes - everything from delicious, quick meals for your family to wonderful classics made easy.
I'm also here to help you with large group recipes from 20 to 200. So next opportunity you get to cook for a large group - Say 'Yes!' Then relax. I've got your back.
Ever wished you could build your dream home? How about building your dream home in a tropical paradise? Join me, room by room, as we design and build a fabulous dream home in Hawaii!
If you're planning a vacation to Hawaii, I've got you covered on the very best places to go! From many amazing restaurants to incredible adventures in the surf and on land, this is your go-to source for unique and exciting things to do on the Big Island of Hawaii. Or just take a Virtual Vacation!! Let's go!
If you've been asked to cook for a large group activity, be it a Girl's Camp or a Graduation Party, say Yes! I'm here to help. From Menus to Game Plans to Recipes, I'll help you keep on schedule and turn out amazingly delicious food if you're cooking for a crowd! My recipes are tested and trusted. Let's cook!
Ever wished you could build your dream home? Like amazing house design and home building ideas? Me too! Join me as I design and build a home on the Big Island of Hawaii. Follow along while I design each room. Enjoy a front row seat for the entire amazing construction process. Let's play!
Would you like to throw a Luau, but not sure where to start? Want to know how to build a tiki bar and roast a pig? Here's everything you need to have a luau. How about a Christmas Feast or even a fabulous dinner for your neighborhood supper club? You've come to the right place. Let's party!
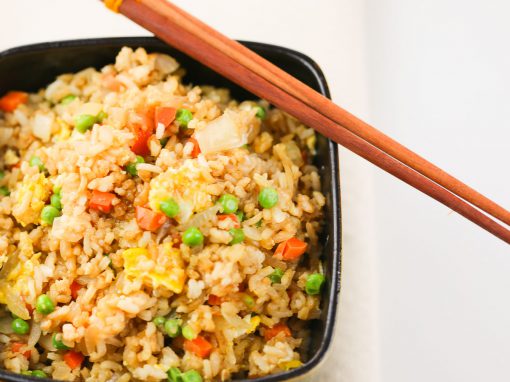

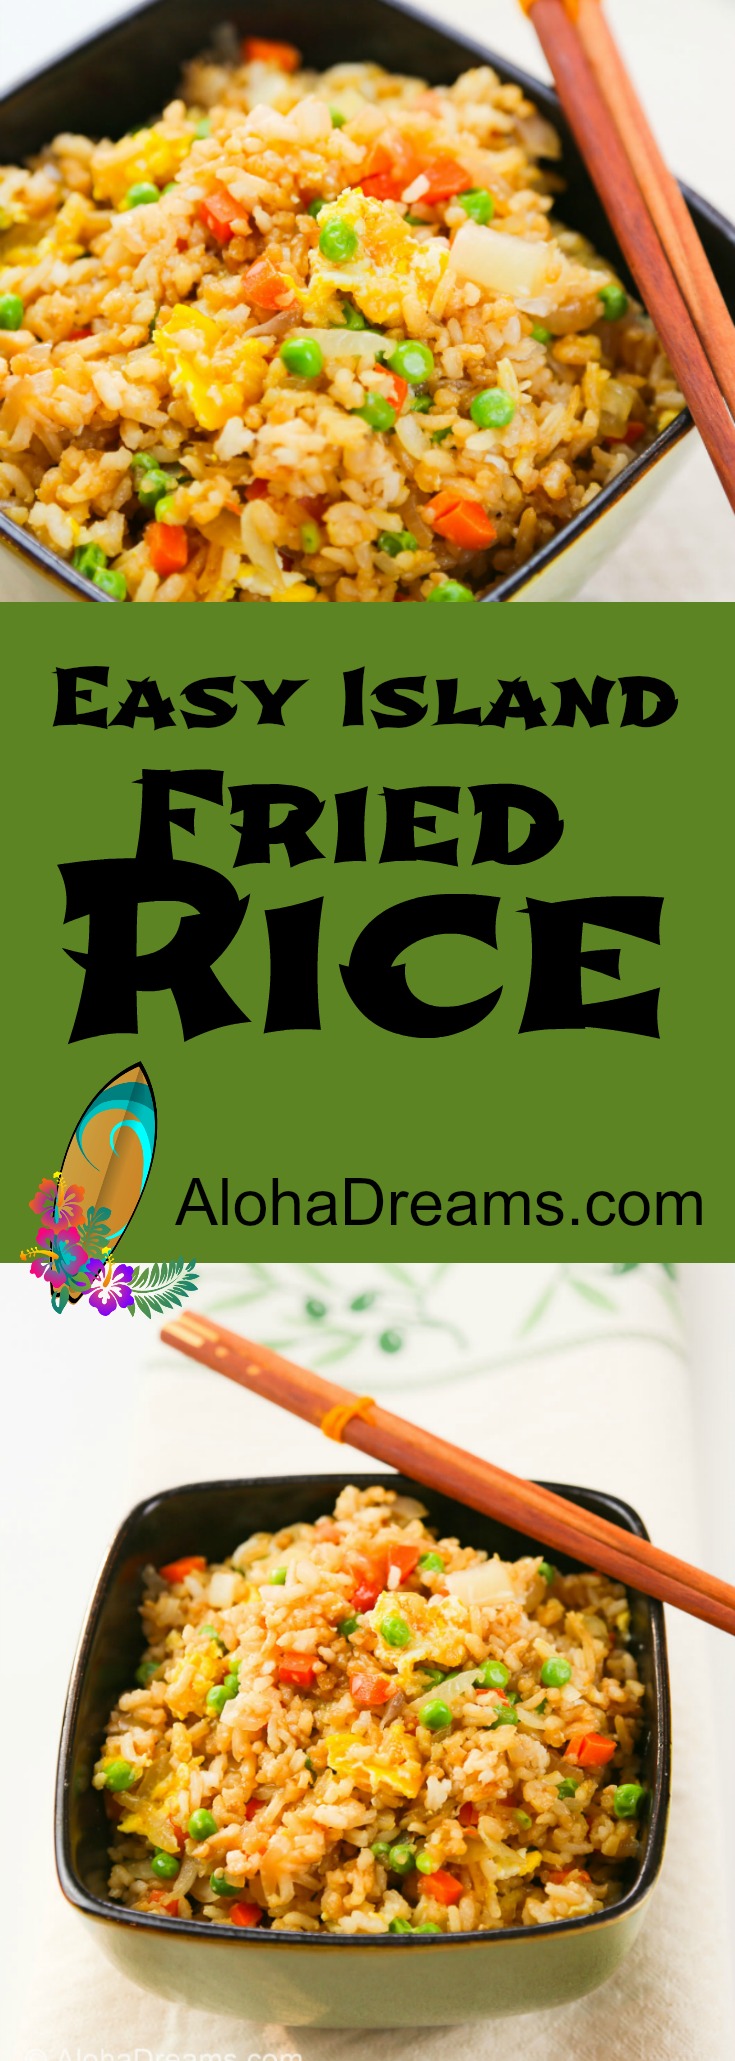
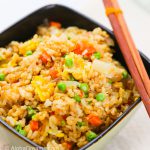
I developed this recipe because EVERY ONE loves Fried Rice and I desperately wanted Fried Rice for our Luaus. But neither you, nor I, nor any of my dear, long-suffering friends are interested in spending hours in front of a hot wok, cooking 20 or 30 batches of fried rice. Ain’t gonna happen. SO – I came up with this quick and easy version of Fried Rice. Here’s the secret: it’s not actually fried. The ‘fried’ look and taste is supplied with sesame oil and soy sauce. The usual ‘add-ins’ of carrots, peas, and scrambled eggs further contribute to the sense that you’re enjoying fried rice.
Is it the recipe I use when I’m fixing dinner for less than 20? Nope. Is it a darn good alternative for 100 – 400? Absolutely. In fact, I had enough compliments and recipe requests, that I’ve included a “Family Size” version as well. It’s one of the more popular side dishes at our luau. Let me walk you through the steps to make it.
The absolute best way to easily cook rice for a crowd is in the oven. It’s a fool-proof, hands off method that turns out perfect rice every time. The first time I tried it, I checked the rice about 10 minutes prior to the completion of the cooking time. It was still slightly crunchy – and with guests due soon I was getting concerned (it does happen, I just try never to show it). But I steadfastly replaced the aluminum foil and said a small prayer. When I removed the rice from the oven 10 minutes later – it was perfect. It’s turned out perfect every time I’ve made it. Just check a spoonful from the center of the pan before you remove it from the oven and if it’s not quite done, cover it back up and let it go 5 – 10 more minutes.
Let’s talk about this one for a minute. Generally, most rice will triple when cooked, so 1 cup of raw rice will yield 3 cups cooked rice. This means if you start with 12 cups (5 pounds, 4 ounces) of white, long grained, uncooked rice, you’ll wind up with 36 cups of cooked rice. For this recipe you’ll be adding in 4 more cups of ham and about 4 cups of vegetables which will give you about 44 cups total. Since an average serving size is about 1/3 cup – 1/2 cup, this gives you between 88 – 132 servings per pan. I just made 2 (20 x 13 x 3) pans of this rice for our luau this past weekend. We served 141 people with enough leftovers to have served 175 – 200 with the 2 pans. You can easily count on 1 pan of this rice serving 75 people. I would even be comfortable planning to handle 80-90, and possibly even 100 people, since not everyone will take some. But rice is cheap, and so 75 is what I use for planning.
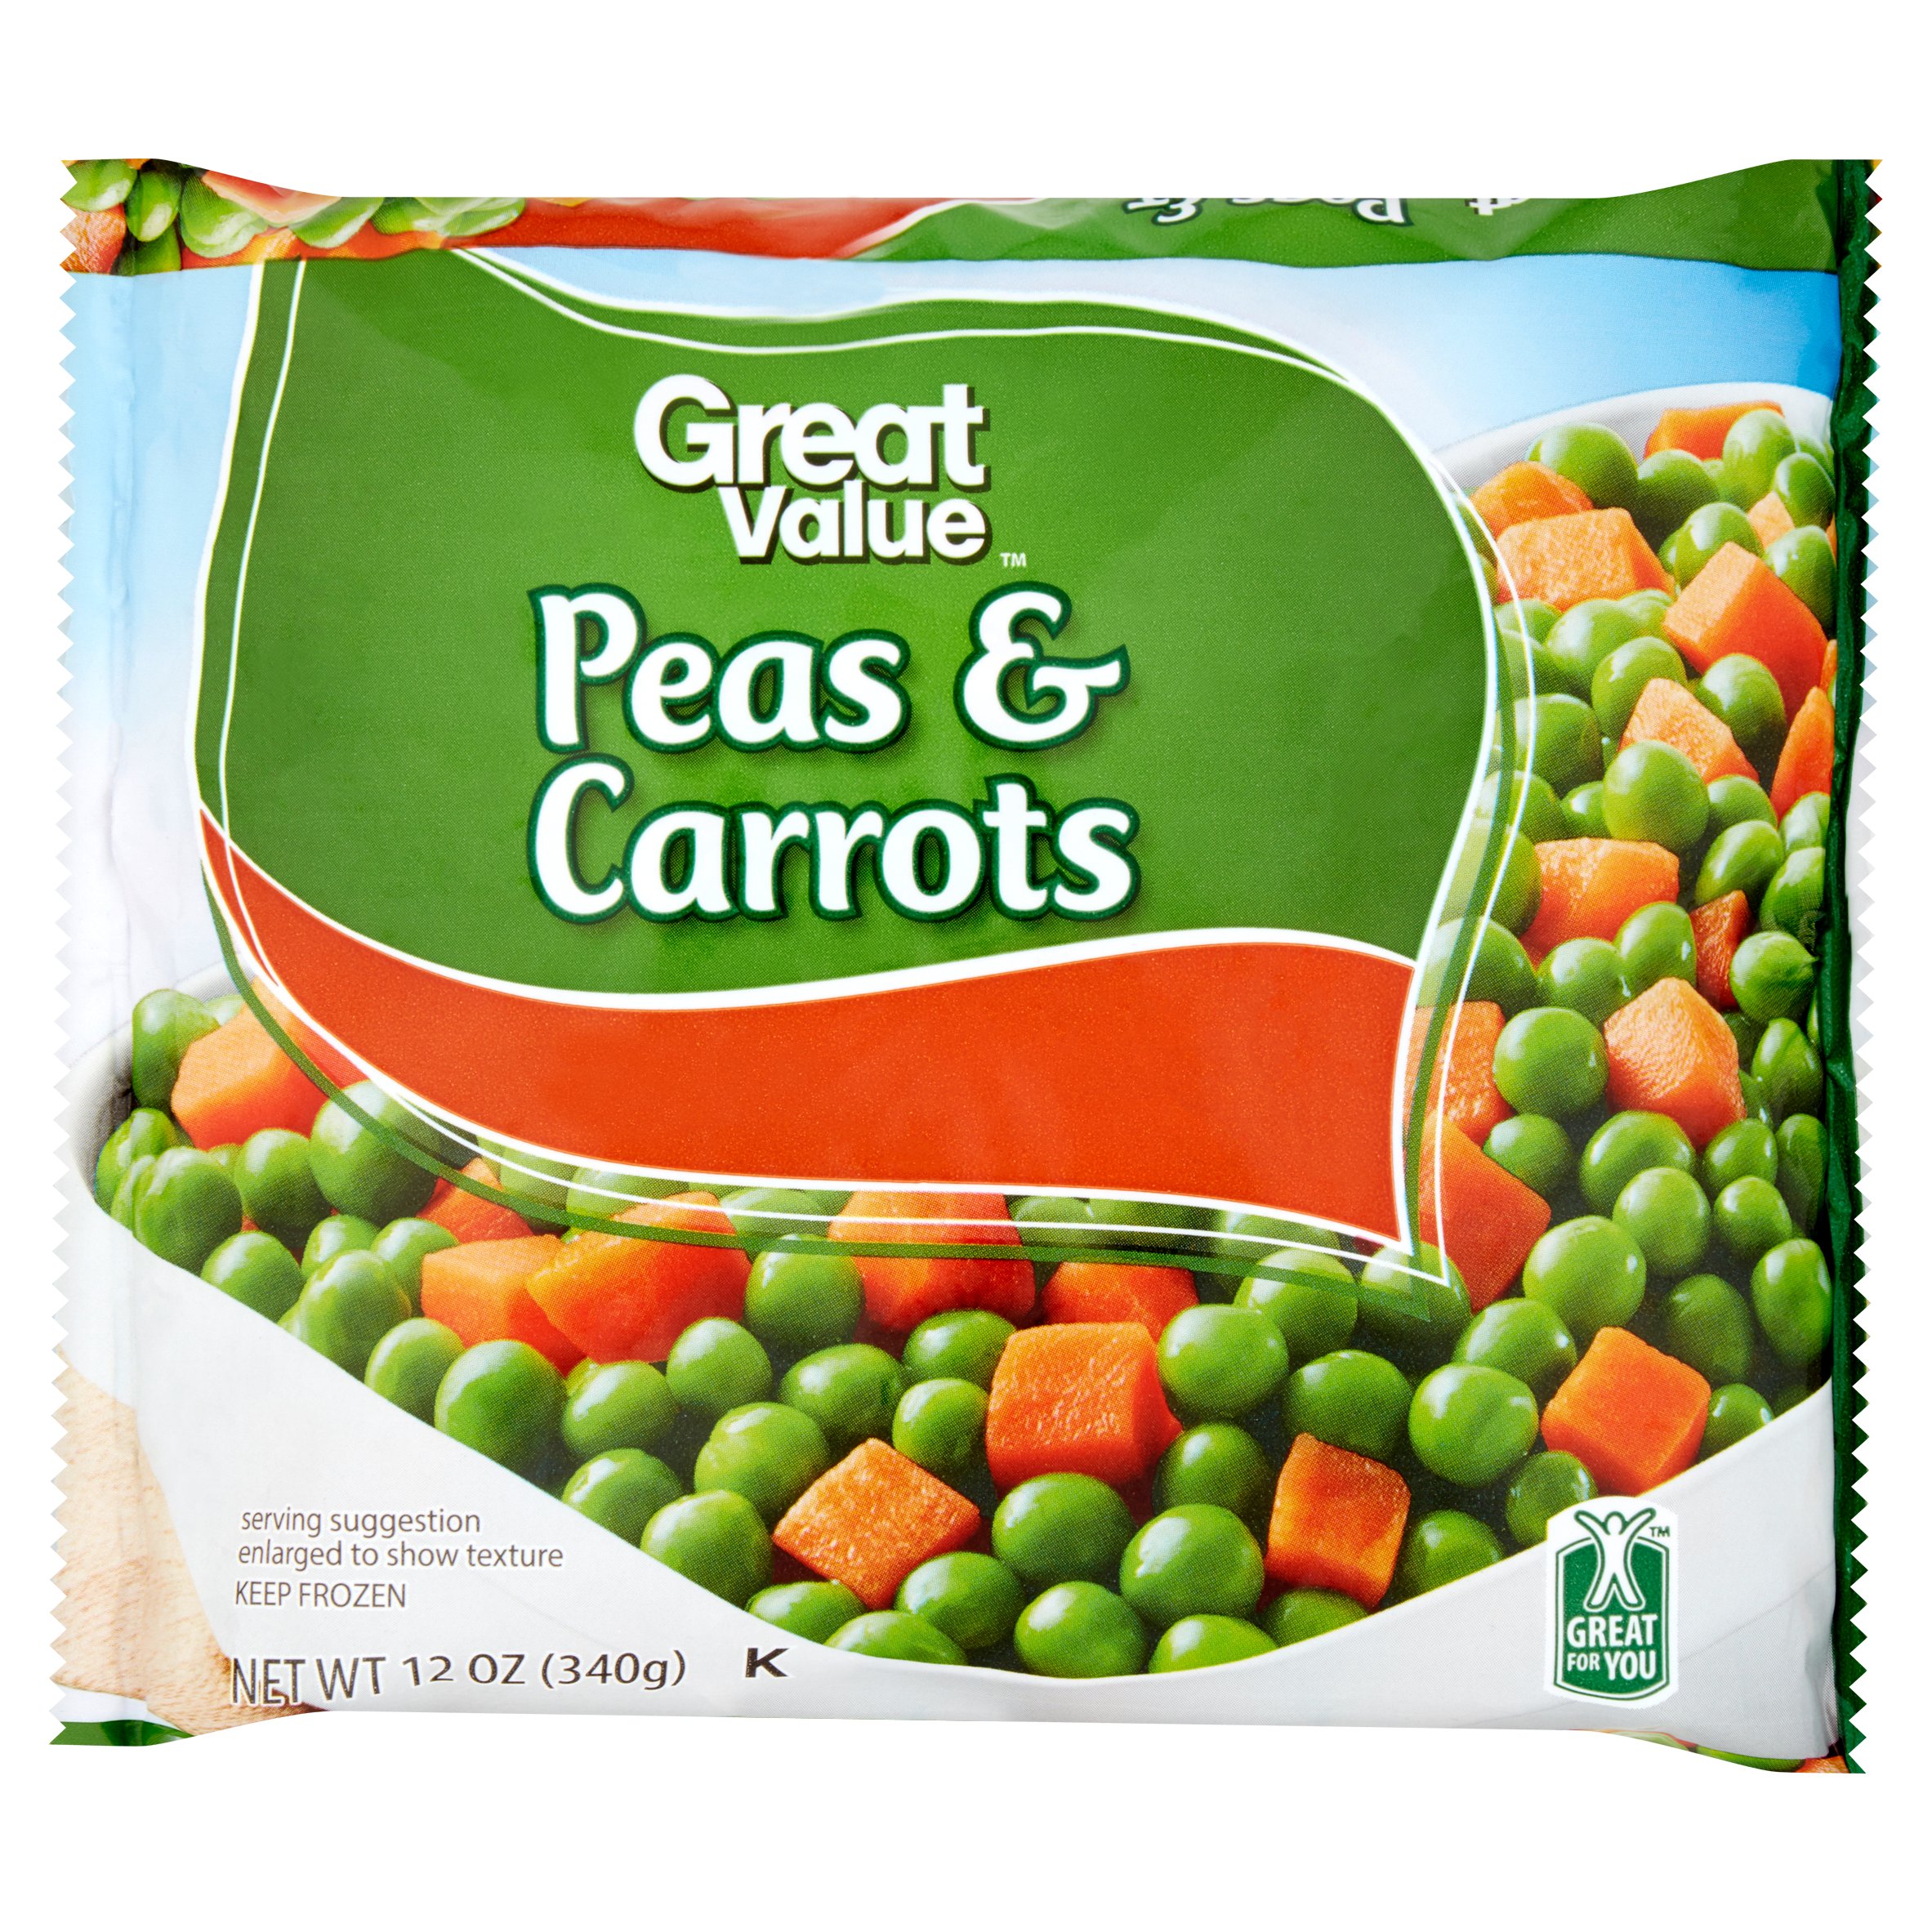
By the way – you can make many versions of this: Spanish Rice by adding pureed tomatoes, corn, oregano and green chilies or even simple plain white rice by omitting any of the add-ins with this recipe. You can also add some diced spam if you want to make it authentic Hawaiian. Like shrimp, chicken or pork? Go for it. As for the veggies, nothing’s easier than a frozen package of peas & carrots!
This rice for a crowd recipe is SO much easier than worrying about the rice overcooking and burning on the stove top. Keep it, uncovered, in a warm 200 degree oven and it easily retains its heat for up to an hour. I’m officially in love.
Here’s a helpful hit when you measure the rice: It’s just as easy to dump the rice in the pan in discrete piles as it to throw it in casually. That way when you’re done, there’s no question as to the number of cups of rice you’ve add to the pan.
Cooking rice in this quantity makes it difficult to effectively mix in the soy sauce and other ingredients. Once cooked, the rice takes up most of the space in the large roasting pan. If you’re not careful, you end up with clumpy, gummy rice.
The last time I served this, I was in a hurry and wasn’t able to easily, quickly and thoroughly mix in the soy sauce. I ended up serving a pan of “fried rice” with large unappetizing pockets of plain white rice. To add insult to injury, I had to transport the rice about 15 minutes the church for serving. Because I was short on room, I stacked several large, heavy pans on top of the rice pans, which turned the rice into a gummy block.
I can tell you the 200 teens were very excited with the prospect of fried rice as part of a Chinese dinner. They were less enthusiastic with my sub-par offering. Fortunately, they have been taught the importance of kindness…
To keep our reputations intact, I’ve found a very effective solution:
1. Simply pick up an extra aluminum roasting pan so that you have 2 total for each recipe. Once the rice comes out of the oven, remove half of it to the second pan. Evenly divide the soy sauce, sesame oil, eggs and meat between the 2 pans. Toss to mix well. Simply take a couple forks or serving spoons and fluff it to break up any larger clumps and cool it down so you can handle it, then break up all chunks by hand. The rice should retain its temperature well, but you can always put it, uncovered, in a 200 degree oven to re-warm it if necessary.
2. If you’re transporting this rice after cooking it, make sure you don’t stack anything on it.
3. Fluff it right before serving. Since you have now divided the rice between 2 roasting pans, this gives you enough room in the pans to easily fluff it.
A great side dish for your next luau, girl's camp, youth conference or family reunion. Makes 44 cups. Yields roughly 75 - 100 servings.
Meanwhile, preheat oven to 350-degrees. Lightly spray a 20" x 13" x 3" roasting pan with cooking spray. Tear off a large sheet of aluminum foil large enough to easily cover the top of the roasting pan. Set aside.
Place 12 cups UNCOOKED rice, chopped onion, frozen carrots and peas and minced garlic in roasting pan, spread evenly. Place roasting pan on flat baking sheet for stability when transporting to and from the oven.
Once water and broth is boiling, pull out the oven rack and move the roasting pan on the baking sheet to the extended rack. Carefully pour the boiling liquid over the rice and stir to mix thoroughly.
IMMEDIATELY cover tightly with aluminum foil. Using oven mitts (it's hot), press foil tightly around the pan to ensure a tight seal around ALL the edges, crimping along edges. Carefully slide the rack back in the oven and bake for 45-50 minutes or until rice is tender.
15 minutes before rice is done, in a medium sauté pan over medium heat, cook meat if including. When meat is browned and cooked, whisk eggs, add to pan and scramble eggs for several minutes.
Test the rice for doneness and when done remove from oven and remove foil. Scoop out half of it into the second disposable aluminum roasting pan. Evenly divide the soy sauce, sesame oil, eggs and meat between the 2 pans. Toss to mix well. Simply take a couple forks or serving spoons and fluff it to break up any larger clumps. Then, when it's cool enough to handle, break up the rice with your hands. The rice should retain its temperature well during this process, but you can always put it back in the oven at 350 for about 20 minutes to re-heat if necessary.
Can be kept warm in the oven, covered with foil, at 150 degrees or put in a covered slow cooker on LOW. Add a little water if necessary to keep from drying out.
Make sure to 'fluff' the rice immediately prior to serving.
NOTE 1: 12 cups of uncooked rice cooks up to 24 cups of cooked rice. You'll be adding in Then you’re adding 9 cups veggies, for a total of 33 cups. If everyone took 1/2 cup, this would technically serve only 66 people. In reality the average person will take 1 large serving spoon full, which is between 1/3 and 1/2 cup and not everyone takes some – so you end up with plenty for 75.
NOTE 2: It's important to select a roasting pan which holds 15 quarts to allow plenty of room for rice expansion. The 3 inch deep "full size" disposable steam pan enables the rice to cook more evenly.
Make perfect rice every time with this easy and proven recipe to cook rice in the oven.
Bake 23-25 minutes until the rice is tender but not mushy and all the liquid should be absorbed. If it's not done, bake for another 2 to 4 minutes. While rice is cooking prep all ingredients for the fried rice and set aside.
When rice is done turn it out onto a large tray and spread in a even layer to cool.
Add 4-5 cups cooked, cooled rice. Stir and toss, until the rice is pale brown, toasted, and has a lightly chewy texture, about three minutes, adding oil as needed.
I'm so glad you dropped by. I'm Betsy. Here you'll find my favorite fabulous, trusted recipes - everything from delicious, quick meals for your family to wonderful classics made easy.
I'm also here to help you with large group recipes from 20 to 200. So next opportunity you get to cook for a large group - Say 'Yes!' Then relax. I've got your back.
Ever wished you could build your dream home? How about building your dream home in a tropical paradise? Join me, room by room, as we design and build a fabulous dream home in Hawaii!
If you're planning a vacation to Hawaii, I've got you covered on the very best places to go! From many amazing restaurants to incredible adventures in the surf and on land, this is your go-to source for unique and exciting things to do on the Big Island of Hawaii. Or just take a Virtual Vacation!! Let's go!
If you've been asked to cook for a large group activity, be it a Girl's Camp or a Graduation Party, say Yes! I'm here to help. From Menus to Game Plans to Recipes, I'll help you keep on schedule and turn out amazingly delicious food if you're cooking for a crowd! My recipes are tested and trusted. Let's cook!
Ever wished you could build your dream home? Like amazing house design and home building ideas? Me too! Join me as I design and build a home on the Big Island of Hawaii. Follow along while I design each room. Enjoy a front row seat for the entire amazing construction process. Let's play!
Would you like to throw a Luau, but not sure where to start? Want to know how to build a tiki bar and roast a pig? Here's everything you need to have a luau. How about a Christmas Feast or even a fabulous dinner for your neighborhood supper club? You've come to the right place. Let's party!
Are you ready for flaming torches, tropical drinks, amazing roast pig, Huli Huli chicken and all things tiki?? The sound of the Hawaii War Chant is in the air and the leis are lined up. It is SO on. In just under 5 weeks… WE ARE HAVING A LUAU!

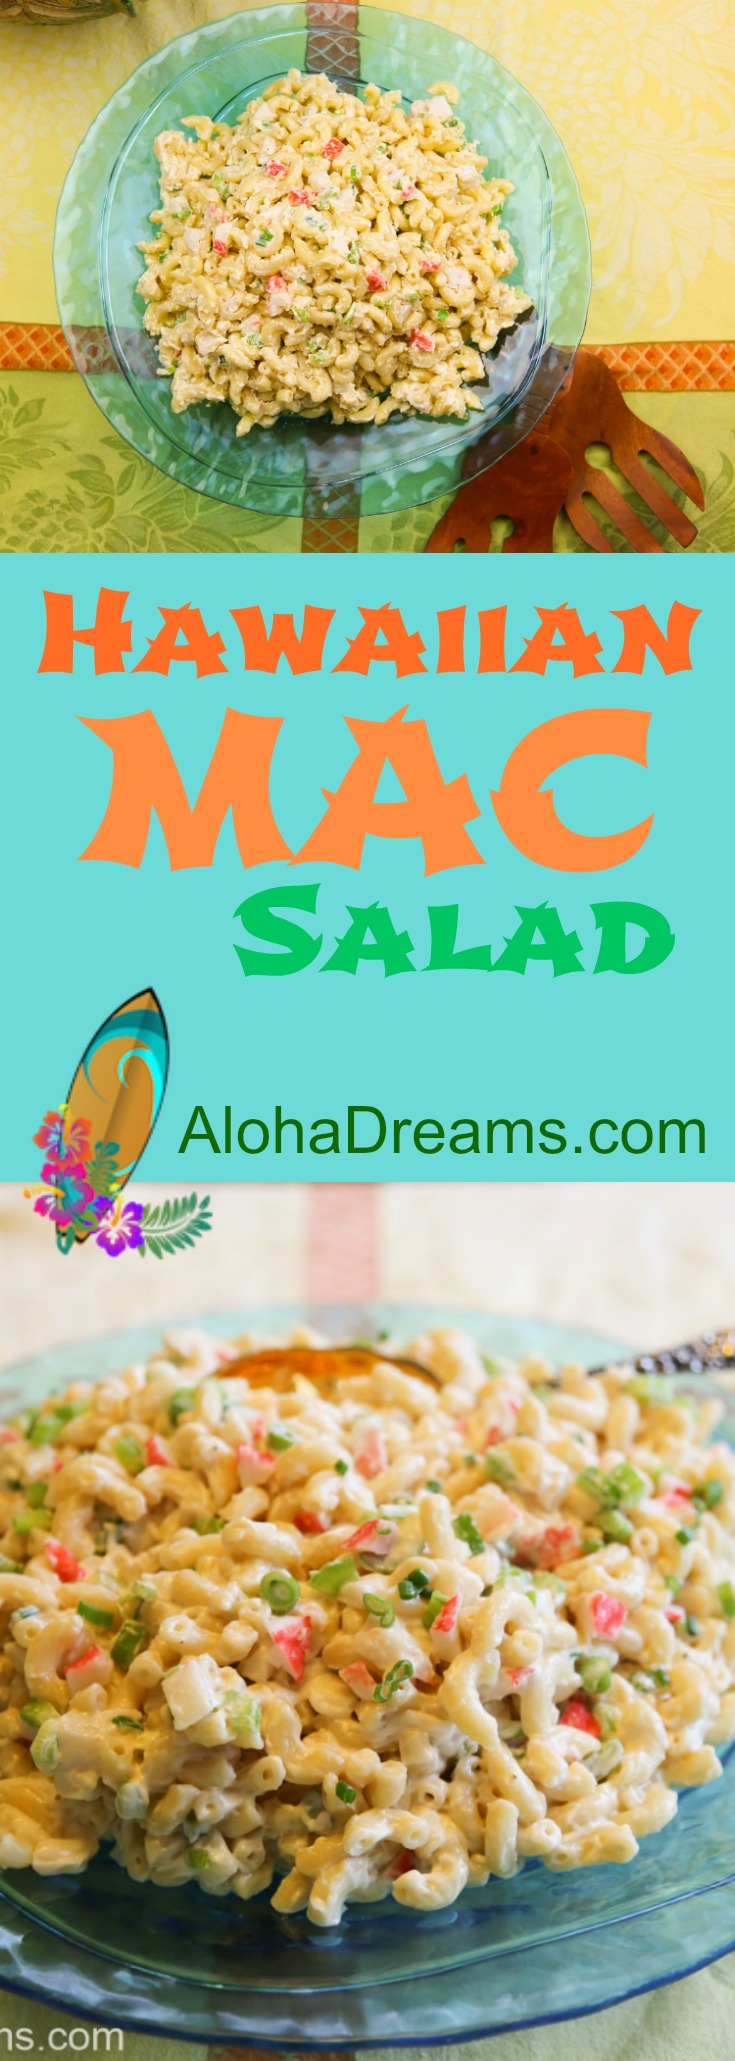
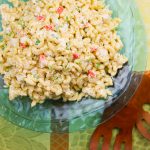
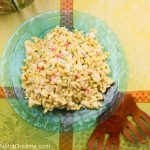
Join me over the next month as I post some fabulous Luau Recipes – everything from Beach Baby Pudding Cups to Huli Huli chicken – perfect summer recipes for your next barbecue, cookout or family reunion. We’ll be starting with one of my personal favorites – Auntie Ahulani’s Amazingly Good Mac Salad.
I received this recipe, along with many others, from Auntie Ahulani, a wonderful Hawaiian lady. At 76 she is still going strong and, if you’re looking for her, is likely found in her tiny retro kitchen fussing over a bubbling pot of beautiful sun-orange lilikoi jelly. Small but feisty and very kind, Auntie Ahulani was quick to offer to share some of her most amazing recipes with me as long as I would pass them on. I’ll be sharing them with you in the coming months. I hope you enjoy them as much as I do. Here is Aunti Ahulani’s Amazing Good Mac Salad recipe.

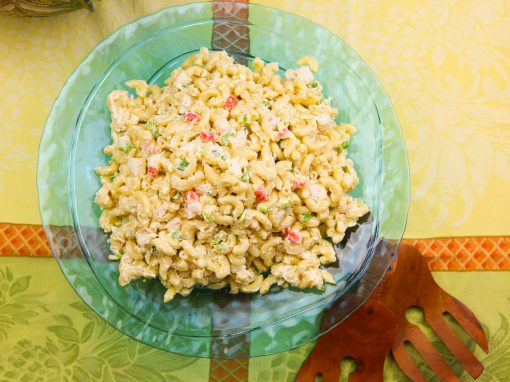
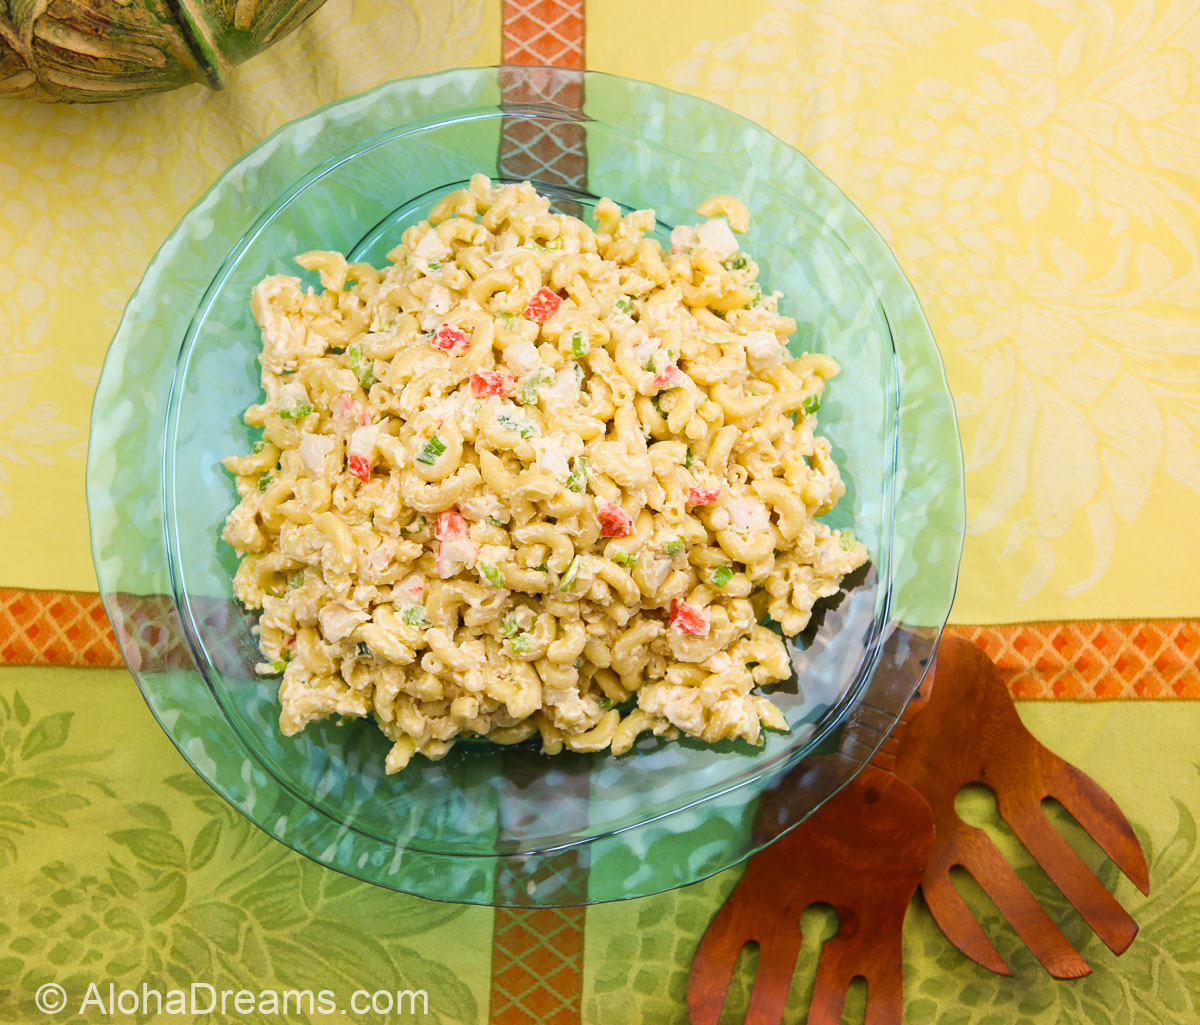
Authentic Hawaiian Mac Salad is ridiculously simple. In fact, a true Hawaiian macaroni salad is basically just macaroni, carrot, mayonnaise, salt and pepper. If you’re feeling frisky you can add celery, extra onion, potatoes, crab, or peas. But don’t even think of mixing in ham or pineapple – it’s just not authentic. This version omits the carrot.
Besides being true to the add-in options, there are 2 main things that make Hawaiian Macaroni Salad authentic: lots of mayonnaise (which is partly why it’s so wonderful) and soft plump macaroni. Actually the two go hand in hand. Hawaiians cook their macaroni until it’s very soft. There’s a reason for this. It enables the macaroni to soak up more of the wonderful dressing. In Hawaii it’s all about the mayonnaise.
And you don’t want to use just any brand of mayonnaise. It has to be Hellman’s (sold as Best Foods to our friends west of the Rockies). That’s it. Trust me, it just won’t taste right with any other brand. And don’t hold back on the mayonnaise amount. I know it sounds like a lot, but the creamy delicious results will speak for themselves.
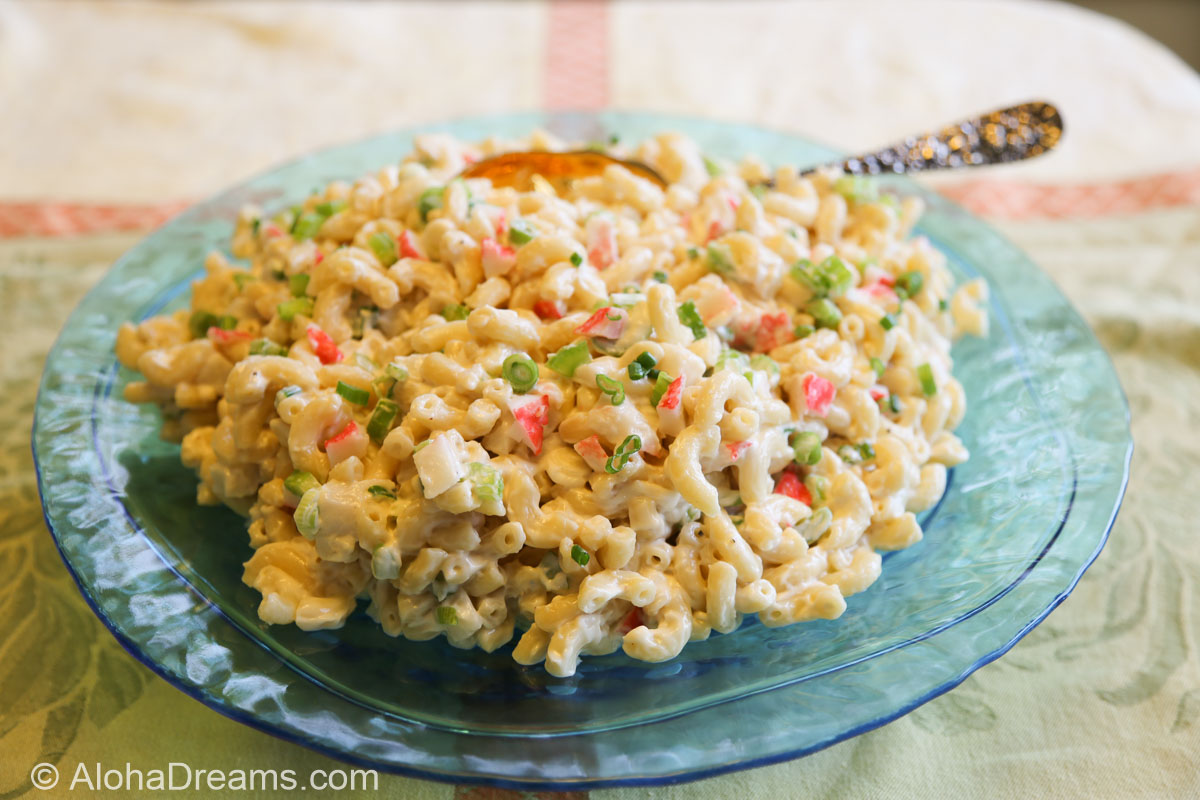
Have you ever had a Hawaiian-style plate lunch? Macaroni salad is a staple of the Hawaii-style plate lunch.
A plate lunch is great meal and consists of a scoop of mayonnaise-rich mac salad along with a couple mounds of white rice to mix into some huli huli chicken or teriyaki chicken with a sweet-and-tangy shoyu, sugar, garlic, ginger marinade. This mac salad is right at home in the mix.
In a very large pot bring 4 quarts water to boil in large pot. Add 1 tablespoon salt and pasta. Cook until soft, about 13 - 15 minutes (you don't want al dente pasta for this). Drain pasta and set aside.
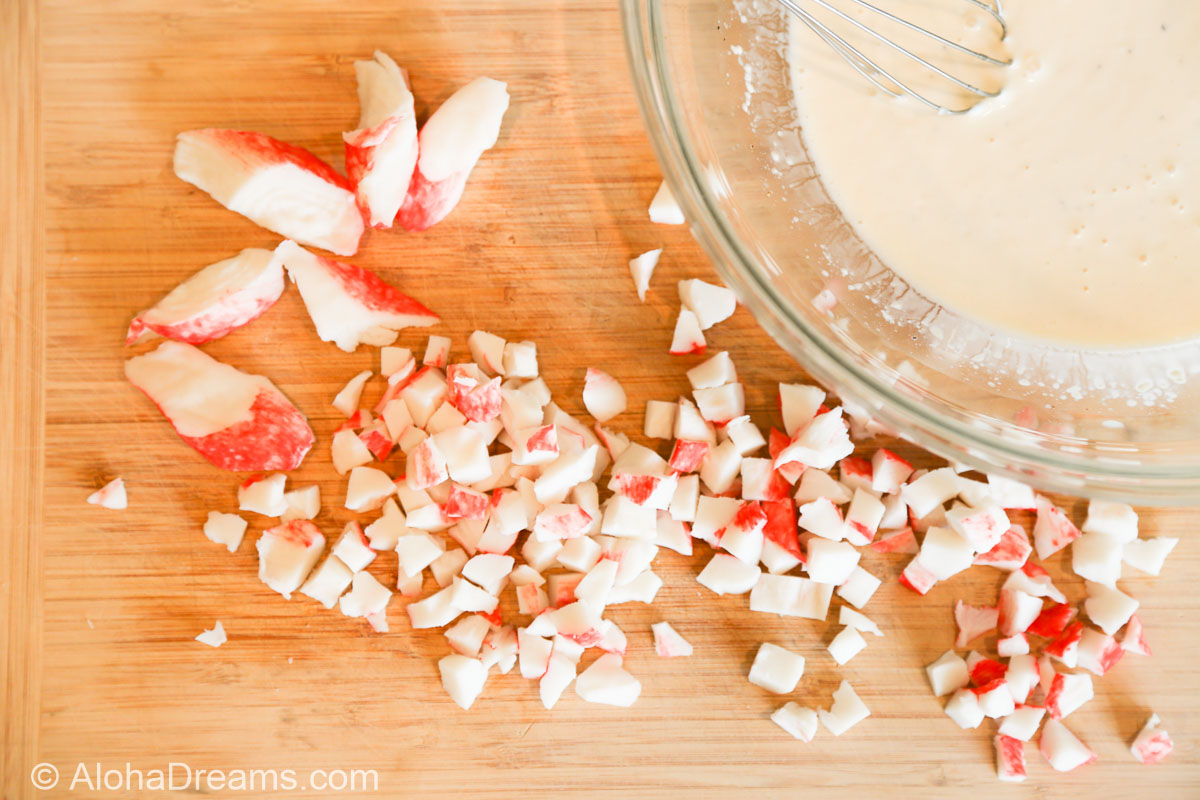
Meanwhile in a large bowl combine onions, crab, peas, celery, eggs, salt and pepper. Mix in the mayonnaise.
A classic authentic Hawaiian Macaroni Salad. Note: After multiple testing and considerable feedback, this recipe will reliably feed 30 as part of a buffet or multi-course dinner. Makes 110 ounces or 30 3.6 ounce servings. An AlohaDreams.com recipe.
In a very large pot bring 4 quarts water to boil in large pot. Add 1 tablespoon salt and pasta. Cook until soft, about 13 - 15 minutes (you don't want al dente pasta for this). Drain pasta and return to pot.
Meanwhile in a large bowl combine onions, crab, peas, celery, eggs, salt and pepper. Mix in the mayonnaise.
Can, and should, be made at least 4 hours in advance and preferably up to 1 day for the flavors to marry. Cover and refrigerate. Serve sprinkled with the chopped green onion.
The page you requested could not be found. Try refining your search, or use the navigation above to locate the post.
I'm so glad you dropped by. I'm Betsy. Here you'll find my favorite fabulous, trusted recipes - everything from delicious, quick meals for your family to wonderful classics made easy.
I'm also here to help you with large group recipes from 20 to 200. So next opportunity you get to cook for a large group - Say 'Yes!' Then relax. I've got your back.
Ever wished you could build your dream home? How about building your dream home in a tropical paradise? Join me, room by room, as we design and build a fabulous dream home in Hawaii!
If you're planning a vacation to Hawaii, I've got you covered on the very best places to go! From many amazing restaurants to incredible adventures in the surf and on land, this is your go-to source for unique and exciting things to do on the Big Island of Hawaii. Or just take a Virtual Vacation!! Let's go!
If you've been asked to cook for a large group activity, be it a Girl's Camp or a Graduation Party, say Yes! I'm here to help. From Menus to Game Plans to Recipes, I'll help you keep on schedule and turn out amazingly delicious food if you're cooking for a crowd! My recipes are tested and trusted. Let's cook!
Ever wished you could build your dream home? Like amazing house design and home building ideas? Me too! Join me as I design and build a home on the Big Island of Hawaii. Follow along while I design each room. Enjoy a front row seat for the entire amazing construction process. Let's play!
Would you like to throw a Luau, but not sure where to start? Want to know how to build a tiki bar and roast a pig? Here's everything you need to have a luau. How about a Christmas Feast or even a fabulous dinner for your neighborhood supper club? You've come to the right place. Let's party!
 Aloha Dreams
Now that I’m almost done with the recipes for our church Youth Conference, you’d think I be finished with the desserts….
Never!! (Even if I wanted to, Jeff wouldn’t let me.)
Nope. Now I’ve been working on the Camping Recipes for a Young Men’s Super Activity at the local lake. What do you feed 45 young men and their leaders who have spent a hot day water skiing, skeet shooting and mountain biking? Plenty of ice-cold, yummy desserts, that’s what. And of course chocolate has to be in the mix somewhere……
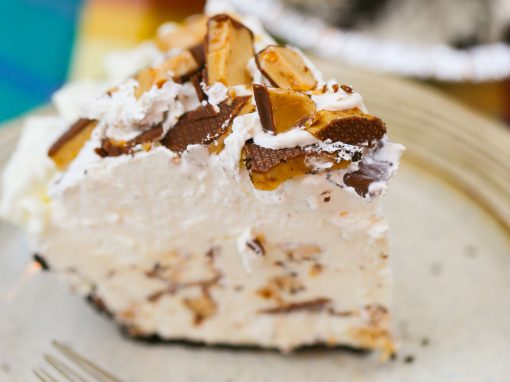
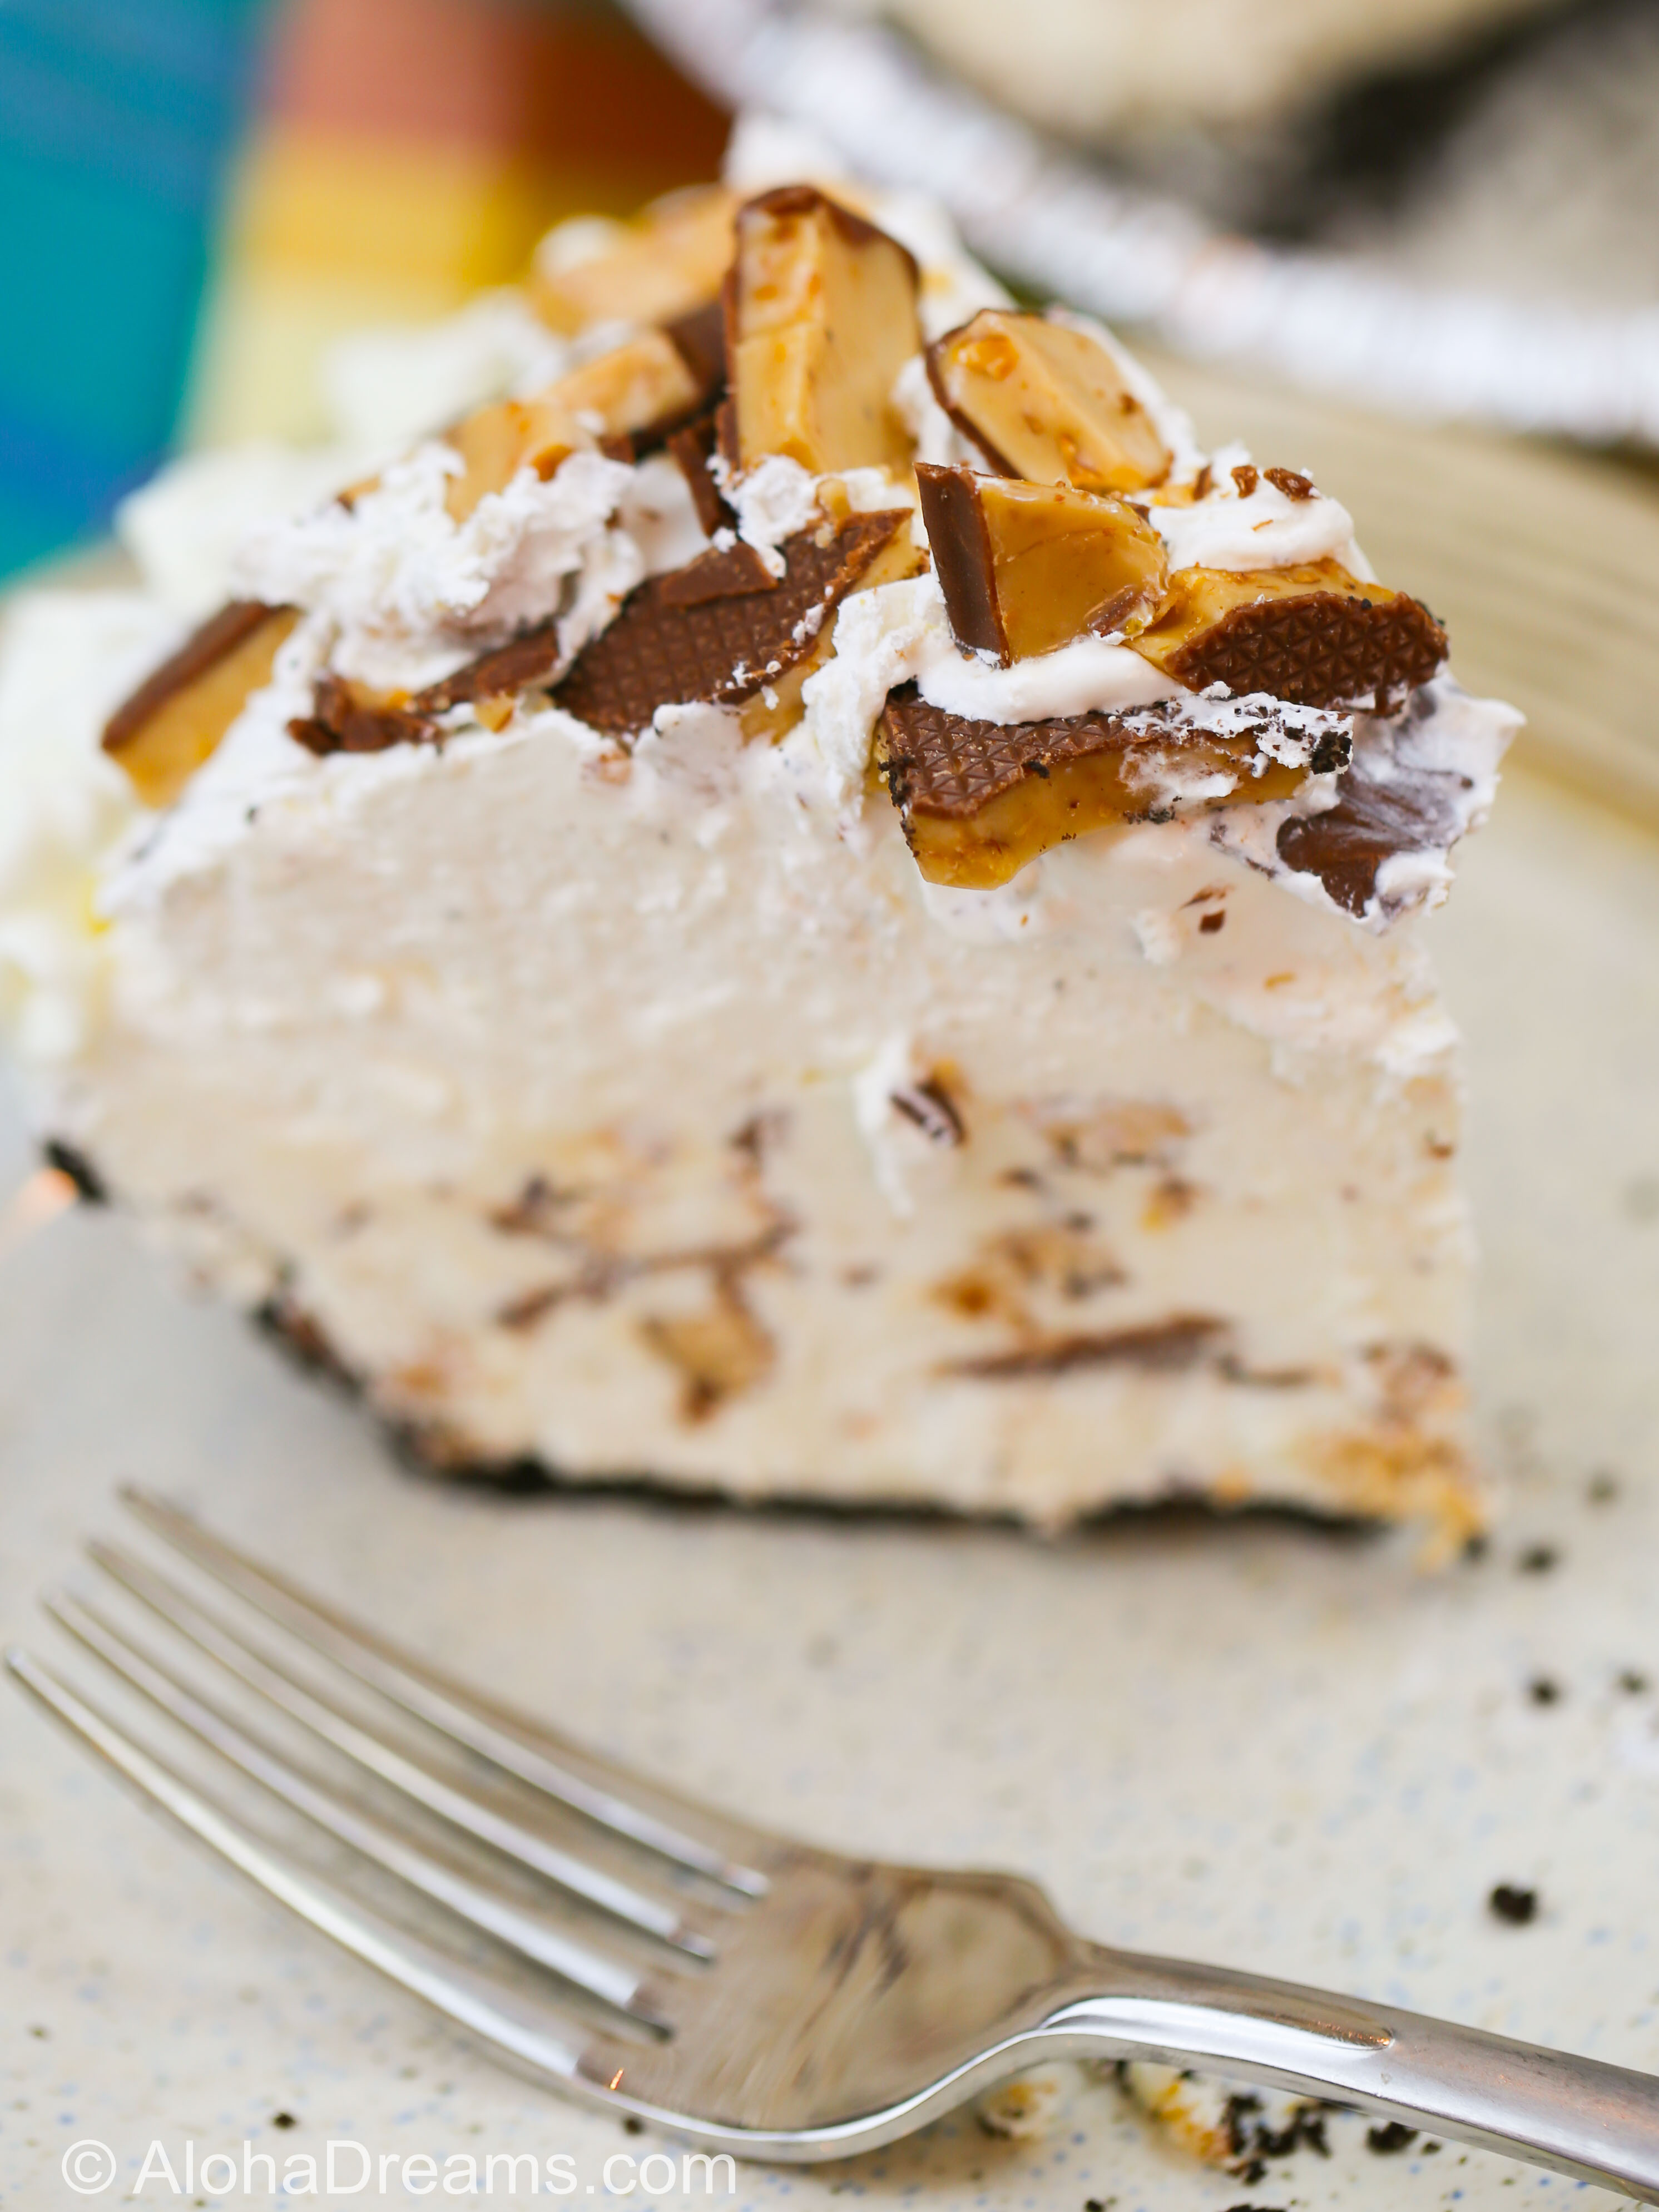
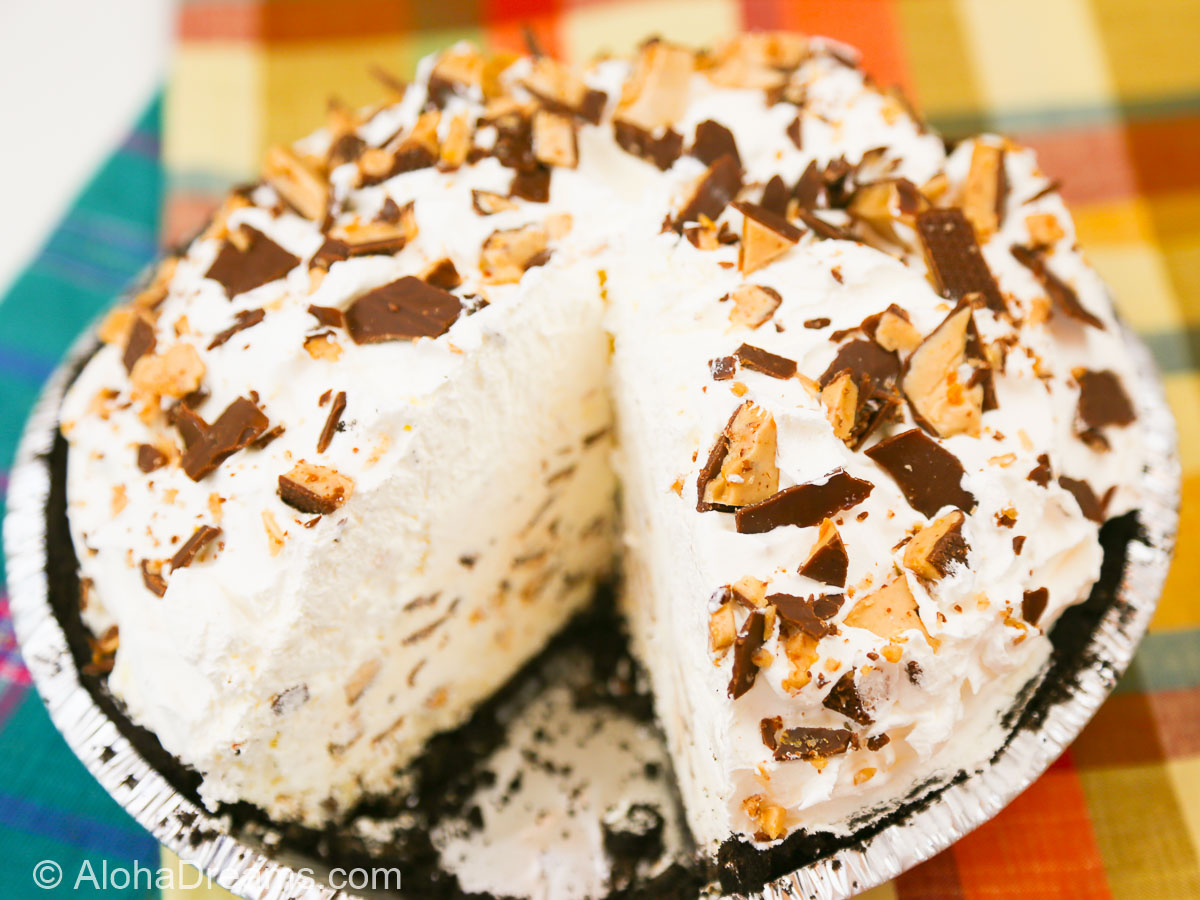
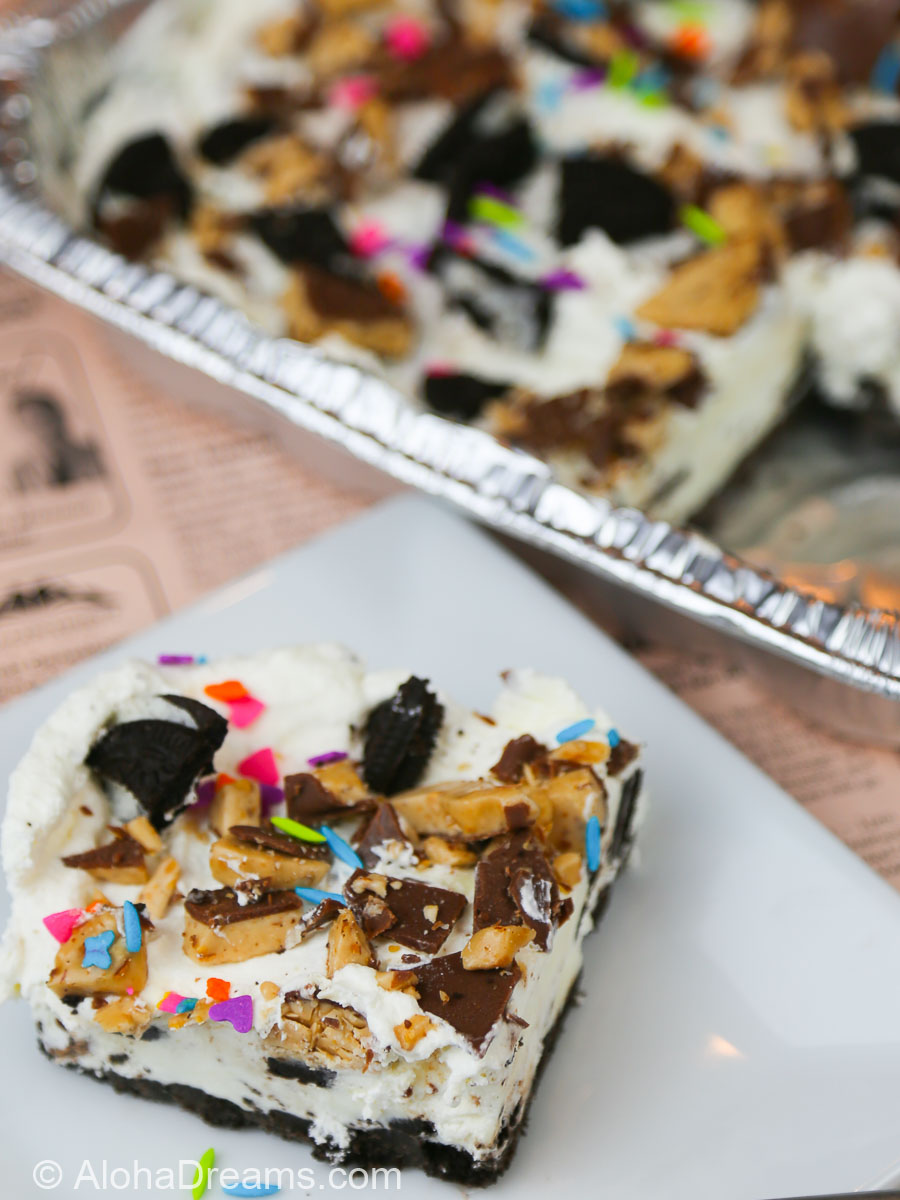
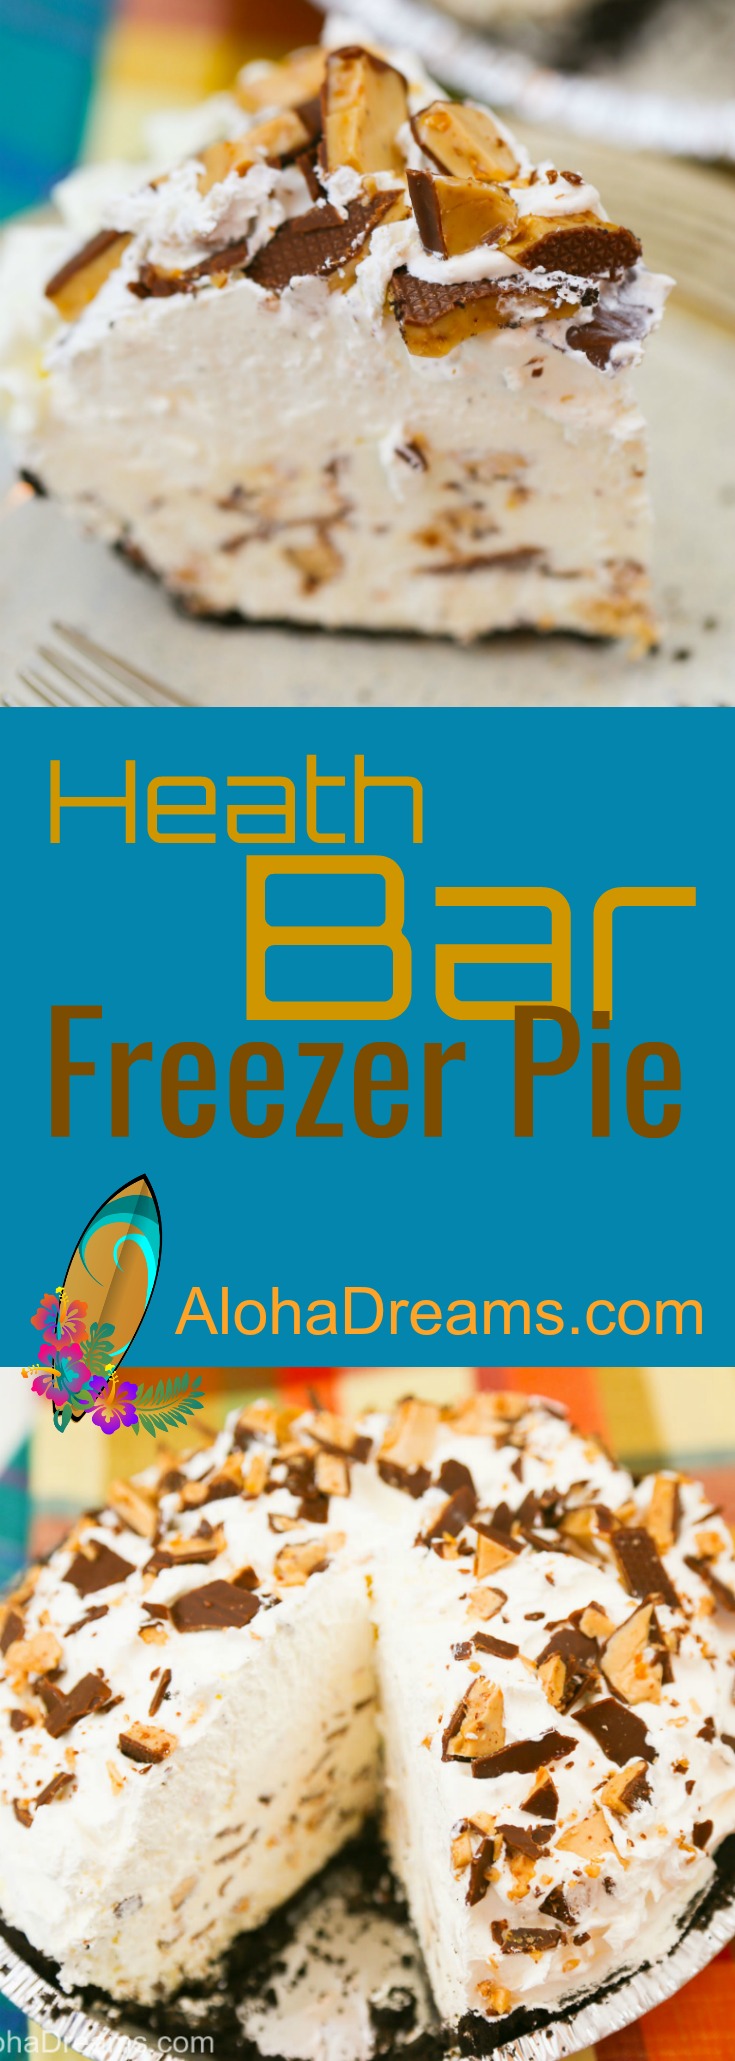
So let’s start with this Heath Bar Freezer Pie.
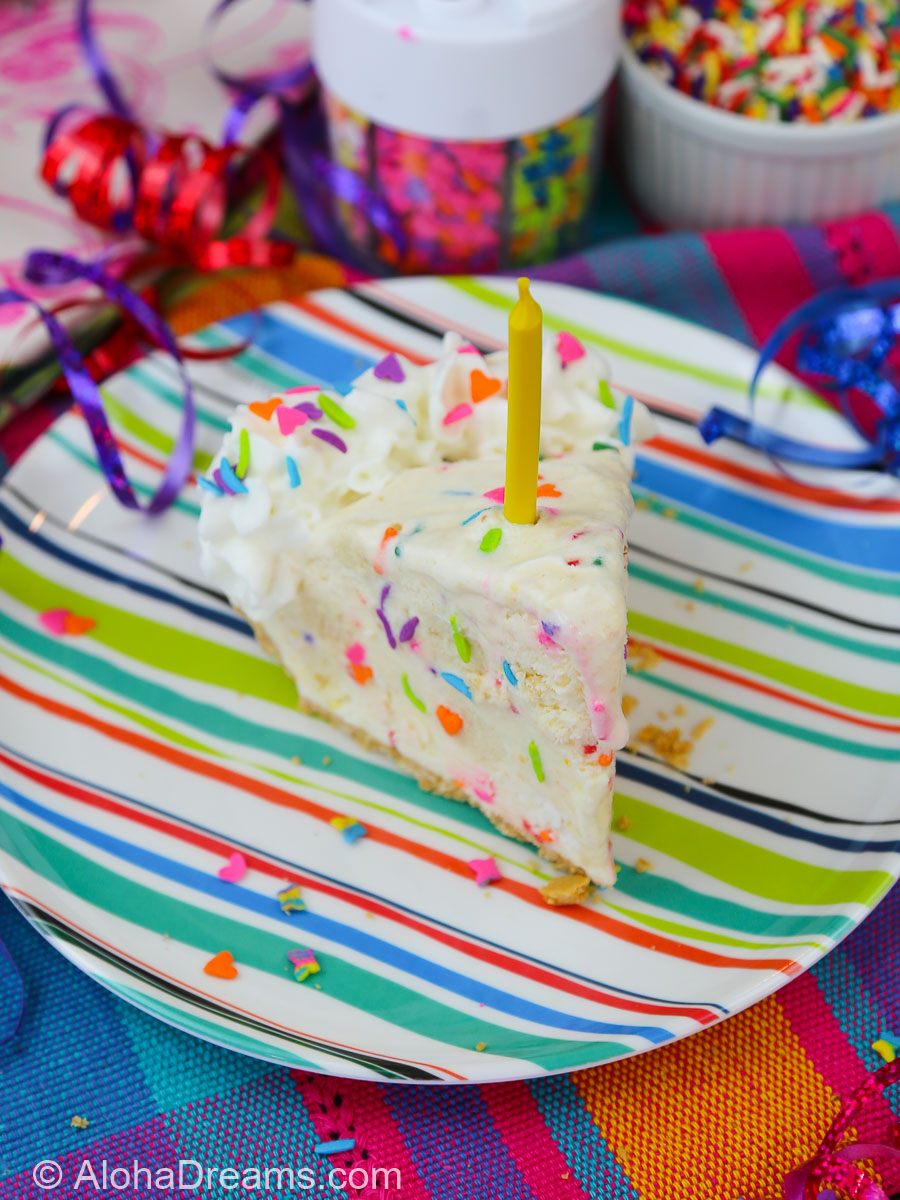
It’s one of 3 freezer pies I made for the camp out. Here are the other 2 pies I made: Birthday Cake Freezer Pie (creamy vanilla ice cream loaded with chunks of birthday cake, frosting and sprinkles) and a real favorite – Oh Yeah Momma Freezer Pie. I’ll be adding the recipes shortly. In the meantime, check out my Camping Recipes page. I’ll be adding those recipes soon as well.
I'm so glad you dropped by. I'm Betsy. Here you'll find my favorite fabulous, trusted recipes - everything from delicious, quick meals for your family to wonderful classics made easy.
I'm also here to help you with large group recipes from 20 to 200. So next opportunity you get to cook for a large group - Say 'Yes!' Then relax. I've got your back.
Ever wished you could build your dream home? How about building your dream home in a tropical paradise? Join me, room by room, as we design and build a fabulous dream home in Hawaii!
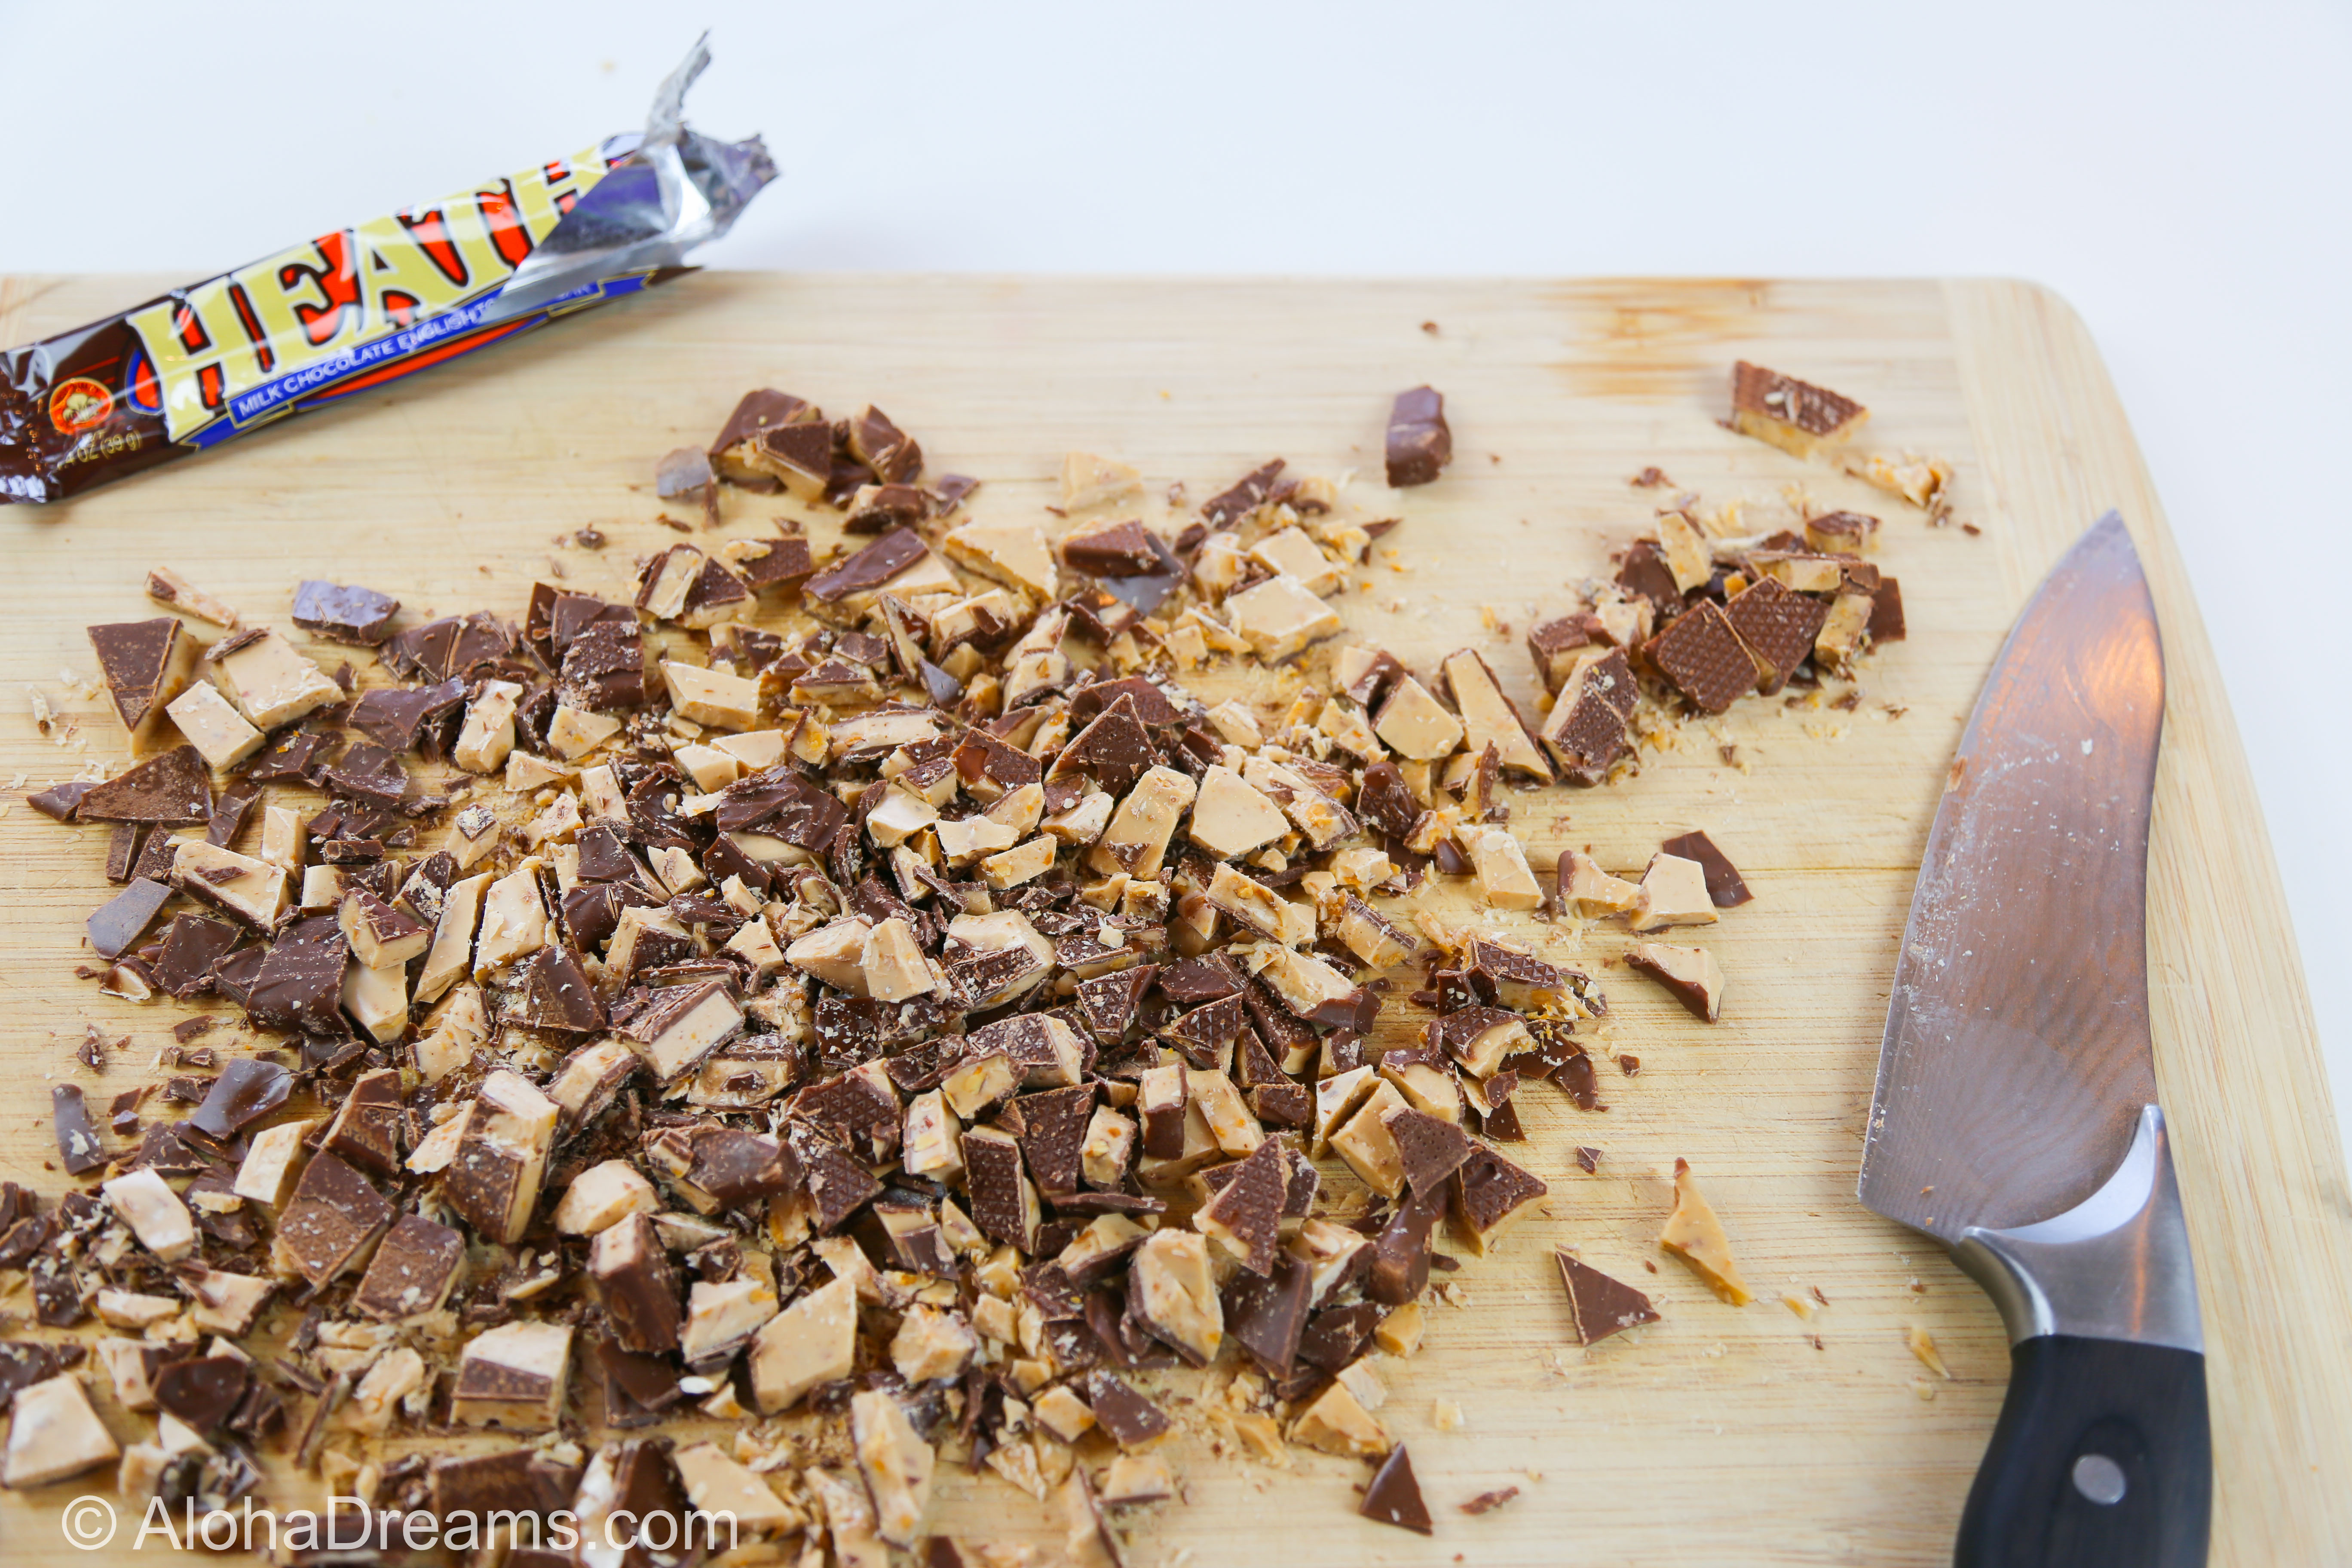
The process is so simple, I almost hate to call it a recipe. Just chop up the heath bars, like so.
Mix them with the softened ice cream. Mound it in the pre-made Oreo cookie pie shell. Cover with the topping mixture, sprinkle on more Heath Bars and freeze. It’s really easy!
By the way – in case you’re wondering what happens if you turn your pie crust upside down to brush several crumbs from the bottom onto your plate for an especially realistic “artistic composition”, THIS happens.
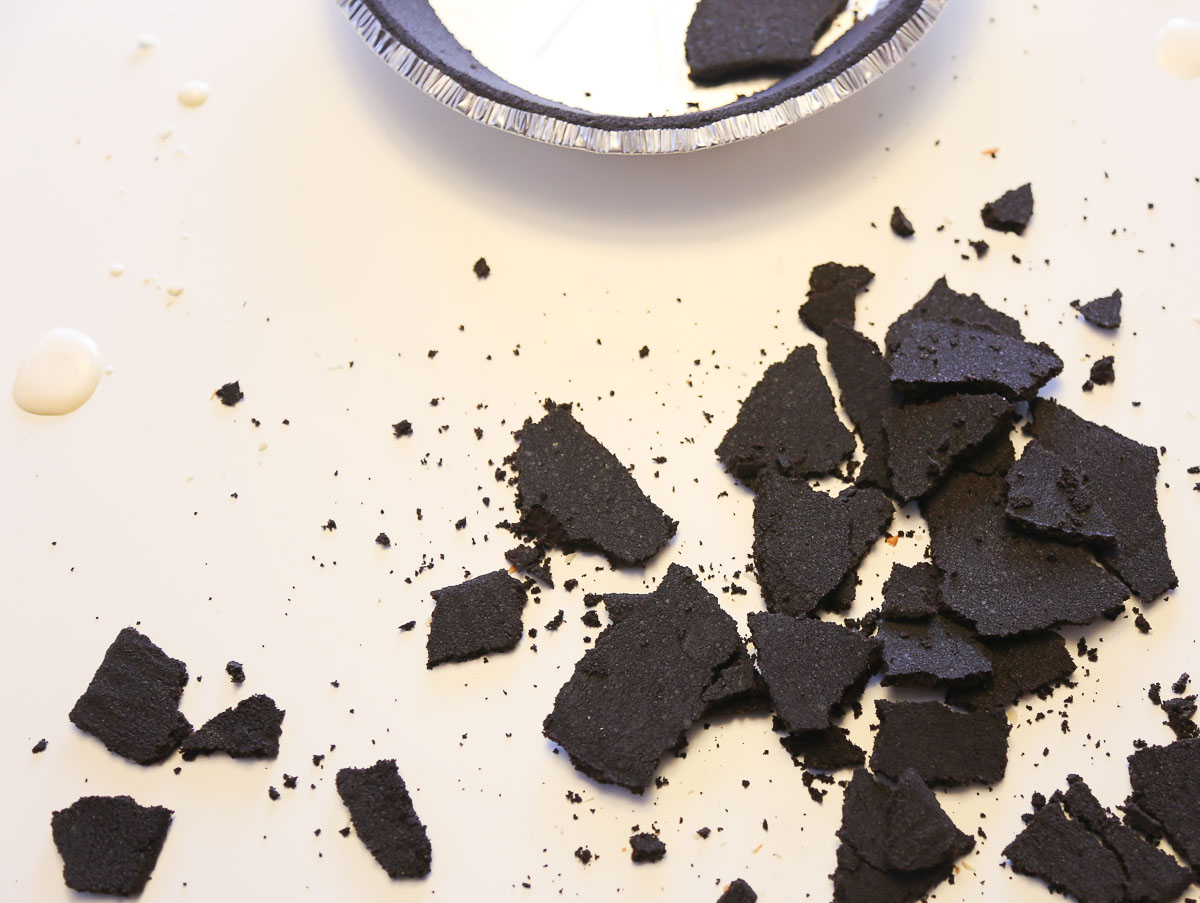
Just sayin’…..

One of the tricks to making pies look amazingly decadant is a high dome. Spreading 12 ounces of whipped topping on this freezer pie accomplished that! You will look marvelous darling.
Several hours prior to preparing: Place whipped topping in refrigerator to thaw. Set out the cream cheese to soften. Place the Heath Bars in the freezer.
When ready to begin preparation, set out the ice cream to soften.
Chop 6 of the frozen Heath candy bars into bite-sized chunks. (You'll be holding back the other 2 of the 8 bars for the topping.)
Once the ice cream is soft enough to stir with some effort, mix in the frozen Heath Bar chunks.
Gently add the ice cream mixture to the pie crust, being careful not to tear the bottom or sides of the crust. Mound the ice cream mixture in the crust and cover with plastic. Place in freezer for at least 2 hours.
Meanwhile, In a large bowl combine the cream cheese and powdered sugar. Whisk together until well combined.
Fold in 1 tub (12 ounces) of the thawed whipped topping.
Stir until combined. Remove the pie from the freezer and spoon the cream cheese mixture over the ice cream. Use an offset spatula or butter knife to gently and evenly spread the filling.
Rough chop the 2 remaining Heath bars into bite size pieces. Sprinkle onto the pie.
Can be made to this point and frozen, gently wrapped with plastic wrap for up to 1 month. To transport the pie to the campout, place in a cooler sitting on a bag of ice with several pounds dry ice in a bag to the side to maintain the temperature.
When ready to serve, cut into pieces. Optional - drizzle with chocolate syrup.
I'm so glad you dropped by. I'm Betsy. Here you'll find my favorite fabulous, trusted recipes - everything from delicious, quick meals for your family to wonderful classics made easy.
I'm also here to help you with large group recipes from 20 to 200. So next opportunity you get to cook for a large group - Say 'Yes!' Then relax. I've got your back.
Ever wished you could build your dream home? How about building your dream home in a tropical paradise? Join me, room by room, as we design and build a fabulous dream home in Hawaii!
If you're planning a vacation to Hawaii, I've got you covered on the very best places to go! From many amazing restaurants to incredible adventures in the surf and on land, this is your go-to source for unique and exciting things to do on the Big Island of Hawaii. Or just take a Virtual Vacation!! Let's go!
If you've been asked to cook for a large group activity, be it a Girl's Camp or a Graduation Party, say Yes! I'm here to help. From Menus to Game Plans to Recipes, I'll help you keep on schedule and turn out amazingly delicious food if you're cooking for a crowd! My recipes are tested and trusted. Let's cook!
Ever wished you could build your dream home? Like amazing house design and home building ideas? Me too! Join me as I design and build a home on the Big Island of Hawaii. Follow along while I design each room. Enjoy a front row seat for the entire amazing construction process. Let's play!
Would you like to throw a Luau, but not sure where to start? Want to know how to build a tiki bar and roast a pig? Here's everything you need to have a luau. How about a Christmas Feast or even a fabulous dinner for your neighborhood supper club? You've come to the right place. Let's party!
Never miss a single Fabulous Recipe!
Sign UP today and ENJOY free Recipes & Party Ideas in your inbox.
(No spam - I promise!)