Select Page
Maui Road to Hana Banana Bread

Maui Road to Hana Banana Bread

1
2
3
4
5
6

Maui’s Road to Hana Banana Bread

Macadamia Nut Banana Bread

Have you ever been to Maui?

It’s wonderful – but before we go any further, let’s at least get you in a Maui frame of mind with some island music from my favorite Hawaiian group, Hapa

Macadamia Nut Banana Bread


There.  That’s much better.

Aloha Dreams

Welcome to Aloha Dreams!

I'm so glad you dropped by.  I'm Betsy.  Here you'll find my favorite fabulous, trusted recipes - everything from delicious, quick meals for your family to wonderful classics made easy.

I'm also here to help you with large group recipes from 20 to 200.  So next opportunity you get to cook for a large group - Say 'Yes!'  Then relax. I've got your back.

Ever wished you could build your dream home? How about building your dream home in a tropical paradise?  Join me, room by room, as we design and build a fabulous dream home in Hawaii!

Maui’s Road to Hana Banana Bread

Macadamia Nut Banana Bread

Have you ever been to Maui?

It’s wonderful – but before we go any further, let’s at least get you in a Maui frame of mind with some island music from my favorite Hawaiian group, Hapa

Macadamia Nut Banana Bread


There.  That’s much better.

Like the Big Island of Hawaii, Maui has many moods.  From the high-end resort feeling of the south shore…

Macadamia Nut Banana Bread

…to the laid-back rural feel of the beautiful upcountry area…

Macadamia Nut Banana Bread

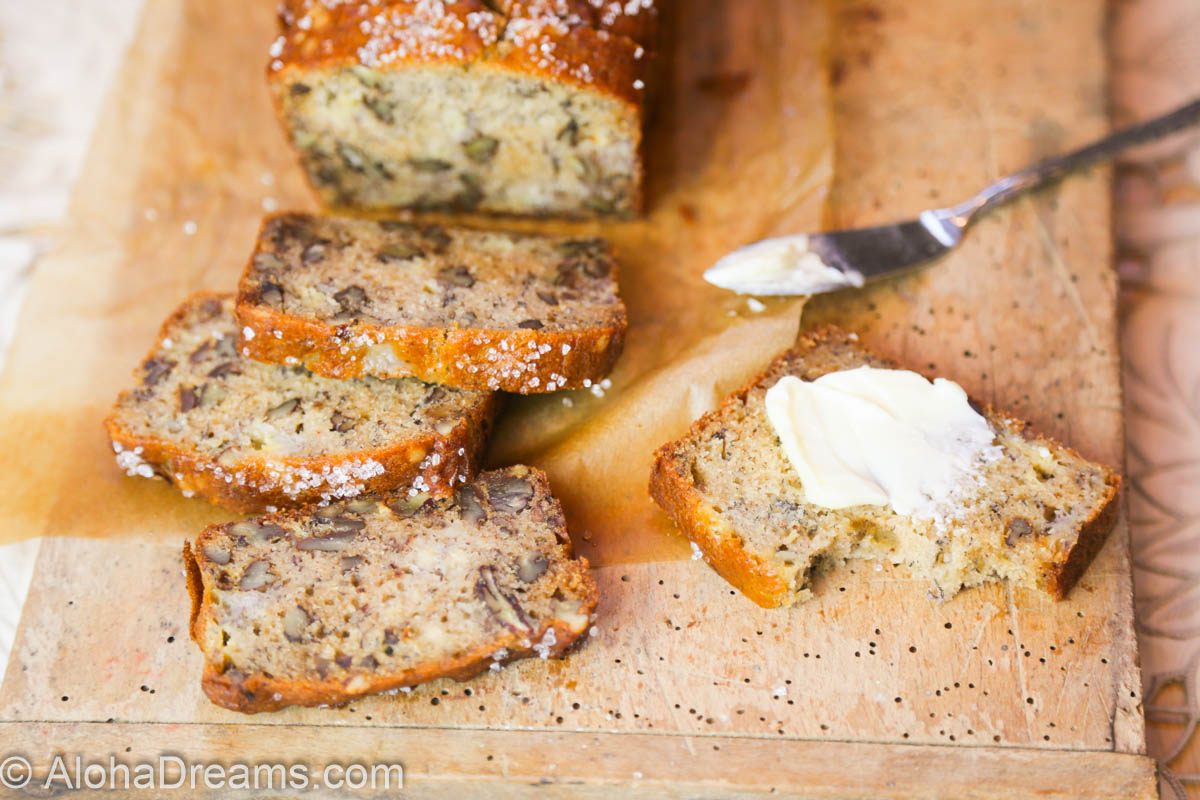
Maui both excites and soothes.   We just got back from a wonderful vacation to Maui.   We snorkeled (no diving this trip), boogie boarded (what a blast!) and enjoyed many fantastic meals (more on those in the future).   And of all the fabulous things we ate on Maui, one of my favorite things was the Road to Hana Banana Bread.

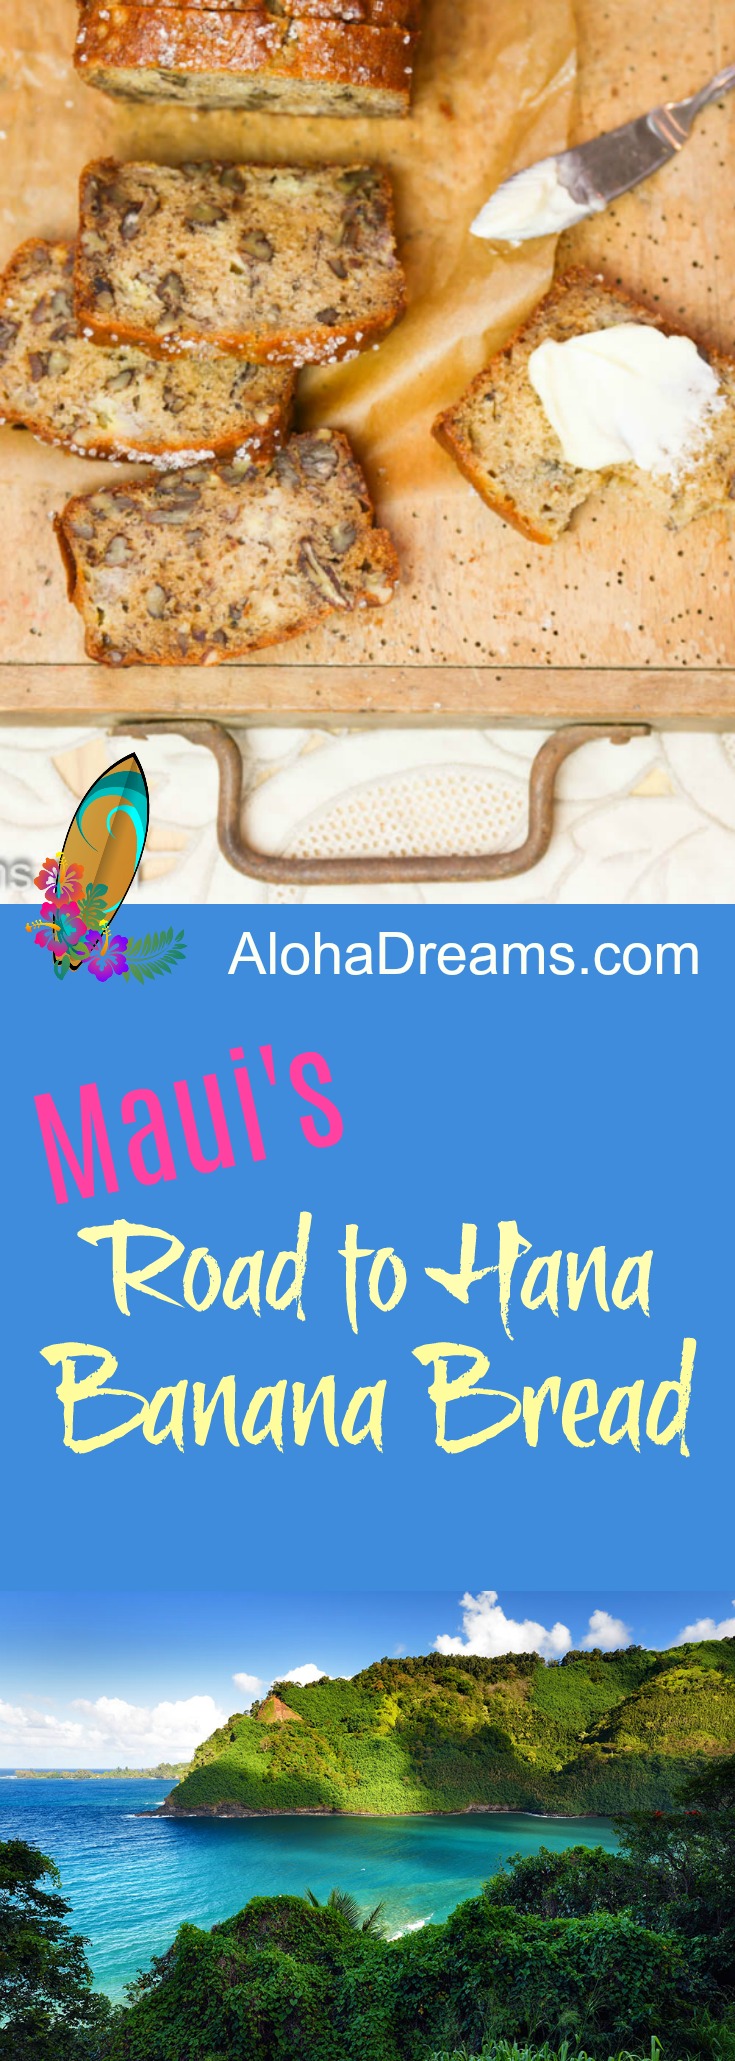
The Road to Hana is 64 miles long, following the shoreline with 620 curves.  Besides being windy, the highway is very narrow and passes over 59 bridges, 46 of which are only one lane wide.  It takes almost 3 hours one-way, and that’s IF you don’t stop anywhere.  Granted, it’s lovely…

… and it winds through some of the most lush tropical rain forest and offers some of the most amazing waterfalls and you’ve ever seen…

… and there are certainly even some gorgeous beaches…

But driving the entire 6 hour round trip sounded like WAY more work than I wanted to sign (Jeff) up for.  

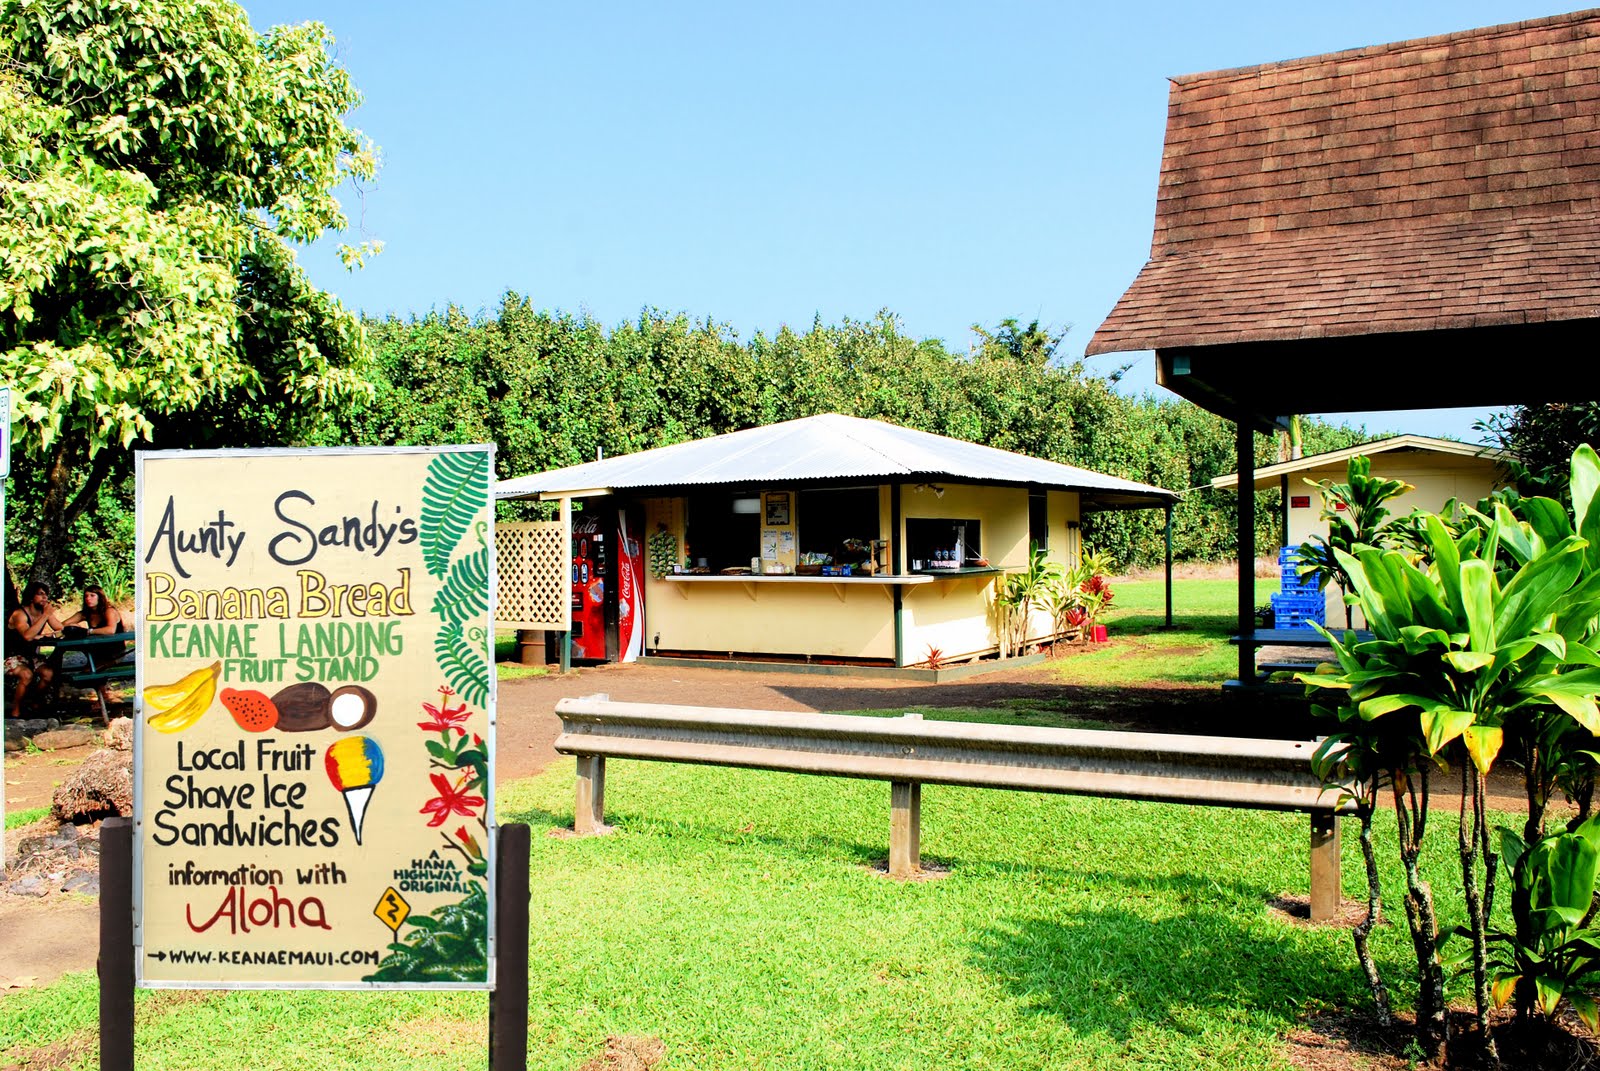
However, there IS one thing not to be missed from the road to Hana (besides not driving it) – the Banana Bread stands.  I suspect these sprung up over the years to keep the captive audience from revolting at the very thought of the drive.  But they are worth the trip alone.

Like this one…

Or this one…

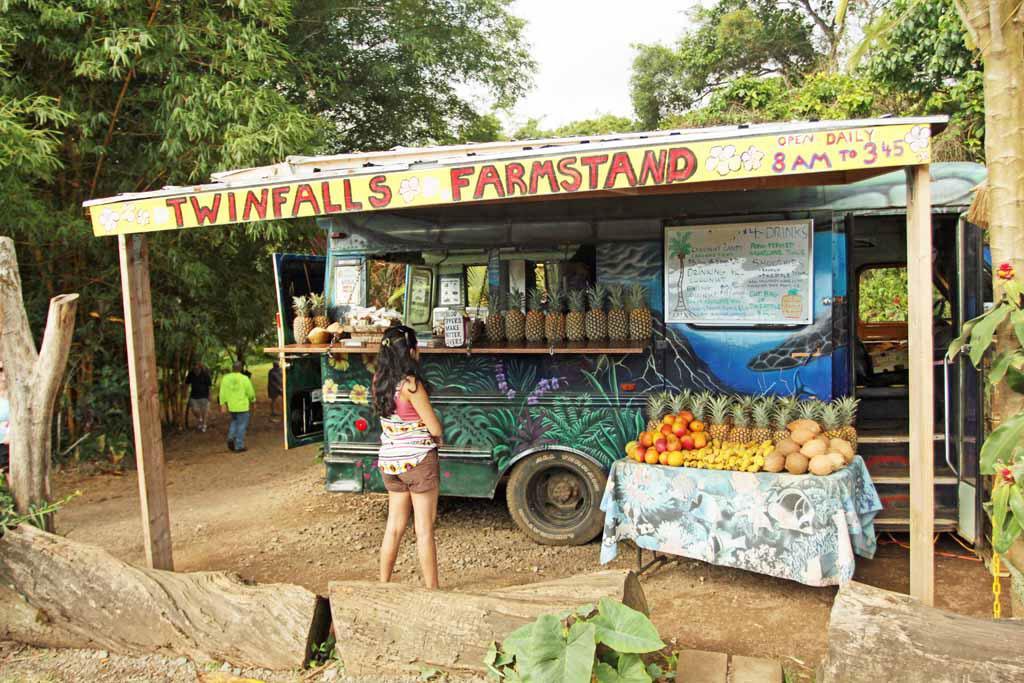
And the most famous of all, Aunty Sandy’s Banana Bread Stand.

The good news is you can get various versions of this wonderful banana bread at Farmer’s Markets throughout the island.  After trying several slices (alright loaves!), I knew I wanted to recreate it. 

Here’s what I learned about how to make the very best banana bread.

I started by modifying my base recipe with some fantastic suggestions from Stella Parks over at one of my favorite food sites, Seriouseats.com.  Stella is a world-class baker and knows a thing or ten about the science of baking.  I was already incorporating buttermilk for moisture in my basic banana bread recipe and on her suggestion, I swapped it for plain Greek yogurt.   Because it’s thicker than buttermilk, yogurt (whether full-fat or skim) thickens the batter, enabling it to peak more in the oven, coming out nicely domed instead of flat.

Macadamia Nut Banana Bread

Next, if at all possible, use a scale to weight the flour.  I always do when baking.  The scale is the best kitchen investment I’ve made.  You want 240 grams of flour.  My second recommendation is to get an instant-read thermometer.  It’s the second-best kitchen investment I’ve made.  Your bread is done at 206 degrees.  No more guess-work!! Yea!!!

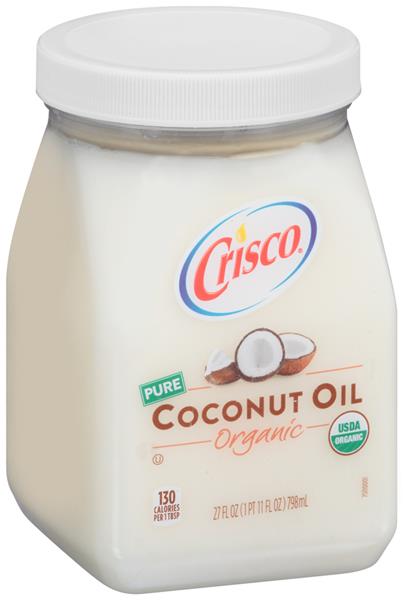
Stella also recommends coconut oil.  According to her, the reason most banana bread recipes call for oil instead of butter, is because oil contains more fat per ounce.  That produces a loaf that’s especially rich and moist.   The problem with oil is that it can sometimes make banana bread feel heavy and wet, or just a touch greasy.   Instead coconut oil makes banana bread as rich and moist as butter, but without the heavy, wet greasiness of oil.  Here’s what you’re looking for.

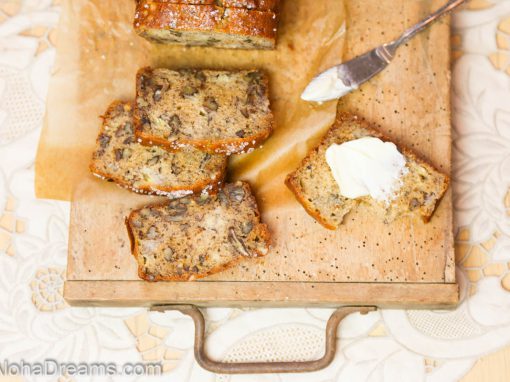
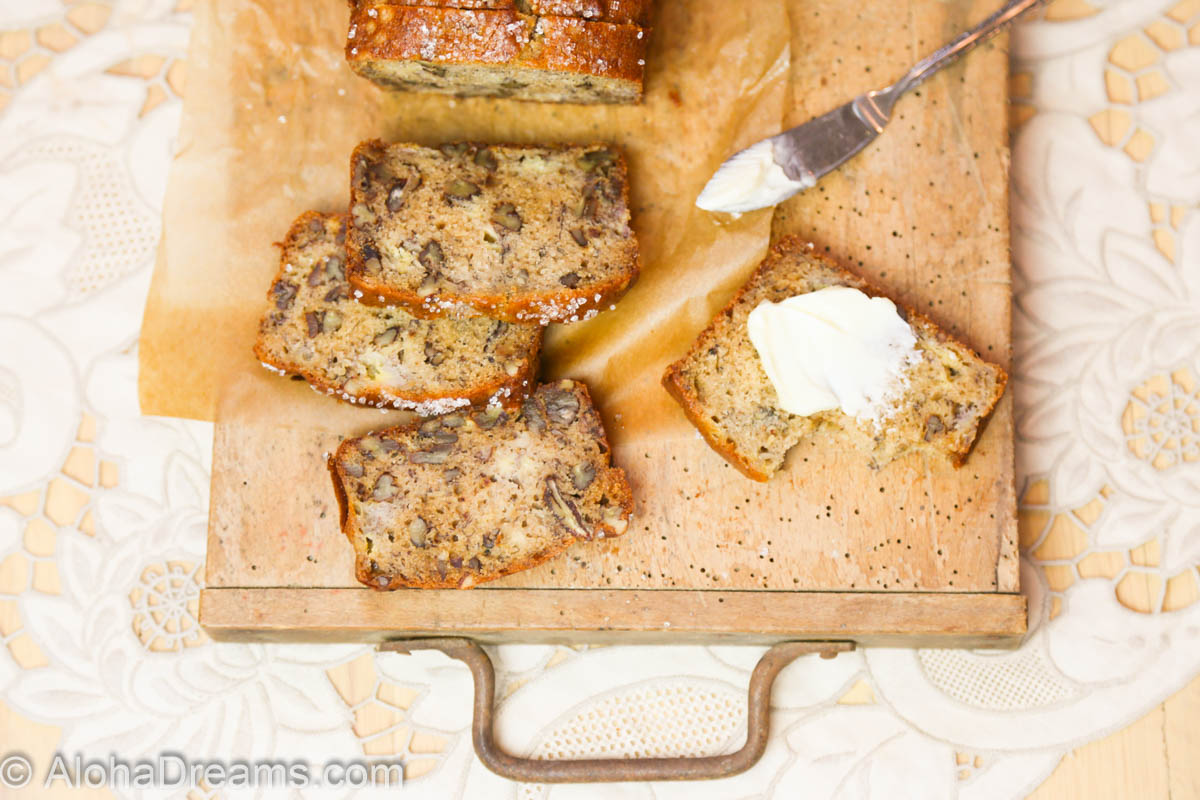
Some other tips I would offer you for banana bread as good as what you can get on the Road to Hana are to use bananas with a sprinkling of brown spots, like the ones below – this avoids a dense, gummy loaf which can be caused by bananas that are completely or even mostly black.

Macadamia Nut Banana Bread

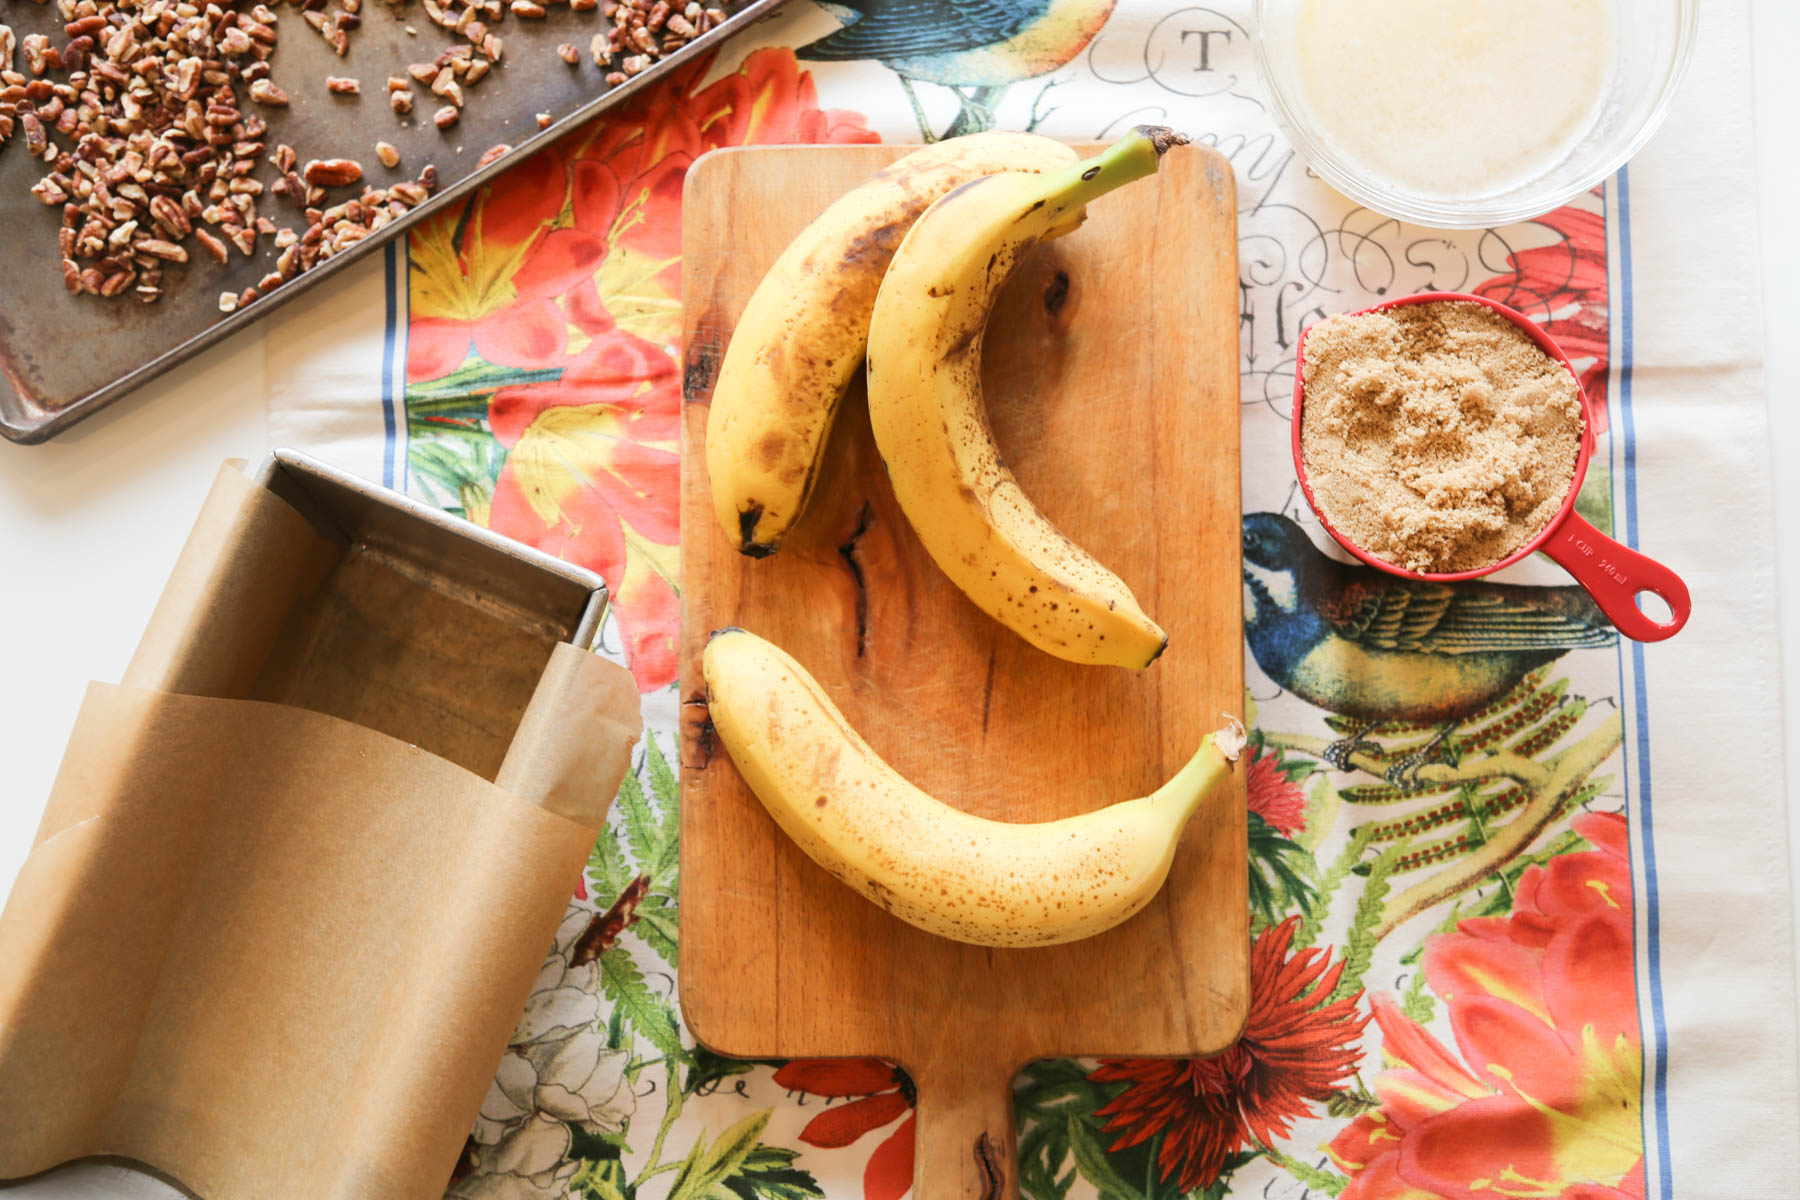
Also, make sure you toast the nuts.  It adds a wonderful depth of flavor to the bread.  I like to use pecan, but macadamia nuts will work great too, for a true island twist.

I used to have a tough time in the past knowing when my bread was done.  There’s a simple cure for that.  Your bread is done when it reaches an internal temperature of around 206°F.   If you don’t already have one, buy yourself an instant read digital thermometer.   No more guessing and you’ll have bread that is spot-on perfect every time.

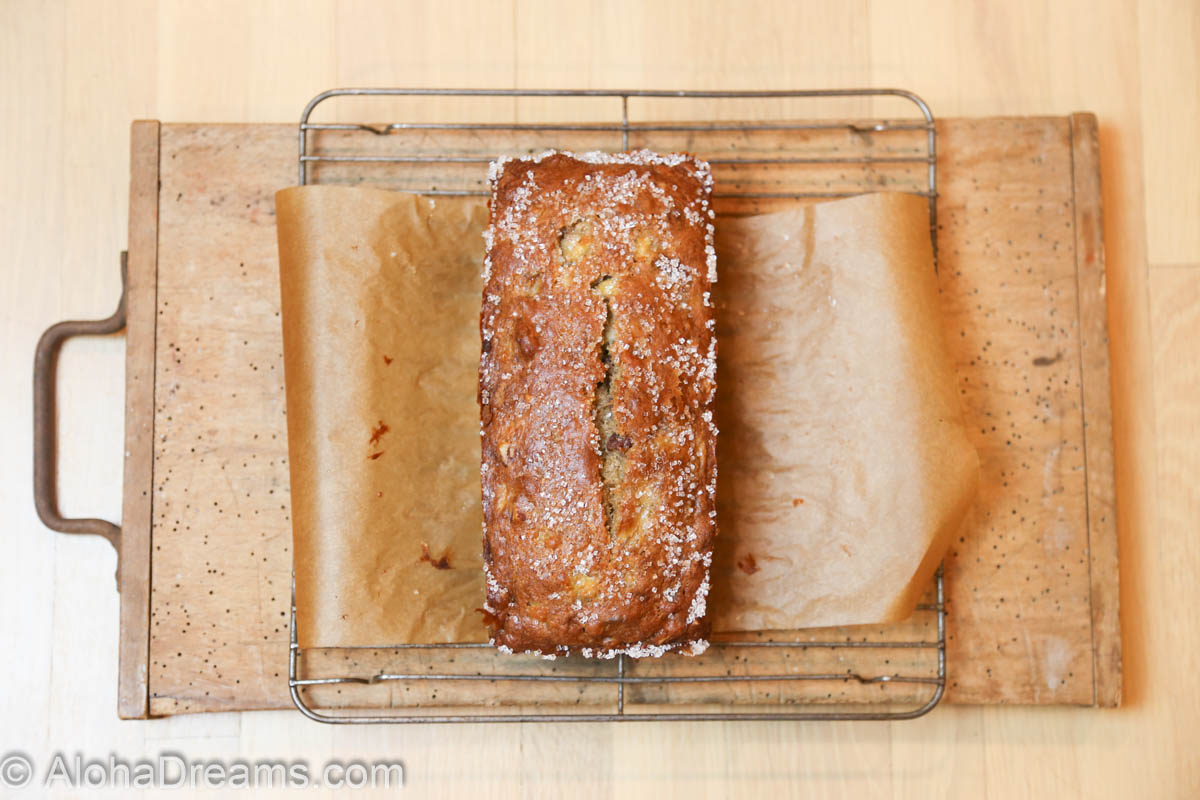
Finally, I like a bit of sugary crunch on the top of my banana bread, so I sprinkle it with a bit of sanding sugar.

I know you’ll enjoy eating this Road to Hana Banana Bread recipe as much as I did.  It’s a great addition to a family breakfast or weekend BBQ.  Enjoy and aloha!

Pin for Later

Or Make Now


4.58 from 21 votes
Maui Road to Hana Banana Bread
Prep Time
15 mins
Cook Time
50 mins
Total Time
1 hr 5 mins
 
Adapted from the wonderful Stella Parks over at Seriouseats.com 

While the coconut oil is not strictly necessary, it makes the banana bread as rich and moist as oil. And because it's solid at room temperature, it provides the slow-melting richness of butter without making the loaf heavy and wet, or greasy. 

An AlohaDreams.com recipe

Course: Side Dish
Cuisine: American
Servings: 17 slices
Author: Betsy Edwards
Ingredients
  • 4 medium bananas , ripe
  • 4 ounces plain Greek yogurt , preferably nonfat
  • 2 large eggs
  • 2 teaspoons water
  • 1 teaspoon vanilla extract
  • 2 cups all-purpose flour (that's 9 ounces or 240 grams)
  • 1 cup sugar
  • 1/4 teaspoon table salt
  • 1 teaspoon baking powder
  • 1 teaspoon baking soda
  • 1/2 teaspoon ground cinnamon
  • 5 1/4 ounces coconut oil - virgin or refined (3/4 cup)(Can substitute 8 tablespoons (1 stick) butter)
  • 4 ounces toasted pecan or macadamia nuts - chopped
Instructions
  1. Adjust oven rack to center position and preheat oven to 350°F.
  2. Line one 10 1/2– by 5 1/2–inch OR two 9- by 5-inch loaf pans loaf pan with enough parchment paper that it drapes over each side several inches.
  3. Peel 4 bananas (you should have about 12 ounces) and in a medium bowl mash bananas with 4 ounces yogurt, 2 eggs, 2 teaspoons water and 1 teaspoon vanilla. NOTE: If bananas are under-ripe, cover bowl with plastic and let mixture stand 30 minutes.

  4. In the bowl of a stand mixer fitted with a paddle attachment, add 240 grams flour, 1 cup sugar, 1/4 teaspoon table salt, 1 teaspoon baking powder, 1 teaspoon baking soda, 1/2 teaspoon cinnamon, and 3/4 cup solid coconut oil. Mix on low until mixture becomes a mealy powder. Add banana mixture and continue mixing only until no more flour is visible. Fold in nuts and scrape into prepared pan(s), spreading into an even layer.

  5. Bake until risen and golden brown - about about 50 minutes for two smaller loaves (or 70 minutes for a large loaf).  Bread is done when it reaches an internal temperature of 206°F.

  6. When done, set the loaf, still in the pan, on a wire cooling rack. Let cool for 10 minutes — this helps the loaf solidify and makes it easier to remove from the pan.

  7. Remove from pan and cool another 10 minutes. Grasping the parchment paper sling, lift the loaf out of the pan and place on the on the cooling rack. Cool for another 10 minutes before slicing.
MAKE AHEAD NOTE:
  1. Wrapped tightly in foil, banana bread will keep up to 3 days at room temperature or 1 week in the fridge. It can also be frozen for up to 3 months.
Recipe Notes

To keep this simple, you can substitute 1 stick of butter (salted or unsalted) for the coconut oil and omit the yogurt entirely if you wish.

Explore Aloha Dreams

Things to do Big Island of Hawaii
Dream Home Bathroom

EXPLORE

If you're planning a vacation to Hawaii, I've got you covered on the very best places to go!   From many amazing restaurants to incredible adventures in the surf and on land, this is your go-to source for unique and exciting things to do on the Big Island of Hawaii.  Or just take a Virtual Vacation!!    Let's go!

SAY YES!

If you've been asked to cook for a large group activity, be it a Girl's Camp or a Graduation Party, say Yes!  I'm here to help.  From Menus to Game Plans to Recipes, I'll help you keep on schedule and turn out amazingly delicious food if you're cooking for a crowd!  My recipes are tested and trusted.    Let's cook! 

AHONUI

Ever wished you could build your dream home?  Like amazing house design and home building ideas?  Me too!  Join me as I design and build a home on the Big Island of Hawaii. Follow along while I design each room. Enjoy a front row seat for the entire amazing construction process.  Let's play!

PARTY

Would you like to throw a Luau, but not sure where to start?   Want to know how to build a tiki bar and roast a pig?  Here's everything you need to have a luau.  How about a Christmas Feast or even a fabulous dinner for your neighborhood supper club?  You've come to the right place.    Let's party!

Aloha Dreams

Welcome to Aloha Dreams!

I'm so glad you dropped by.  I'm Betsy.  Here you'll find my favorite fabulous, trusted recipes - everything from delicious, quick meals for your family to wonderful classics made easy.

I'm also here to help you with large group recipes from 20 to 200.  So next opportunity you get to cook for a large group - Say 'Yes!'  Then relax. I've got your back.

Ever wished you could build your dream home? How about building your dream home in a tropical paradise?  Join me, room by room, as we design and build a fabulous dream home in Hawaii!

Hawaiian Passion Fruit Bars

Hawaiian Passion Fruit Bars

1
2
3
4
5
6

Hawaiian Passion Fruit Bars

passion fruit bars

Raise your hands if you like lemon bars.

Me too!

But some people find them a bit too tart for their dessert tastes.  Welcome to the solution.  Passion Fruit Bars are still a tangy treat – but the sweet kick from the passion fruit juice off-sets the tang wonderfully and it all goes perfectly with the buttery shortbread crust!

In case you’ve never seen one, this is a passion fruit.  (They’re also called Lilikoi (pron. lily-koi).  I’ve always thought that was a pretty word.)

passion fruit bars


You can remove the pulp and seeds and make a WONDERFUL tasting puree.

passion fruit bars

….or you can buy it here if you don’t happen to have any growing in your backyard.

The base is a super-crispy buttery crust that I also used for my Pineapple Cheesecake Bars.  It comes together in a snap and doesn’t require any chilling. It’s sturdy, sets easily, cuts cleanly and makes the perfect filling-to-crust ratio.

passion fruit bars

Pin for Later

passion fruit bars

Or Make Now

Family Size


Passion Fruit Bars - Family Size Version
Prep Time
15 mins
Cook Time
1 hr
Total Time
1 hr 15 mins
 

Cut in 3 rows by 6 rows to serve 18.  

An AlohaDreams.com recipe

Course: Dessert
Servings: 18 servings
Author: Betsy Edwards
Ingredients
For the Shortbread Base:
  • 1 cup all-purpose flour (4.25 ounces or 120 grams) spoon into measuring cup
  • 1/4 cup granulated sugar
  • 1/2 cup unsalted butter (1 stick, melted and slightly cooled)
  • 1/2 teaspoon vanilla extract
  • 1/2 teaspoon salt
For the Filling:
  • 8 large eggs
  • 2 1/3 cups granulated sugar (increase sugar to 2 2/3 cups if using passion fruit concentrate)
  • 1 1/2 cups passion fruit puree
  • 1/2 cup all-purpose flour
Instructions
For the Shortbread Base:
  1. Preheat oven to 350 degrees. Line the bottom and sides of a 9 x 13 baking pan with aluminum foil or parchment paper, leaving enough overhang on all sides to lift later. Set aside.

  2. In a medium bowl stir the melted butter, granulated sugar, vanilla, and salt. Add the flour and stir until everything is combined. Press the mixture evenly into the prepared baking pan.

  3. Bake at 350 degrees about 15 minutes or until edges are lightly browned. While the crust is baking, prepare the passion fruit filling.

For the Filling:
  1. In a large bowl, whisk together the eggs, granulated sugar, and passion fruit puree. Sift the flour into the egg mixture. Whisk until combined.
  2. When the crust is done baking, slide the rack half-way out of the oven. Pour the filling over the hot crust and return it to the oven. Reduce temperature to 325 F and bake for 25-30 minutes. It’s done when the center barely jiggles when the pan is tapped.
  3. Remove the pan from the oven and let cool until it reaches room temperature, then refrigerate to get cold before cutting.
MAKE AHEAD NOTE: Can be stored in an airtight container in the refrigerator for up to 1 week.
  1. When ready to serve, remove the bars from the pan using the parchment or foil to lift. Cut into 3 rows by 6 rows for 18 bars, wiping the knife between cuts. Sprinkle the top with powdered sugar and serving.


Large Group


Passion Fruit Bars
Prep Time
15 mins
Cook Time
45 mins
Total Time
1 hr
 

Cut into 4 rows by 6 rows to make 24 bars.

An AlohaDreams.com recipe

Course: Dessert
Servings: 24 servings
Author: Betsy Edwards
Ingredients
For the Shortbread base
  • 3 cups all-purpose bleached flour (12.75 ounces or 360 gram) Spoon into measuring cup to measure
  • 3/4 cup granulated sugar
  • 1 1/2 cup unsalted butter (2 1/2 sticks, melted)
  • 1 teaspoon vanilla extract
  • 1/2 teaspoon salt
For the Filling:
  • 16 large eggs
  • 4 2/3 cups granulated sugar (increase sugar to 5 cups if using passion fruit concentrate)
  • 3 cups passion fruit puree (24 fl. ounces)
  • 1 cup all-purpose flour
Special Equipment
  • 1 (13 x 18) half sheet baking pan
Instructions
For the Shortbread Base:
  1. Preheat oven to 350 degrees. Line the bottom and sides of 13 x 18 inch baking pan with aluminum foil or parchment paper, leaving enough overhang on all sides to lift later. Set aside.

  2. In a medium bowl stir the melted butter, granulated sugar, vanilla, and salt. Add the flour and stir until everything is combined. Press the mixture evenly into the prepared baking pan.
  3. Bake at 350 degrees about 15 minutes or until edges are lightly browned. While the crust is baking, prepare the passion fruit filling.

For the Filling:
  1. In a large bowl, whisk together the eggs, granulated sugar, and passion fruit puree. Sift the flour into the egg mixture. Whisk until combined.
  2. When the crust is done baking, slide the rack half-way out of the oven. Pour the filling over the hot crust and return it to the oven. Reduce temperature to 325 F and bake for 25-30 minutes. It’s done when the center barely jiggles when the pan is tapped.
  3. Remove the pan from the oven and let cool until it reaches room temperature, then refrigerate to get cold before cutting.
MAKE AHEAD NOTE: Can be stored in an airtight container in the refrigerator for up to 1 week.
  1. When ready to serve, remove the bars from the pan using the parchment or foil to lift. Cut into 4 rows by 6 rows for 24 bars, wiping the knife between cuts. Sprinkle the top with powdered sugar and serving.


Aloha Dreams

Welcome to Aloha Dreams!

I'm so glad you dropped by.  I'm Betsy.  Here you'll find my favorite fabulous, trusted recipes - everything from delicious, quick meals for your family to wonderful classics made easy.

I'm also here to help you with large group recipes from 20 to 200.  So next opportunity you get to cook for a large group - Say 'Yes!'  Then relax. I've got your back.

Ever wished you could build your dream home? How about building your dream home in a tropical paradise?  Join me, room by room, as we design and build a fabulous dream home in Hawaii!

Explore Aloha Dreams

Things to do Big Island of Hawaii
Dream Home Bathroom

EXPLORE

If you're planning a vacation to Hawaii, I've got you covered on the very best places to go!   From many amazing restaurants to incredible adventures in the surf and on land, this is your go-to source for unique and exciting things to do on the Big Island of Hawaii.  Or just take a Virtual Vacation!!    Let's go!

SAY YES!

If you've been asked to cook for a large group activity, be it a Girl's Camp or a Graduation Party, say Yes!  I'm here to help.  From Menus to Game Plans to Recipes, I'll help you keep on schedule and turn out amazingly delicious food if you're cooking for a crowd!  My recipes are tested and trusted.    Let's cook! 

AHONUI

Ever wished you could build your dream home?  Like amazing house design and home building ideas?  Me too!  Join me as I design and build a home on the Big Island of Hawaii. Follow along while I design each room. Enjoy a front row seat for the entire amazing construction process.  Let's play!

PARTY

Would you like to throw a Luau, but not sure where to start?   Want to know how to build a tiki bar and roast a pig?  Here's everything you need to have a luau.  How about a Christmas Feast or even a fabulous dinner for your neighborhood supper club?  You've come to the right place.    Let's party!

Beach Baby Pudding Cups

Beach Baby Pudding Cups

  Aloha Dreams

   Fabulous Recipes, Cooking for a Crowd & Dream Home Design      

1
2
3
4
5
6

Beach Baby Pudding Cups

Beach Baby Pudding Cups

Aren’t these darling?

These Beach Baby Coconut Pudding Cups are everything great about the islands: creamy coconut pudding, sweet juicy pineapple and the “sand” is crushed Golden Oreo’s.  I’ve made them multiple times for kids and the kids LOVE ‘EM (not to mention the adults).  You will too since they are so easy to make.  They are one of the 6 different desserts we’re having at our luau this weekend, including Hawaiian Pineapple Cheesecake Bars and Maui Flip Flops !!

How fun is that??

If you’ve seen recipes calling for an Oreo cookie crust you may have been like me and wondered if the recipe called for the whole cookie or just the 2 outside cookie “shells” without the creamy filling.  And the answer is…..the whole cookie!  Simply put the entire cookie in the food processor.  Pulse it until it’s the consistency of sand.

Beach Baby Pudding Cups

These taste best if made the same day. But you can make them the night before if you’re stretched for time.

Go for it even if you’re not having a luau. The kids EVERYONE will love them!

Beach Baby Pudding Cups

Pin for Later

Pineapple Cheesecake Bars

Or Make Now

Family Size


4 from 1 vote
Beach Baby Pudding Cups
Beach Baby Pudding Cups - Family Size
Prep Time
30 mins
 

Makes approximately 12 servings.

An AlohaDreams.com recipe.

Course: Dessert
Servings: 10 servings
Ingredients
  • 1/2 (4 ounces) package cream cheese bar , softened
  • 1 tablespoon butter , softened
  • 1/4 cup powdered sugar
  • 4 ounces Cool Whip topping
  • 1 (3 ounce) box JELL-O coconut cream pudding mix (vanilla works too)
  • 1/4 cup milk
  • 1 cup crushed pineapple in juice , drained very well.
  • 1/2 (1 pound 3.1 ounce) package Golden Oreos
Special Equipment
  • 12 paper drink umbrellas
  • 12 (9 ounce) plastic tumblers
Instructions
  1. Set out cream cheese and butter to soften. (Aloha Tip: to use immediately, you can soften the cream cheese by completely unwrapping it, placing in a microwave safe bowl and microwaving it for 10 seconds. You can do the same with the butter).

  2. Put complete Oreo cookie (both cookie and fillinin the food processor and blend using pluses until they are the texture of sand. Set aside.
  3. In a medium bowl combine cream cheese, butter, and powdered sugar with mixer. Fold in Cool Whip until well combined. In a separate bowl mix pudding mix and milk with a whisk. When well combined, add pudding to cream cheese mixture. Spoon the pudding cream cheese mixture into a 1 gallon bag. Place bag in a bowl and refrigerate for 15 minutes to get thicker.
  4. Drain the pineapple in a strainer for 10 minutes, pressing down to remove the extra juice).
MAKE AHEAD NOTE: Can be made to this point up to 1 day ahead. Cover the Oreo crumbs and refrigerate the pineapple and cream cheese mixtures each in a separate covered container.
  1. To assemble, place several tablespoons of Oreo crumbs in each tumbler. Cut off the corner of the baggie containing the pudding mixture. Add about ½ inch of the cream cheese pudding mixture to each tumbler. Gently tap the tumblers on the counter to displace any air bubbles if necessary. Add a layer of the crushed pineapple. Add another layer of several more tablespoons of Oreo Crumbs. Add a second half-inch layer of the pudding mixture followed with a second layer of the crushed pineapple. Top off with a layer of Oreo crumbs and a drink umbrella.
  2. Refrigerate until ready to serve. Best made the same day but can be made the day before.


Large Group


4 from 1 vote
Beach Baby Pudding Cups
Beach Baby Pudding Cups - Large Group
Prep Time
1 hr
Total Time
1 hr
 

A real kid pleaser for your next party or family dinner.  

An AlohaDreams.com recipe.

Course: Dessert
Servings: 28 servings
Author: Betsy Edwards
Ingredients
  • 2 (8 ounce) cream cheese bars , softened
  • ¼ cup butter , softened
  • ½ cup powdered sugar
  • 2 containers - 1 (8 ounce) container, 1 (12 ounce) Cool Whip topping
  • 1 (3 ounce) box JELL-O coconut cream pudding mix (vanilla works too)
  • 1/4 cup milk
  • 1 (20 ounce) can crushed pineapple in juice , drained very well.
  • 1 (1 pound 3.1 ounce) package Golden Oreos
Special Equipment
  • 28 paper drink umbrellas
  • 28 (9 ounce) plastic tumblers
Instructions
  1. Set out cream cheese and butter to soften. (Aloha Tip: to use immediately, you can soften the cream cheese by completely unwrapping it, placing in a microwave safe bowl and microwaving it for 10 seconds. You can do the same with the butter.)

  2. Put complete Oreo cookie (both cookie and filling) in the food processor and blend using pluses until they are the texture of sand. Set aside.

  3. In a medium bowl combine cream cheese, butter, and powdered sugar with mixer. Fold in Cool Whip until well combined. In a separate bowl mix pudding mix and milk with a whisk. When well combined, add pudding to cream cheese mixture. Spoon the pudding cream cheese mixture into a 1 gallon bag. Place bag in a bowl and refrigerate for 15 minutes to get thicker.

  4. Drain the pineapple in a strainer for 10 minutes, pressing down to remove the extra juice).

  5. MAKE AHEAD NOTE: Can be made to this point up to 1 day ahead. Cover the Oreo crumbs and refrigerate the pineapple and cream cheese mixtures each in a separate covered container.

  6. To assemble, place several tablespoons of Oreo crumbs in each tumbler. Cut off the corner of the baggie containing the pudding mixture. Add about ½ inch of the cream cheese pudding mixture to each tumbler. Gently tap the tumblers on the counter to displace any air bubbles if necessary. Add a thin layer of the crushed pineapple. Add another thin layer of Oreo Crumbs. Add a second thin layer of the pudding mixture followed with a second thin layer of the crushed pineapple. Top off with a sprinkling of the Oreo crumbs and a drink umbrella.

  7. Refrigerate until ready to serve.  Best made the same day, but can be made the night before.


Aloha Dreams

Welcome to Aloha Dreams!

I'm so glad you dropped by.  I'm Betsy.  Here you'll find my favorite fabulous, trusted recipes - everything from delicious, quick meals for your family to wonderful classics made easy.

I'm also here to help you with large group recipes from 20 to 200.  So next opportunity you get to cook for a large group - Say 'Yes!'  Then relax. I've got your back.

Ever wished you could build your dream home? How about building your dream home in a tropical paradise?  Join me, room by room, as we design and build a fabulous dream home in Hawaii!

Explore Aloha Dreams

Things to do Big Island of Hawaii
Dream Home Bathroom

EXPLORE

If you're planning a vacation to Hawaii, I've got you covered on the very best places to go!   From many amazing restaurants to incredible adventures in the surf and on land, this is your go-to source for unique and exciting things to do on the Big Island of Hawaii.  Or just take a Virtual Vacation!!    Let's go!

SAY YES!

If you've been asked to cook for a large group activity, be it a Girl's Camp or a Graduation Party, say Yes!  I'm here to help.  From Menus to Game Plans to Recipes, I'll help you keep on schedule and turn out amazingly delicious food if you're cooking for a crowd!  My recipes are tested and trusted.    Let's cook! 

AHONUI

Ever wished you could build your dream home?  Like amazing house design and home building ideas?  Me too!  Join me as I design and build a home on the Big Island of Hawaii. Follow along while I design each room. Enjoy a front row seat for the entire amazing construction process.  Let's play!

PARTY

Would you like to throw a Luau, but not sure where to start?   Want to know how to build a tiki bar and roast a pig?  Here's everything you need to have a luau.  How about a Christmas Feast or even a fabulous dinner for your neighborhood supper club?  You've come to the right place.    Let's party!

Hawaiian Pineapple Cheesecake Bars

Hawaiian Pineapple Cheesecake Bars

  Aloha Dreams

   Fabulous Recipes, Cooking for a Crowd & Dream Home Design      

1
2
3
4
5
6

Luscious Hawaiian Pineapple Cheesecake Bars

Pineapple Cheesecake Bars

Have you ever been to The Polynesian Cultural Center?  If not, you really owe it to yourself to visit it if you’re on Oahu.  You’ll enjoy exploring the rich heritage of 6 Pacific Islands. Wander through 42 acres of tropical splendor and enjoy the adventure of traditional hands-on activities.

Polynesian Cultural Center Recipes

You can learn to cook the Samoan way, using sticks, stones, leaves, husks, coconut milk, taro, fish, and plenty of patience. Or dine like alii (a hereditary line of rulers) at an authentic Polynesian luau and top it off with the most spectacular evening show in the islands.

Polynesian Cultural Center Recipes
One of the best desserts at the luau is a delicious pineapple dessert bar.  But you don’t have to plan a luau to enjoy these.  I really think you’ll like them.  Even people who don’t like pineapple or coconut take a bite and say “WOW!”    Treat yourself to a mini trip to Hawaii with these!
Pineapple Cheesecake Bars

You’ll love how amazing these bars will turn out.  They start with my favorite shortbread cookie as a base.  On that is spread a wonderful creamy cheesecake with a hint of pineapple, sweet white chocolate chips and crunchy toasted macadamia nuts.  Sprinkle on some toasted coconut and you’ll find out why everyone loves these!  They’re the next best thing to a trip to the Polynesian Cultural Center!

Pineapple Cheesecake Bars

These wonderful bars use my favorite shortbread recipe as a base.  It’s buttery, crunchy and firm enough to hold together even when cut into small bar-size pieces.  The dough comes together very easily and then you simply press it into the baking pan.  Since you won’t be seeing it under all that delightful pineapple cheesecake filling, it doesn’t have to be very neat, simply even.

Pineapple Cheesecake Bars

If you’ve never baked shortbread before the main thing is making sure you don’t over cook it.  You want to remove it from the oven when it’s a very light golden brown.  No darker than this.

Pineapple Cheesecake Bars

Cut into 4 rows by 6 rows to create 24 squares.  This is a reasonable size for a single serving.  Like this.

Pineapple Cheesecake Bars

To serve a larger group cut each of the 24 squares in half long-wise.  This size is ok if you’re serving several dessert choices, with enough of each choice for every guest.

Pineapple Cheesecake Bars

Pin for Later

Pineapple Cheesecake Bars

Or Make Now

Family Size


4 from 1 vote
Hawaiian Pineapple Cheesecake Bars
Luscious Hawaiian Cheesecake Bars – Family Size
Prep Time
20 mins
Cook Time
40 mins
Total Time
1 hr
 

An AlohaDreams.com recipe.

Course: Dessert
Servings: 8 servings
Author: Betsy Edwards
Ingredients
For the shortbread base
  • 1 cup all-purpose bleached flour (4.25 ounces or 120 grams), spoon into measuring cup to measure
  • 1/4 cup granulated sugar
  • 1/2 cup unsalted butter (1 stick, melted)
  • 1/2 teaspoon vanilla
  • 1/2 teaspoon salt
For the filling
  • 8 ounces cream cheese room temperature
  • 1 large egg
  • 1 cup powdered sugar
  • 1/4 cup granulated sugar
  • 1 cup crushed pineapple un-drained
  • 1/2 teaspoon pure vanilla extract
  • 1/2 cup white chocolate chip
  • 1/2 cup chopped macadamia nuts , divided
For the garnish
  • 1/2 cup sweetened flake coconut , toasted
Special Equipment
  • 1 8 x 8 baking dish
Instructions
For the garnish
  1. Move oven shelf to top position and turn on broiler. Spread 1/2 cup sweetened flake coconut and 1/4 cup rough chopped macadamia nuts on a cookie sheet. Heat under the broiler (DO NOT LEAVE THE BROILER) until coconut and nuts are a golden brown. (IF YOU LEAVE IT CAN EASILY BURN) Remove from oven and set aside.

For the shortbread base
  1. Preheat oven to 300 degrees. Line the bottom and sides of baking pan with aluminum foil or parchment paper, leaving enough overhang on all sides to lift later. Set aside.

  2. In a medium bowl stir the melted butter, granulated sugar, vanilla, and salt. Add the flour and stir until everything is combined. Press the mixture evenly into the prepared baking pan.
  3. Bake at 300 degrees about 15 minutes or until edges are lightly browned. While the crust is baking, prepare the coconut topping and cream cheese filling.
For the filling
  1. In a large bowl, with a mixer or by hand, mix eggs and 1 cup powdered sugar until completely combined. Add cream cheese, sugar, crushed pineapple and vanilla extract, and mix thoroughly. Gently fold-in 1/2 cup white chocolate chips and 1/4 cup chopped macadamia nuts.

  2. Spread filling evenly over the shortbread base. Increase oven temperature to 350 and bake on ON A CENTER SHELF for additional 25 minutes or until batter is set. Remove from oven, immediately sprinkle 1/4 cup reserved chopped, toasted macadamia nuts and 1/2 cup toasted coconut.

MAKE AHEAD NOTE: Let cool, cover lightly and refrigerated at least 12 and up to 24 hours.
  1. When ready to serve cut into bars.


Large Group


4 from 1 vote
Hawaiian Pineapple Cheesecake Bars
Luscious Hawaiian Cheesecake Bars – Large Group
Prep Time
20 mins
Cook Time
40 mins
Total Time
1 hr
 

An AlohaDreams.com recipe.

Course: Dessert
Servings: 24 bars
Author: Betsy Edwards
Ingredients
For the shortbread base
  • 3 cups all-purpose bleached flour (12.75 ounces or 360 grams) , spoon into measuring cup to measure
  • 3/4 cup granulated sugar
  • 1 1/2 cup unsalted butter (2 1/2 sticks, melted)
  • 1 teaspoon vanilla
  • 1/2 teaspoon salt
For the filling
  • 16 ounces cream cheese room temperature
  • 2 large eggs
  • 2 cups powdered sugar
  • 1/2 cup granulated sugar
  • 2 cups crushed pineapple un-drained (one 20 ounce can)
  • 1 teaspoon pure vanilla extract
  • 1 1/2 cup white chocolate chips divided
  • 1 cup chopped macadamia nuts divided
For the garnish
  • 1 cup sweetened flake coconut , toasted
Special Equipment
  • 1 (13 inch x 18 inch) half sheet baking sheet
Instructions
For the garnish
  1. Move oven shelf to top position and turn on broiler.  Spread 1 cup sweetened flake coconut and 1/2 cup rough chopped macadamia nuts on a cookie sheet.  Heat under the broiler (DO NOT LEAVE THE BROILER) until coconut and nuts are a golden brown.   (IF YOU LEAVE IT CAN EASILY BURN)  Remove from oven and set aside.

For the shortbread base
  1. Preheat oven to 300 degrees.  Line the bottom and sides of baking pan with aluminum foil or parchment paper, leaving enough overhang on all sides. Set aside.

    In a medium bowl stir the melted butter, granulated sugar, vanilla, and salt. Add the flour and stir until everything is combined. Press the mixture evenly into the prepared baking pan. 

    Bake at 300 degrees about 15 minutes or until edges are lightly browned. While the crust is baking, prepare the coconut topping and cream cheese filling.

For the filling
  1. In a large bowl, with a mixer or by hand, mix eggs and 2 cups powdered sugar until completely combined.  Add cream cheese, sugar, crushed pineapple and vanilla extract, and mix thoroughly.  Gently fold-in 1 cup white chocolate chips and 1/2 cup chopped macadamia nuts, reserving 1/2 cup of  white chocolate chips and 1 cup chopped macadamia nuts.  

    Spread filling evenly over the shortbread base.  Increase oven temperature to 350 and bake on ON A CENTER SHELF for additional 25 minutes or until batter is set. Remove from oven, immediately sprinkle 1/2 cup reserved chopped, toasted macadamia nuts and 1 cup toasted coconut.

MAKE AHEAD NOTE: Let cool, cover lightly and refrigerated at least 12 and up to 24 hours.
  1. When ready to serve cut into bars, 4 rows by 6 rows for a total of 24 bars.


Aloha Dreams

Welcome to Aloha Dreams!

I'm so glad you dropped by.  I'm Betsy.  Here you'll find my favorite fabulous, trusted recipes - everything from delicious, quick meals for your family to wonderful classics made easy.

I'm also here to help you with large group recipes from 20 to 200.  So next opportunity you get to cook for a large group - Say 'Yes!'  Then relax. I've got your back.

Ever wished you could build your dream home? How about building your dream home in a tropical paradise?  Join me, room by room, as we design and build a fabulous dream home in Hawaii!

Explore Aloha Dreams

Things to do Big Island of Hawaii
Dream Home Bathroom

EXPLORE

If you're planning a vacation to Hawaii, I've got you covered on the very best places to go!   From many amazing restaurants to incredible adventures in the surf and on land, this is your go-to source for unique and exciting things to do on the Big Island of Hawaii.  Or just take a Virtual Vacation!!    Let's go!

SAY YES!

If you've been asked to cook for a large group activity, be it a Girl's Camp or a Graduation Party, say Yes!  I'm here to help.  From Menus to Game Plans to Recipes, I'll help you keep on schedule and turn out amazingly delicious food if you're cooking for a crowd!  My recipes are tested and trusted.    Let's cook! 

AHONUI

Ever wished you could build your dream home?  Like amazing house design and home building ideas?  Me too!  Join me as I design and build a home on the Big Island of Hawaii. Follow along while I design each room. Enjoy a front row seat for the entire amazing construction process.  Let's play!

PARTY

Would you like to throw a Luau, but not sure where to start?   Want to know how to build a tiki bar and roast a pig?  Here's everything you need to have a luau.  How about a Christmas Feast or even a fabulous dinner for your neighborhood supper club?  You've come to the right place.    Let's party!

Hawaiian Wedding Cake

Hawaiian Wedding Cake

  Aloha Dreams

   Fabulous Recipes, Cooking for a Crowd & Dream Home Design      

1
2
3
4
5
6

Hawaiian Wedding Cake

Fruit Kabobs in a Pineapple

Looking for a quick and easy treat?  This Hawaiian Wedding Cake comes together in a snap and tastes like a piña colada on your plate. It’s a perfect luau recipe.  Using a simple cake mix, the three layers on top – crushed pineapple, a creamy pudding, whipped topping with toasted coconut – transport you on a tropical vacation.

You’ll want to make sure your cream cheese is softened before making this cake otherwise you’ll have un-blended pockets of cream cheese in your pudding mixture.  If you’re like me and forget to set the cream cheese out to soften there’s an easy solution.  Just cut the cream cheese in cubes, place it in a microwavable bowl and microwave for about 15 – 20 seconds.  Stir well.  If it is still not completely softened, continue for additional 10 second increments. Don’t allow the cream cheese to become hot.  You just want it soft enough to mix easily.

You’ll also want to use whole milk to mix with the pudding.   The whole milk does a better job thickening the pudding then skim or 2% milk.

Family Size


4.25 from 4 votes
Hawaiian Wedding Cake
Prep Time
20 mins
Cook Time
25 mins
Total Time
45 mins
 

This is an easy, tasty cake which comes together quickly.  Ignore the directions on the cake mix box and use just the ingredients in the recipe.  Cut in 3 rows x 6 rows to serve 18.

Course: Dessert
Servings: 18 servings
Author: Betsy Edwards
Ingredients
  • 1 package yellow cake mix (approx. 15 - 18 ounce size)
  • 1 1/4 cups buttermilk
  • 4 egg whites
  • 1 egg
  • 1 (8 ounce) package cream cheese cubed (bring to room temperature)
  • 1 cup milk
  • 1 (3.4 ounce) package instant vanilla pudding mix
  • 2 cans (one 20 ounce, one 8 ounce) crushed pineapple , drained
  • 1 (8 ounce) carton frozen whipped topping thawed
  • 1/2 cup sweetened shredded coconut toasted
Instructions
  1. Set out cream cheese and whipped topping to come to soften to make them easy to spread.  Spread coconut on a baking sheet and put under broiler until golden brown.  DO NOT WALK AWAY.  Set aside.

  2. Pre-heat oven to 350 degrees Spray a 13-in. x 9-in. baking pan with cooking spray. Set aside.
  3. In a large bowl, combine the cake mix, buttermilk, egg whites and egg. (That's all you're adding. Do not add ingredients on the cake box.) Beat on low speed for 30 seconds. Beat on medium speed for 2 minutes.
  4. Transfer to the prepared 13-in. x 9-in. baking pan. Bake at 350° for 25-30 minutes or until a toothpick inserted near the center comes out clean. When cake is done, remove from oven and cool on a wire rack.
  5. While cake is baking, in a small bowl, beat cream cheese until fluffy. Gradually beat in milk then add pudding and continue mixing until well blended.
  6. Drain pineapple and spread over cake.  Spread pudding mixture over the pineapple.   Top with whipped topping.  Sprinkle toasted coconut over cake.

MAKE AHEAD NOTE: Can be made to this point 6 - 8 hours before serving.
  1. Store in the refrigerator.   Cut in 3 rows x 6 rows to serve 18.


Large Group


4.25 from 4 votes
Hawaiian Wedding Cake
Hawaiian Wedding Cake - Large Group Recipe
Prep Time
20 mins
Cook Time
25 mins
Total Time
45 mins
 

This is a quick and easy crowd pleaser.  Do not use ingredients on the cake mix box. This is a double recipe, using two (9 x 13 inch) baking pans.   Cut each pan in 3 rows x 6 rows to serve 18 per pan, or a total of 36.

Course: Dessert
Servings: 36 servings
Author: Betsy Edwards
Ingredients
  • 2 packages yellow cake mix approx. 15 - 18 size
  • 2 1/2 cups buttermilk
  • 8 egg whites
  • 2 eggs
  • 2 (8 ounce) packages cream cheese , cubed (bring to room temperature
  • 2 cups milk
  • 2 (3.4 ounce) packages instant vanilla pudding mix
  • 4 cans (two 20 ounces, two 8 ounces) crushed pineapple , drained
  • 2 (8 ounce cartons) frozen whipped topping thawed
  • 1 cup sweetened shredded coconut , toasted
Instructions
  1. Set out cream cheese and whipped topping to come to soften to make them easy to spread. Spread coconut on a baking sheet and put under broiler until golden brown. DO NOT WALK AWAY.  Set aside.

  2. Pre-heat oven to 350 degrees. Spray two 13-in. x 9-in. baking pans with cooking spray. Set aside.
  3. In a large bowl, combine the cake mix, buttermilk, egg whites and egg. (That's all you're adding. Do not add ingredients on the cake box.) Beat on low speed for 30 seconds. Beat on medium speed for 2 minutes.
  4. Divide batter between the two prepared 13-in. x 9-in. baking pans. Bake at 350° for 25-30 minutes or until a toothpick inserted near the center comes out clean. When cakes are done, remove from oven and cool on a wire rack.
  5. While cakes are baking, in a small bowl, beat cream cheese until fluffy. Gradually beat in milk then add pudding and continue mixing until well blended.
  6. Drain pineapple and spread, dividing between the two cakes. Spread pudding mixture over the pineapple. Top with whipped topping. Sprinkle toasted coconut over cakes.
MAKE AHEAD NOTE: Can be made to this point 6 - 8 hours before serving.
  1. Store in the refrigerator.


Aloha Dreams

Welcome to Aloha Dreams!

I'm so glad you dropped by.  I'm Betsy.  Here you'll find my favorite fabulous, trusted recipes - everything from delicious, quick meals for your family to wonderful classics made easy.

I'm also here to help you with large group recipes from 20 to 200.  So next opportunity you get to cook for a large group - Say 'Yes!'  Then relax. I've got your back.

Ever wished you could build your dream home? How about building your dream home in a tropical paradise?  Join me, room by room, as we design and build a fabulous dream home in Hawaii!

Explore Aloha Dreams

Things to do Big Island of Hawaii
Dream Home Bathroom

EXPLORE

If you're planning a vacation to Hawaii, I've got you covered on the very best places to go!   From many amazing restaurants to incredible adventures in the surf and on land, this is your go-to source for unique and exciting things to do on the Big Island of Hawaii.  Or just take a Virtual Vacation!!    Let's go!

SAY YES!

If you've been asked to cook for a large group activity, be it a Girl's Camp or a Graduation Party, say Yes!  I'm here to help.  From Menus to Game Plans to Recipes, I'll help you keep on schedule and turn out amazingly delicious food if you're cooking for a crowd!  My recipes are tested and trusted.    Let's cook! 

AHONUI

Ever wished you could build your dream home?  Like amazing house design and home building ideas?  Me too!  Join me as I design and build a home on the Big Island of Hawaii. Follow along while I design each room. Enjoy a front row seat for the entire amazing construction process.  Let's play!

PARTY

Would you like to throw a Luau, but not sure where to start?   Want to know how to build a tiki bar and roast a pig?  Here's everything you need to have a luau.  How about a Christmas Feast or even a fabulous dinner for your neighborhood supper club?  You've come to the right place.    Let's party!

Tropical Salad

Never miss a single Fabulous Recipe!

Sign UP today and ENJOY free Recipes & Party Ideas in your inbox.

(No spam - I promise!)

You have Successfully Subscribed!