Select Page
French Apple Custard Pie with Creme Anglaise Sauce

French Apple Custard Pie with Creme Anglaise Sauce

  Aloha Dreams

   Fabulous Recipes, Cooking for a Crowd & Dream Home Design      

1
2
3
4
5
6

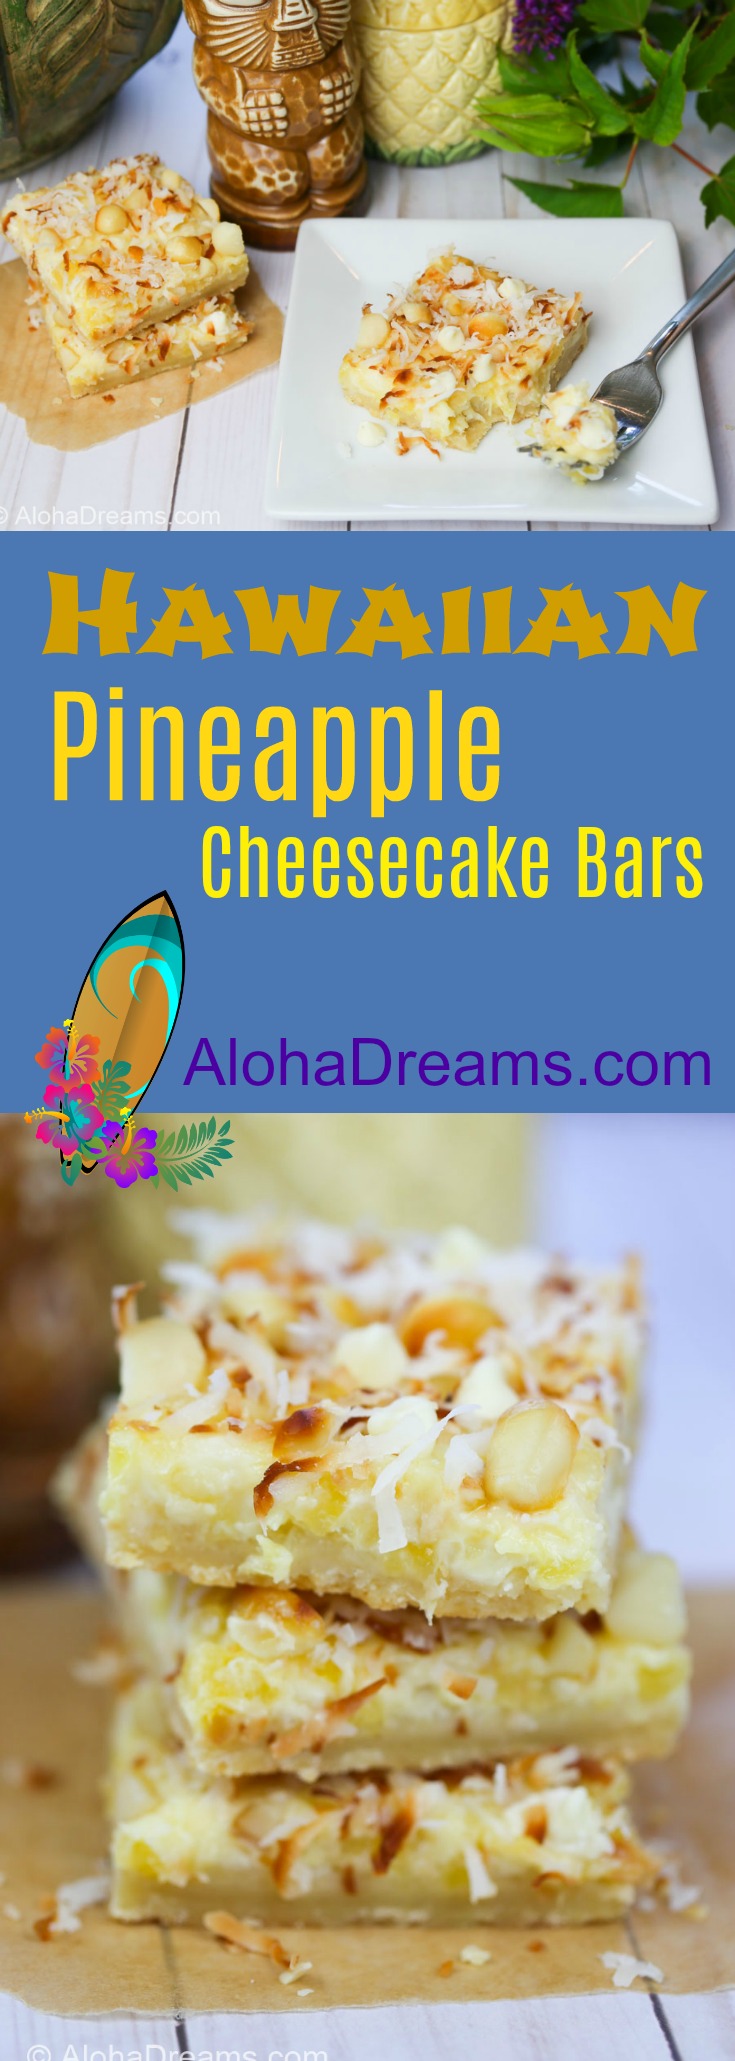
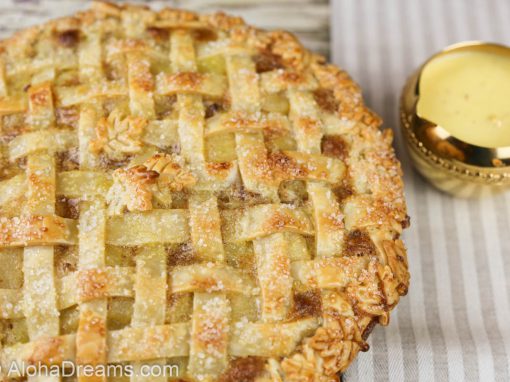
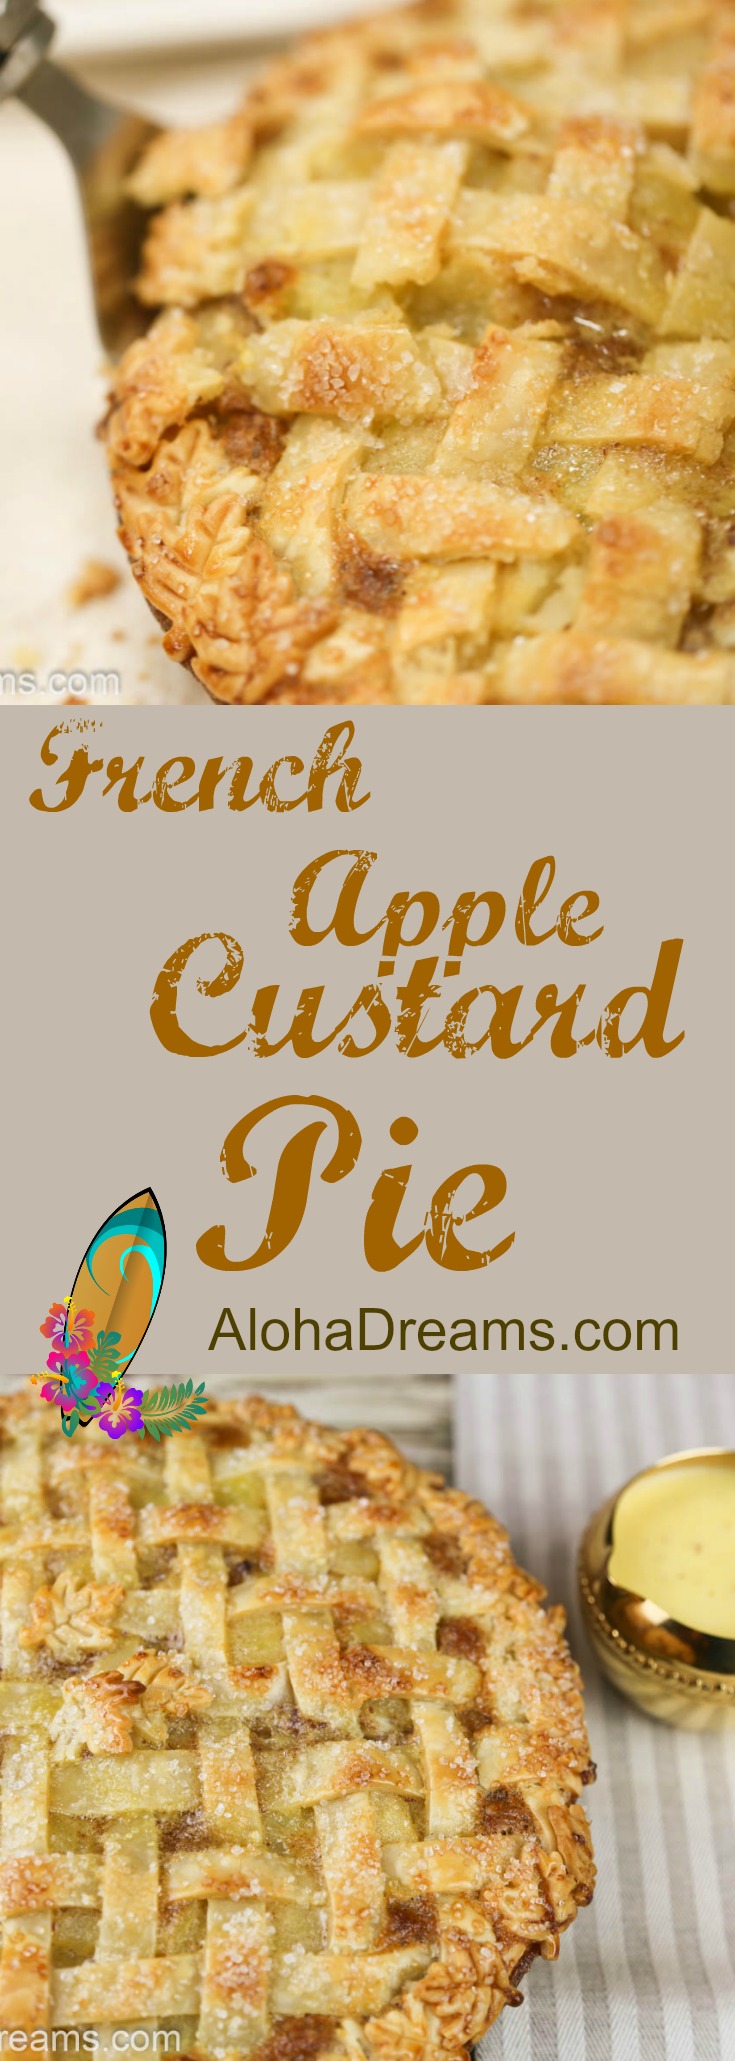
French Apple Custard Pie with Creme Anglaise Sauce (Heaven on a Plate)

French Apple Custard Pie

Hi guys!  So are you looking for a wonderful, over-the-top, (easy) way to say “I love you!” for the Holidays?  Well, here it is.  This pie is gorgeous (if I do say so myself), it tastes great – – – and you know what?  It’s.  Really.  Not.  That.  Difficult.

Come with me and I’ll show you how.  There are several secrets to this, and they apply to any pie you’re going to make this holiday season.  Let’s do this!

Secrets to Perfectly Baked Pie Crust

This is a 2-crust pie.  You can make your own crust – or if you’re in a hurry like I was, you can use ready made crust (the kind that comes in packages of 2 rolls).  Looking like this, no one will notice (or even care) that you didn’t make the crust from scratch, unless you tell them.   This pie also uses what’s known as a blind baked bottom crust.

There are two times when blind baking is necessary: 1) when you’re making a custard pie or 2) when you will not be baking the pie filling. Sometimes recipes for Pumpkin Pies (which are a type of custard pie) call for blind baking the crust because the moisture in the pumpkin filling can make the crust soggy before it has time to finish baking.

I know blind baking a pie crust can sound somewhat intimidating, especially if the idea of simply baking a pie is already in your category of ‘big hairy task that I’d rather not deal with’.  If that’s the case – relax.  We can do this together.  Blind baking is nothing more than letting the (bottom) pie crust bake partially on its own before you add the filling. It’s really easy – especially once you know a few baker’s secrets.

#1  Use a glass pie pan.

I know there are some pretty ceramic versions out there, but trust me – a clear glass pie pan cooks better.  Besides you can monitor the done-ness of your crust in the glass pan, whereas you have no visibility with the ceramic or metal pan.

#2  Use chilled pie dough.

If you’re using a ready made pie crust, you’ll want to let it come to room temperature before unrolling it and putting it in your pie pan, otherwise it will tear pretty easily as you’re unrolling it.   But once you’ve shaped it in the pan then it needs to get cold again before you pop it in the oven.  This is to help the dough keep its shape.

#3  Use pie weights with an aluminum foil liner.

Once the pie has hung out for at least an hour in the refrigerator, lay a large sheet of aluminum foil over the dough and gently press it down to conform to the shape of the dough/pan.  Don’t do this before the dough is cold otherwise you run the risk of the foil sticking to the dough.  Some recipes call for parchment paper instead of the foil, but I like the foil because it also serves as a shield to keep the edge of the pie crust from burning.   Pie edges tend to burn easily and we don’t want that!

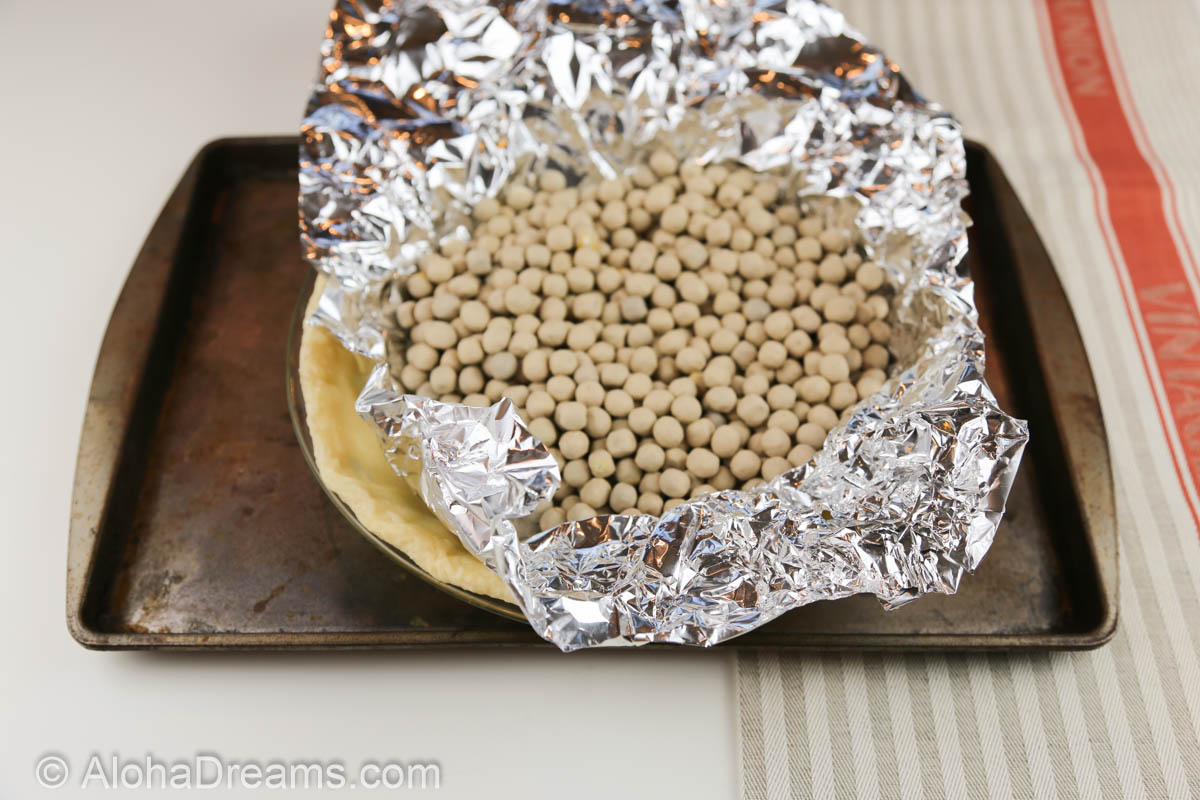
Once you’ve gently molded the foil, add pie weights or pour in sugar to come up 3/4 of the way on the sides of the dish.  This is just another step to help your pie keep its shape.  Without this step your pie will puff up on the bottom and slump on the sides.  (No puffy bottom, slump-y sides on our watch!)  Notice we didn’t dock the pie (prick it all over the bottom with a fork).  That’s because docking is not necessary with this method and you don’t want holes in the bottom of your crust with a custard filling.  Once your pie is ready for the oven it should look like the following picture with the pie weights (little ceramic balls) mostly filling the aluminum foil shield.  I’ve pulled back an edge so you can see the pie underneath, but you’ll want to make sure all the edges are covered.

French Apple Custard Pie

You’ll only need to blind bake the crust at 425 degrees for 10 minutes.


#5  Put the pie on a rimmed baking sheet before you put it in the oven.

I always put my pies on a rimmed baking sheet.  It makes it easier to get them in and out of the oven and makes it less likely you’ll get burned or that you’ll damage any decoration.  Now that we’ve got the crust under control, it’s on to the filling!


Secrets to a Delicious Filling

#1  Pre-cook your apples to concentrate / reduce juices.

This helps keep the filling from being too loose and watery.

#2 Use an abundance of apples.

I love to serve over-the-top dishes, like miles-high meringue on my Lemon Meringue pies, or decadent layer cakes or luscious sauces – it makes my family and guests feel special and loved!  One of the best ways to do this with an apple pie is to use plenty of apples so the top of the pie is domed and bursting with apple goodness.

#3 Custard takes your filling to the next level.

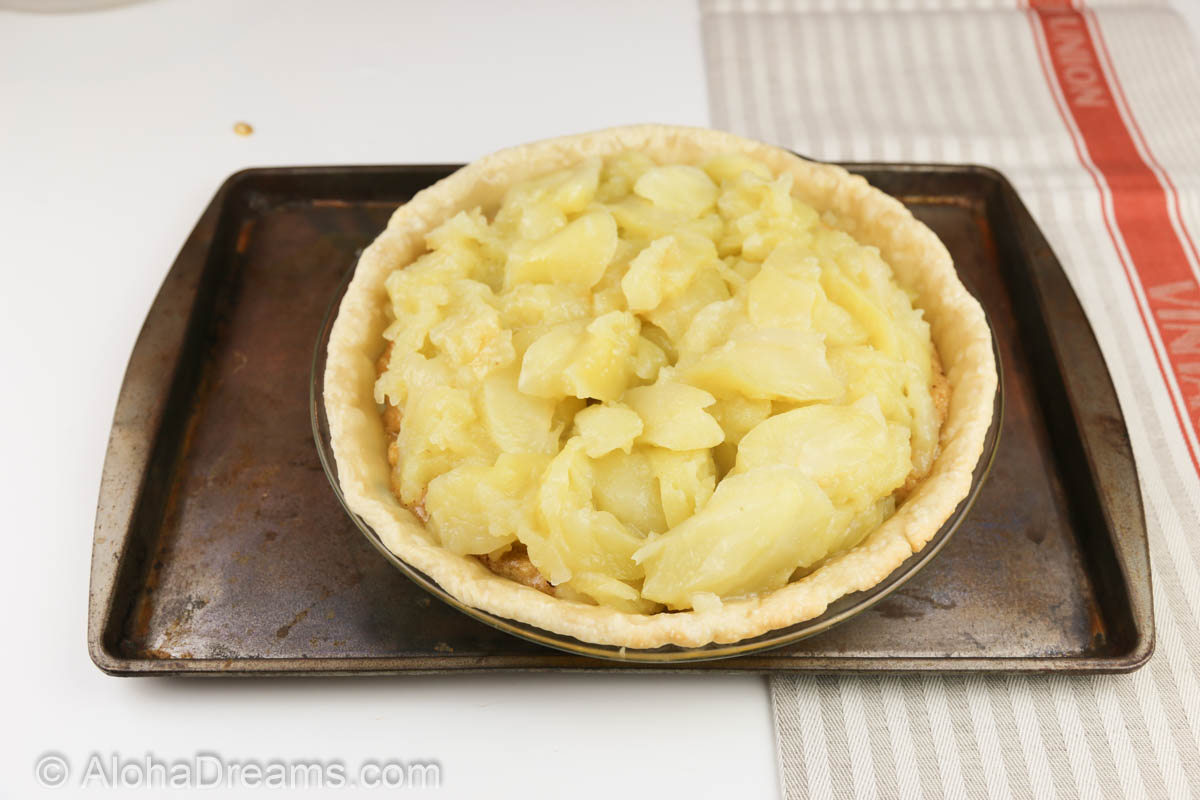
The rich creamy custard is the perfect foil to your tart, delicious apples.  I like to start with a layer of about 1/2 the apples and 1/2 the custard to line the bottom crust after it’s done partially baking, like this.


French Apple Custard Pie

Then a layer of the rich creamy custard.

French Apple Custard Pie

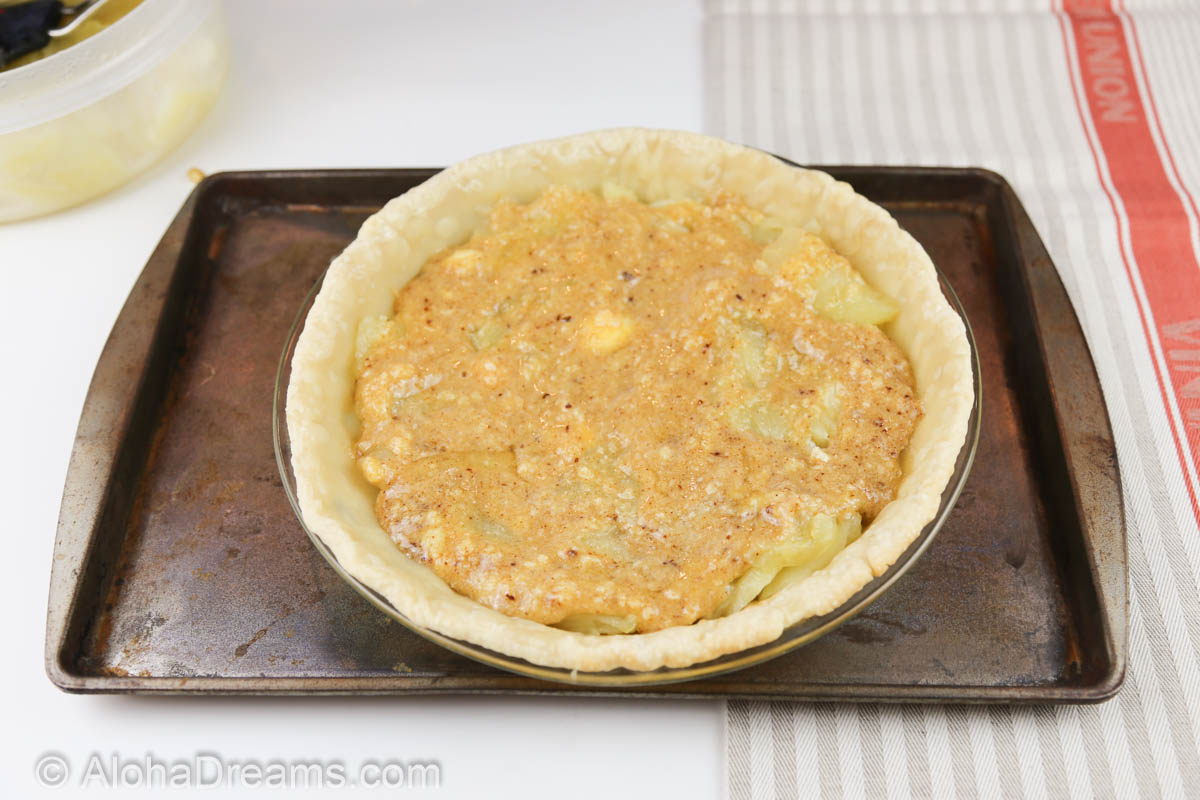
Followed by the rest of the apples and the rest of the custard.   Notice the pie is still on the baking sheet just in case the custard bubbles over the crust.  I hate cleaning ovens, and the baking sheet also helps to prevent this!

Secrets to a Beautiful Pie

We eat first with our eyes.  This pie is delicious – and one bite will prove it.  But before you even put a fork in it, wouldn’t you guess it tastes great?  That’s because it looks great.  It’s like being at Disney World.  You expect an amazing experience before you even begin to explore the park.  That’s not by accident.  You’re visually being primed for that attitude.  Everything you see is telling you at varying degrees of subliminal messaging, “this is going to be AMAZING.”   A beautiful dessert does the same thing.  And it’s really not hard.  Trust me.

#1  Use your ready made pie dough to make a decorative topping.

Ready made dough is generally a LOT easier to work with than homemade if you’re going to decorate a pie.  It’s the correct thickness, it’s a consistent thickness and it’s the correct size.

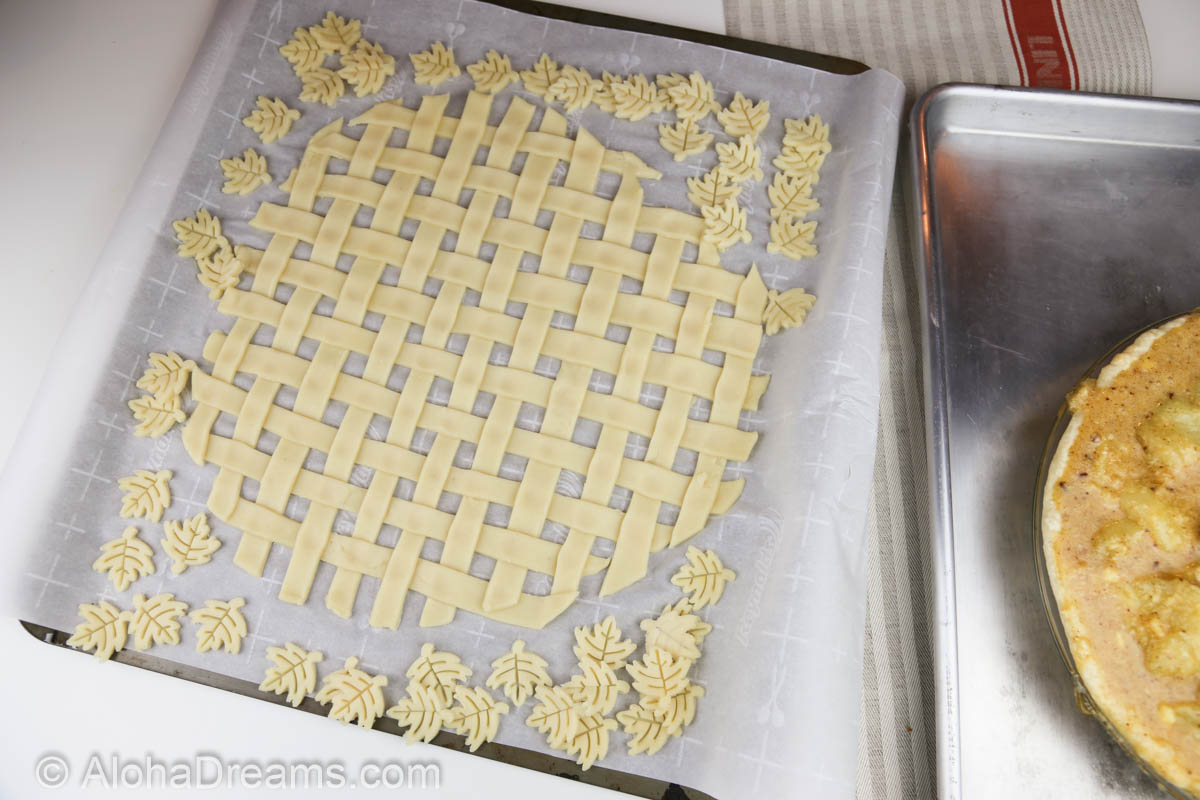
#2  Pre-cut your decoration.

I like to cut stripes for a lattice and then weave them on parchment paper.  This allows me to get them just right before I put them on the pie.  Once I’ve woven them I press down at each intersection of dough to ‘weld’ the strips in place.  Then I put them in the refrigerator for at least an hour to cool down so they hold their shape.  I use dough cutters to cut decorative leaves at the same time.  Once you’re done you should have something that looks like this.

French Apple Custard Pie

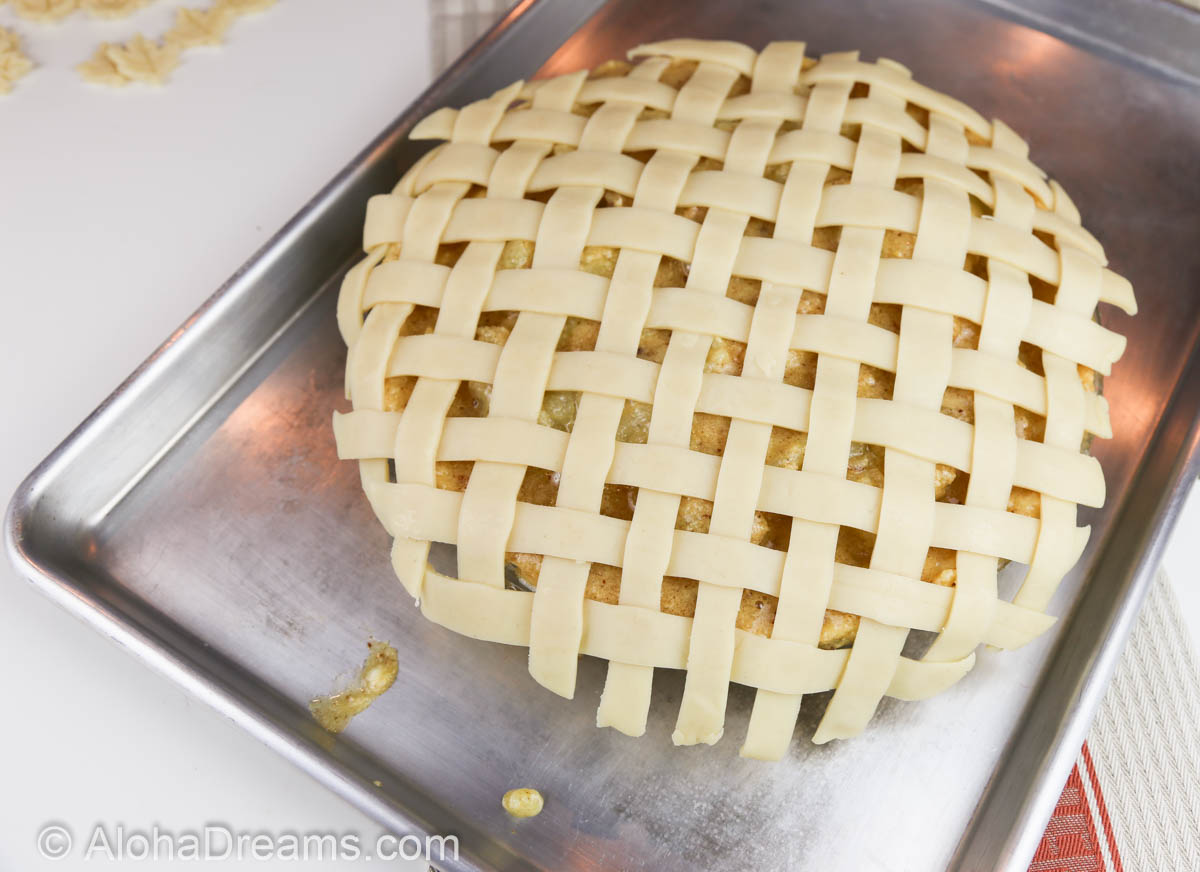
Now comes the fun part. (No, really!)  Move the leaves aside and position your parchment paper beside your pie.  Slide your hands under the paper and lift it up so that the edge of the pie is touching about an inch into the edge of the lattice.  Then gently flip the parchment paper over the pie so the lattice is transferred to the the top of the pie.  If you’ve thoroughly pressed down at each intersection prior to putting the lattice in the fridge, your lattice should hold together when you do this.  If it doesn’t, gently move any strips back into place.  It should now look like this.


French Apple Custard Pie

Simply trim the edges by running a paring knife around the glass and remove the excess dough.
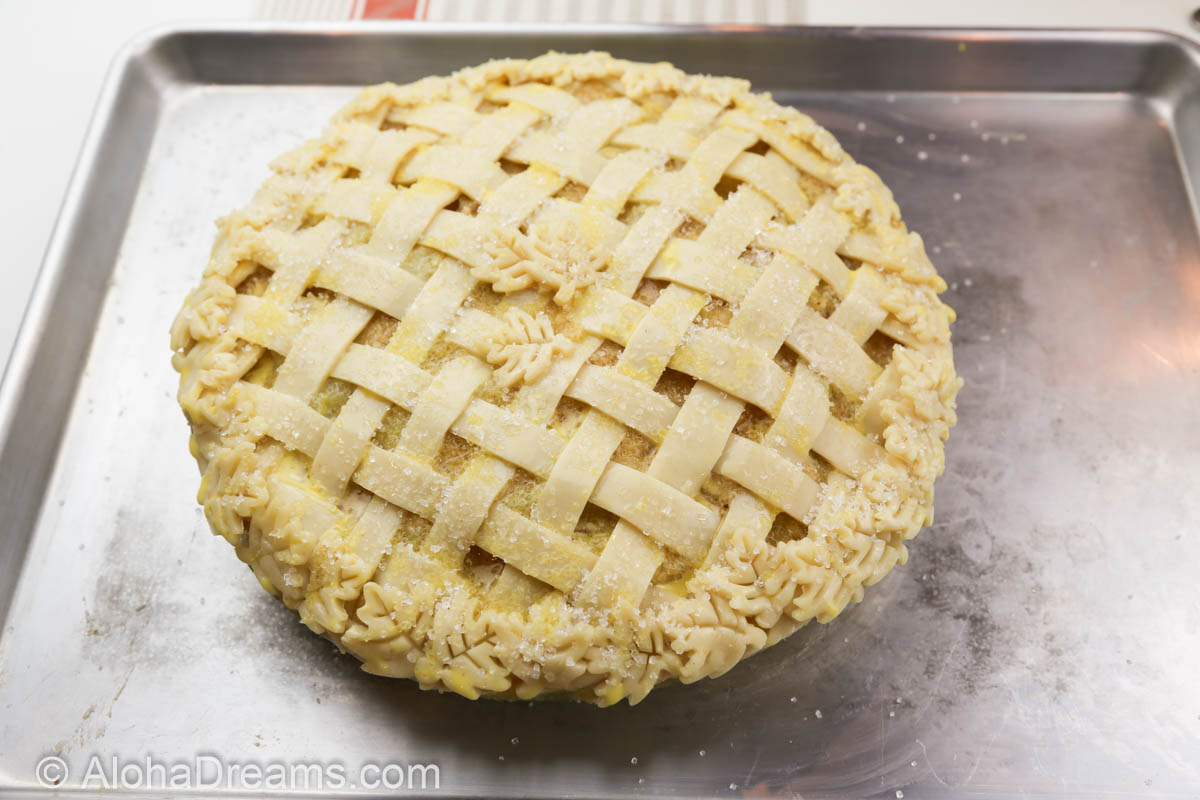
#3  Use an Egg Wash.

If you have any decorative items, like my leaf cut-outs, brushing an egg wash on the top crust will not only help them adhere, it will produce a beautiful brown, drool-worthy crust.

French Apple Custard Pie

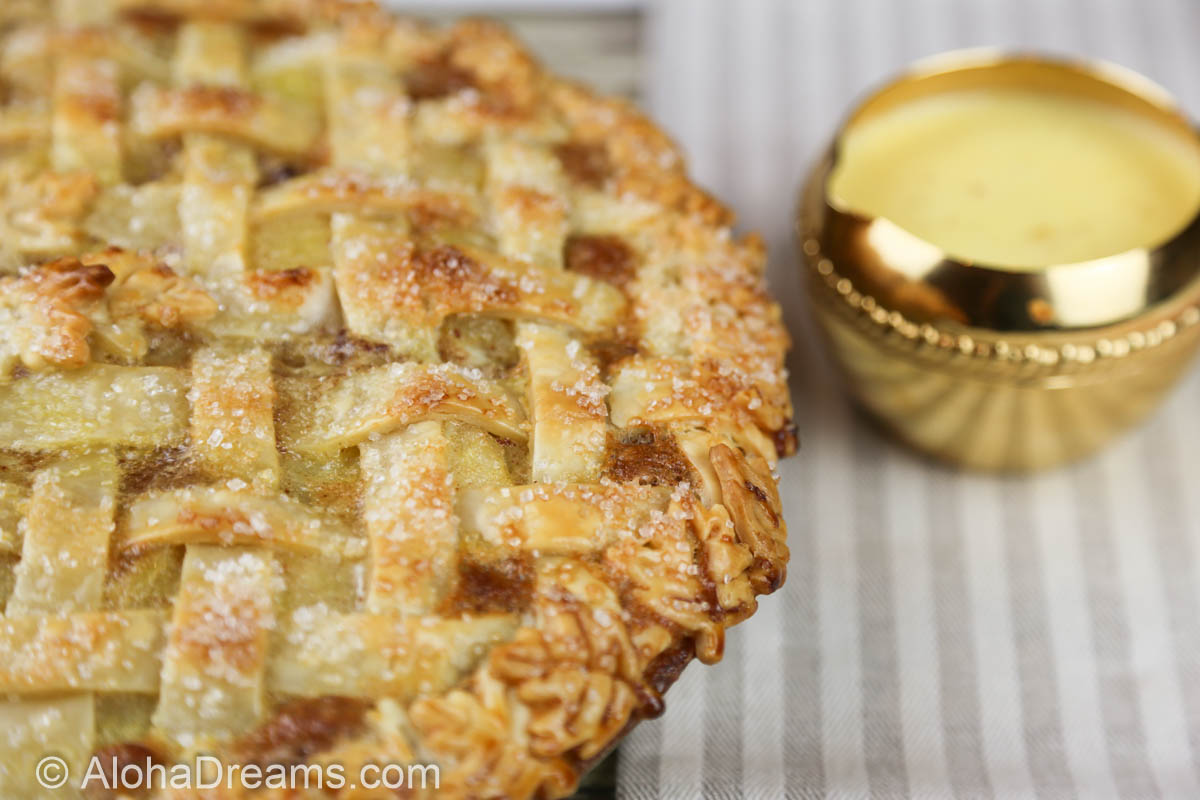
#4  Always use Sanding Sugar.

One of the reasons these pies always catch everyone’s eye is because I sprinkle them heavily with sanding sugar.  Not only is it tasty, it sends a subtle message that this golden, flaky, crunchy thing is sweet and delicious.  Alway remember the sanding sugar.  it really helps take your pie over the top.

French Apple Custard Pie

#5  Protect your Masterpiece.

Your two remaining jobs are: 1) Don’t let it get broken and 2) Don’t let it burn

You can protect it from breaking (as well as protect your oven from bubble-overs) by placing your pie on your rimmed baking sheet.  This enables you to safely move it around without damage.

To prevent it from burning I watch it like a hawk and when the edges get to the desired degree of golden perfection I slap a pie shield on them.  I also cover any spots that are getting dark golden brown with small (couple inch) pieces of aluminum foil so they don’t get any darker and burn.

French Apple Custard Pie

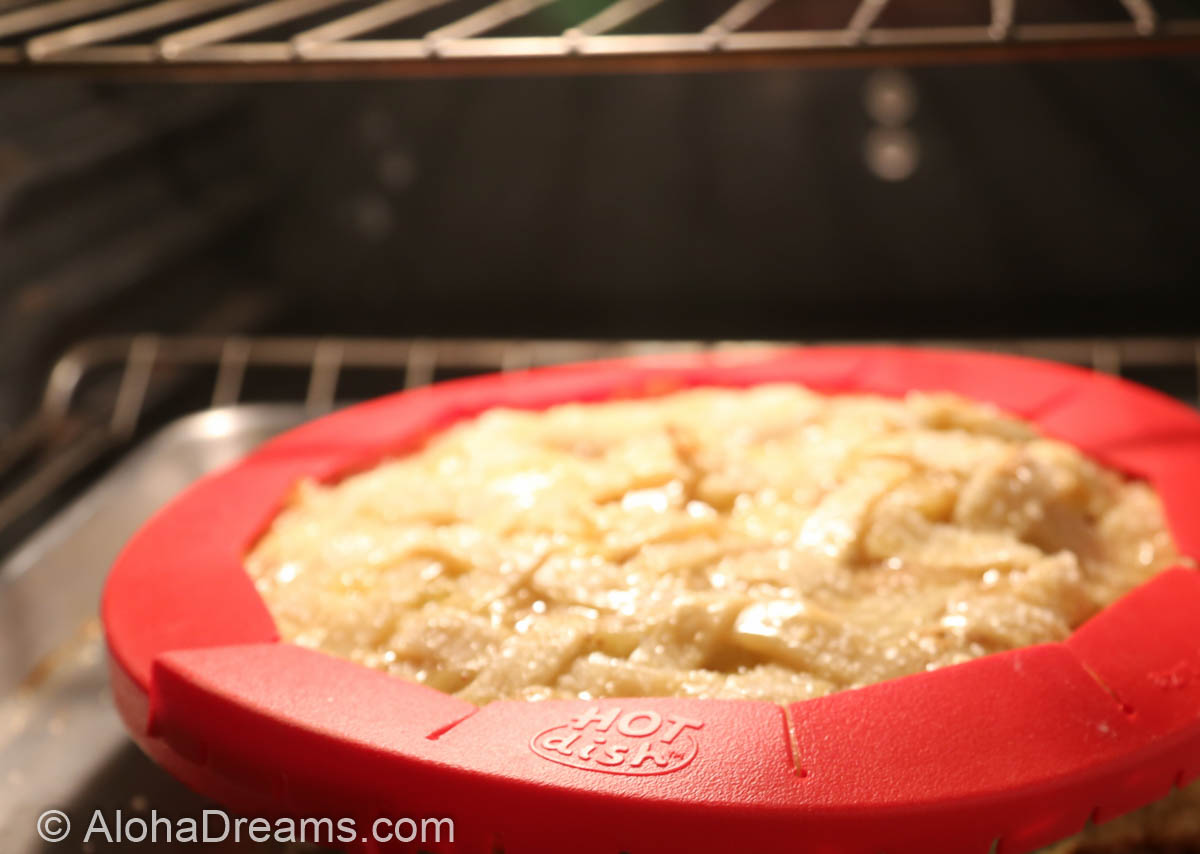
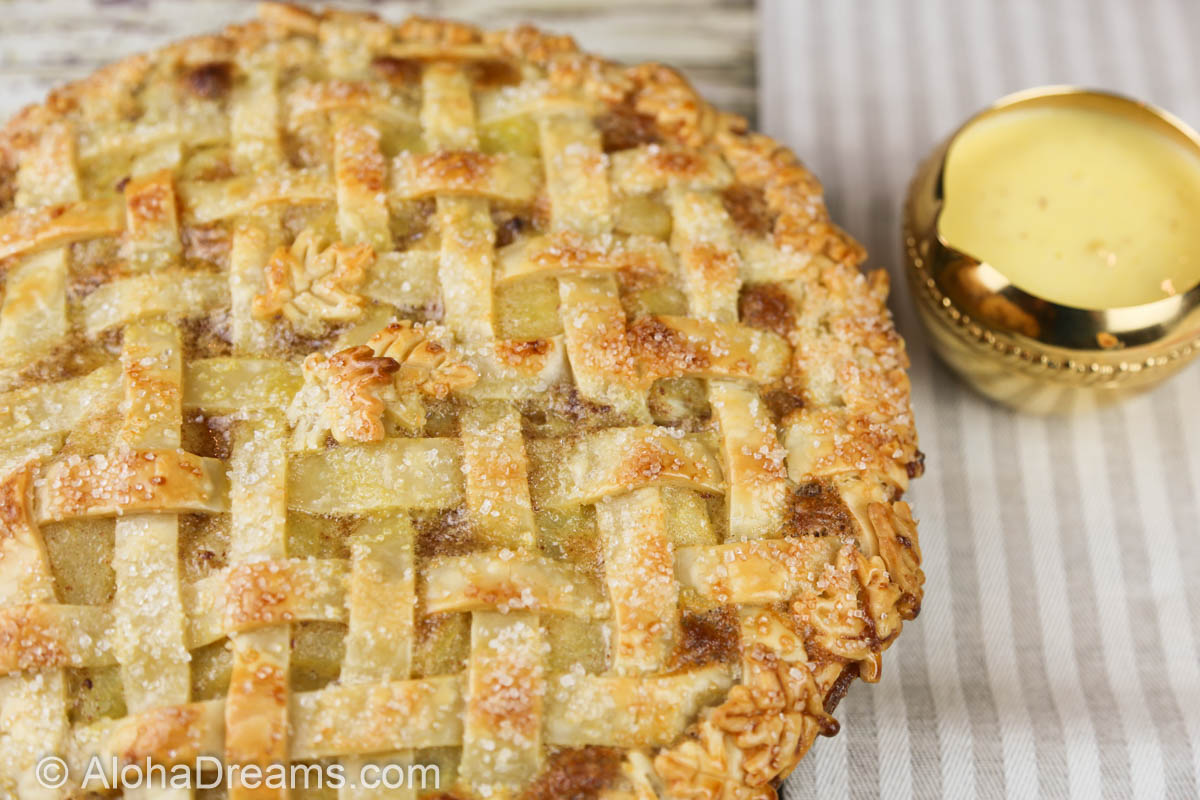
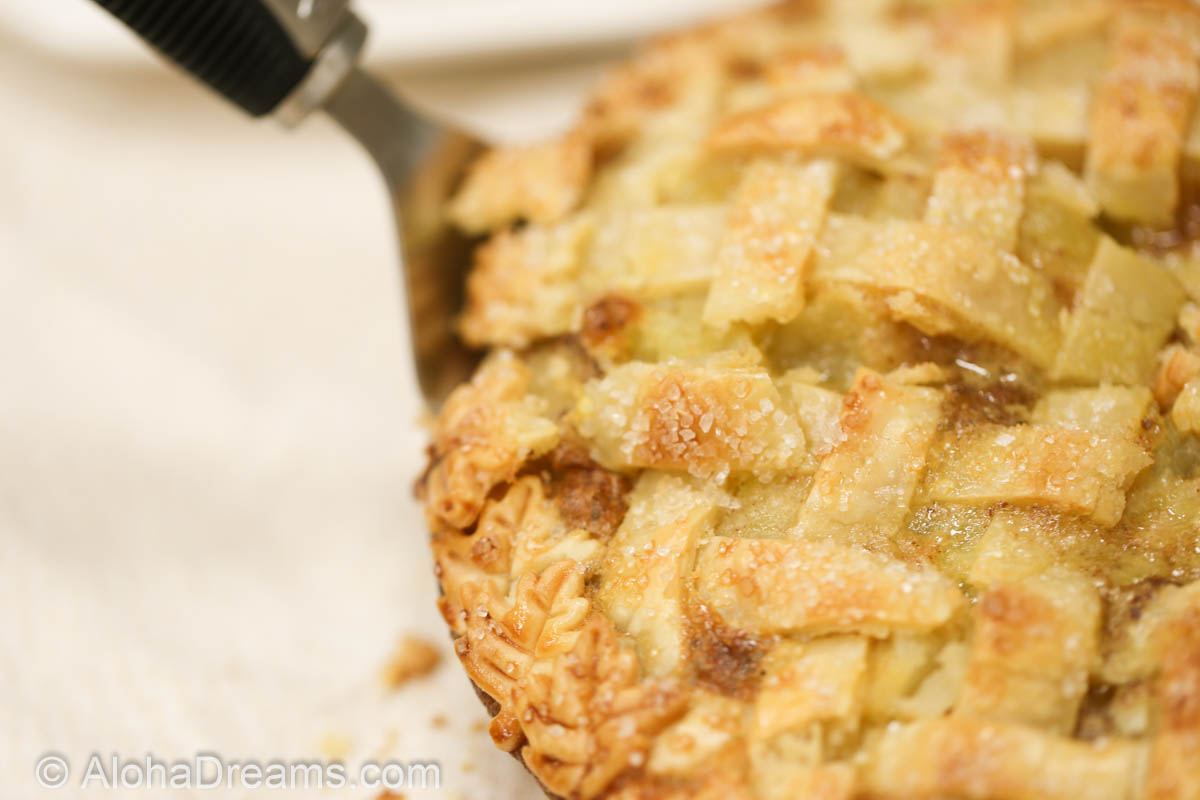
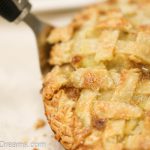
Finally, thoroughly protected, I let it cook until NONE of the top crust has that raw, oily doughy look.  Once it all looks flaky and done, you’re rewarded with this.

French Apple Custard Pie

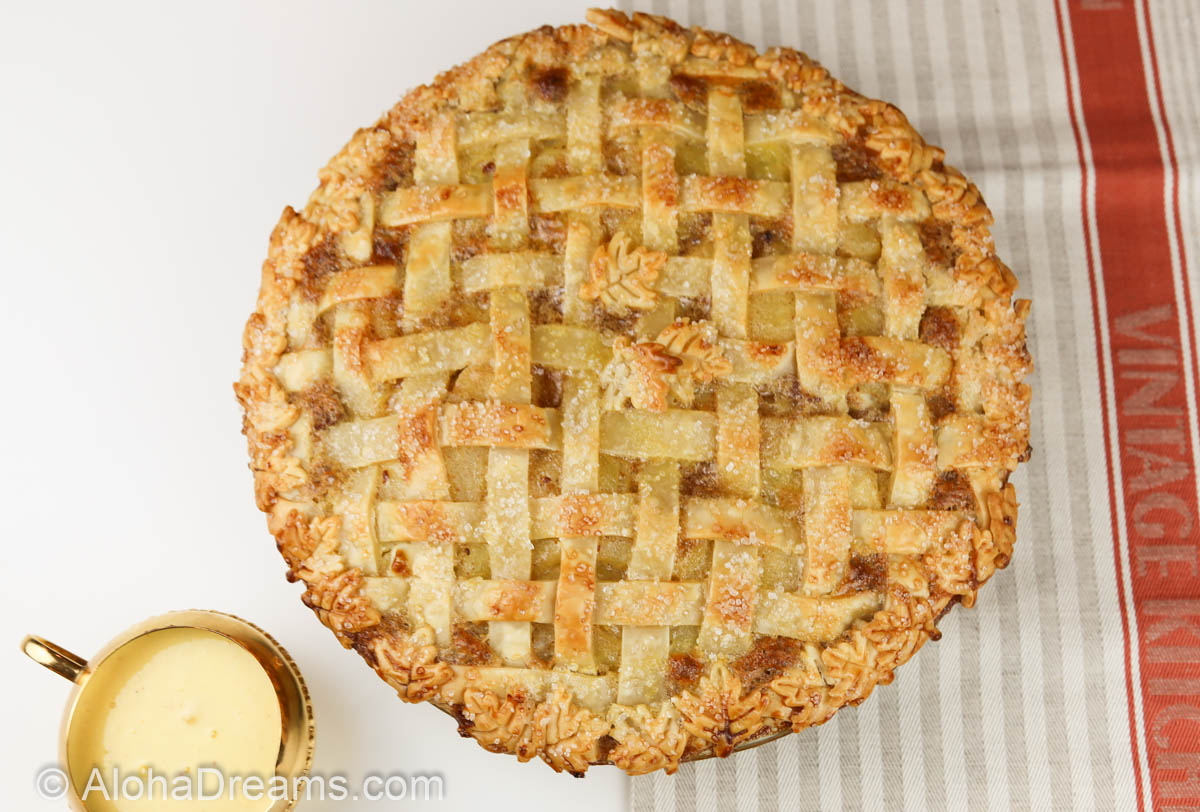
Believe me it tastes every bit as good as it looks.

French Apple Custard Pie

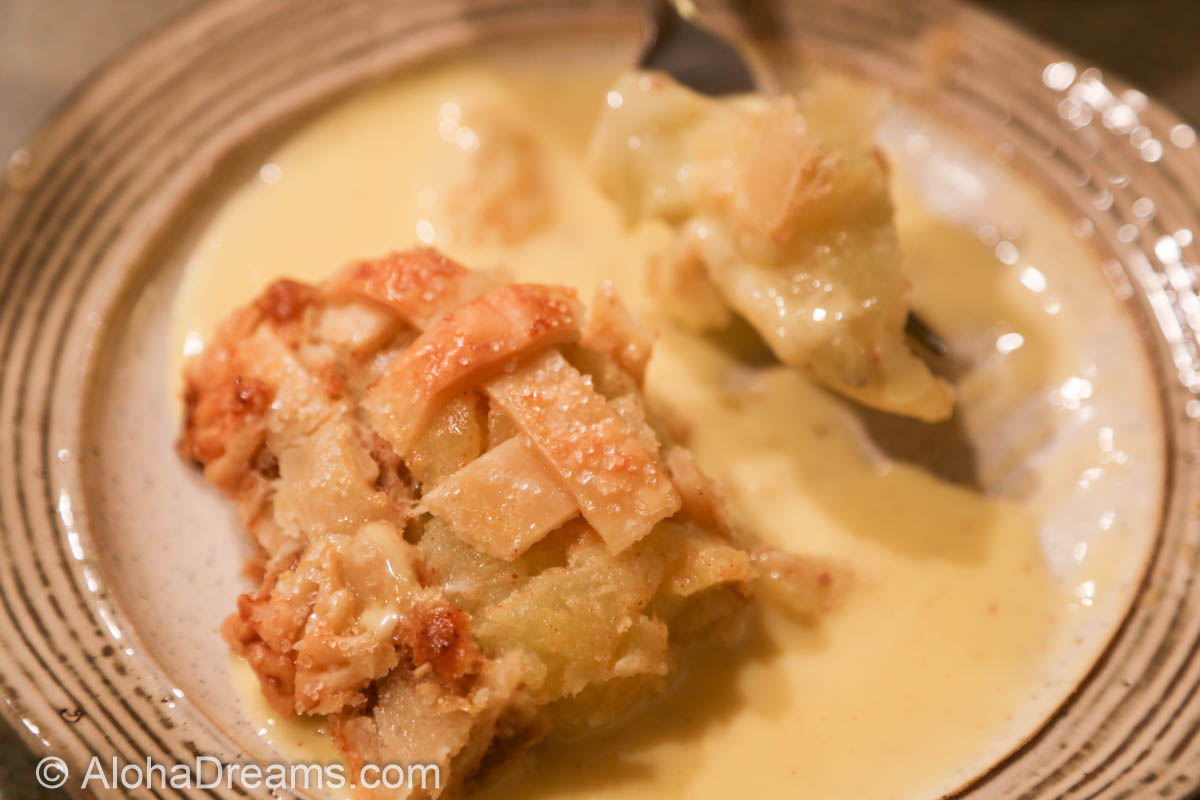
The final, over the top, make ’em howl at the moon, step is a simple (it’s easy) Creme Anglaise sauce.  You REALLY need this sauce in your life.  It’s not low-cal, but hey – it’s the HOLIDAYS.  Enjoy!

French Apple Custard Pie

Pin for Later

French Apple Custard Pie

Or Make Now


French Apple Custard Pie
Prep Time
1 hr
Cook Time
50 mins
Total Time
1 hr 50 mins
 
Course: Dessert
Cuisine: French
Author: Betsy Edwards
Ingredients
  • 1 or 2 packages Pillsbury All Ready Pie Crusts (2 crusts per package (2 crusts per package) the second package is for cut-out leaves, etc.
  • 1 teaspoon flour
Filling
  • 4 1/4 pounds tart apples such as Granny Smith, about 10 large apples
  • 1/2 cup sugar
  • 2 tablespoons butter
  • 2 teaspoons lemon juice
Custard
  • 1/2 cup butter , softened
  • 1/2 cup sugar
  • 2 tablespoons flour
  • 1 teaspoon cinnamon
  • 3 eggs , slightly beaten
Egg Wash
  • 1 large egg
  • 1 tablespoon heavy cream , optional
  • 1 tablespoon water
  • 4 + tablespoons Sanding Sugar
Crème Anglaise
  • 2 cups whipping cream
  • 4 egg yolks
  • 2/3 cup sugar
  • 1 teaspoon vanilla
  • Dash cinnamon
  • Dash nutmeg
Special Equipment
  • 9 inch glass pie pan
  • Aluminum Foil
  • Pie weights or sugar
Instructions
  1. Place 1 of the prepared crusts in the bottom of a 9-inch glass pie pan and gently press up the sides of the pan. Trim edges. Do not prick crust. After shaping the dough in the pan, refrigerate for at least an hour to ensure it's perfectly cold and relaxed.
  2. Cut the other prepared crust in 1/2-inch wide strips.
  3. On a piece of waxed or parchment paper weave the strips into a basket weave pattern. Gently press down at each intersection to secure. Cut leaves or other shapes out of the 3rd prepared crust if desired. Place on a flat baking sheet, cover loosely with plastic wrap and refrigerate for at least and hour and up to 2 days.
  4. Meanwhile peel, quarter, and core the apples, then cut each into wedges about a quarter inch thick. Toss the slices as you cut them with lemon juice to prevent browning. You should have about 10 rounded cups.
  5. In large skillet over medium-low heat, combine filling ingredients. Sauté about 5 minutes, stirring occasionally. DO NOT OVER COOK OR YOU’LL MAKE APPLESAUCE.  Remove from heat. Set aside.

  6. After the dough in the pie pan has chilled an hour, lay a sheet of aluminum foil over the dough and gently press it down to confirm to the shape of the pan. Fold over the edges to prevent the edges burning and pour in pie weights or sugar. Weights or sugar should come up ¾ of the side of the pie to prevent the crust from puffing up and losing its shape while cooking. Place on a baking sheet (for easy transport) and partially bake crust at 425 degrees F for 10 minutes. Remove from oven and set aside.

  7. In a medium bowl, mix custard ingredients.
MAKE AHEAD NOTE – may be made to this point up to a day in advance. If not baking immediately, when pre-baked crust is cooled, carefully remove aluminum foil and weights, cover lightly with a sheet of plastic wrap and hold on counter. Cover and refrigerate custard mixture and apple mixture.
  1. When ready to bake, pre-heat oven to 425 degrees F.
  2. Spoon ½ apple mixture in pie crust-lined pie pan. Pour ½ custard mixture over apples. Add remaining apples and pour in remaining custard.

  3. Gently place the woven crust on the top of the filling. Trim and seal the edges, using a paring knife to trim excess dough and then pressing the lattice gently to the bottom crust to seal.

  4. For the Egg Wash:  Whisk egg, water and cream, if using, together in a small bowl, then brush over the pie.

  5. Stick on any decorative pieces and then sprinkle sanding sugar heavily over the entire pie top.

  6. Bake at 425 for 35 – 40 minutes or until crust is golden brown and flaky, with no doughy damp areas remaining. Check frequently and cover as necessary with pie shield and pieces of aluminum foil.

  7. Meanwhile, make the Crème Anglaise: In a medium saucepan, bring cream just to a boil. In a small bowl, combine 4 egg yolks and 2/3 cup sugar. Blend a small amount of cream into yolks. Blend yolk mixture into cream and cook over low heat about 10 minutes or until mixture coats a spoon. Do not boil. Remove from heat. Sift in cinnamon and nutmeg. Crème Anglaise may be made up to 2 days ahead and chilled, covered.

  8. To serve, pour small amount of warm Crème Anglaise onto individual plates. Cut warm pie into 8 – 10 pieces and place on the plates.


Aloha Dreams

Welcome to Aloha Dreams!

I'm so glad you dropped by.  I'm Betsy.  Here you'll find my favorite fabulous, trusted recipes - everything from delicious, quick meals for your family to wonderful classics made easy.

I'm also here to help you with large group recipes from 20 to 200.  So next opportunity you get to cook for a large group - Say 'Yes!'  Then relax. I've got your back.

Ever wished you could build your dream home? How about building your dream home in a tropical paradise?  Join me, room by room, as we design and build a fabulous dream home in Hawaii!

Aloha Dreams

Explore Aloha Dreams

Things to do Big Island of Hawaii
Dream Home Bathroom

EXPLORE

If you're planning a vacation to Hawaii, I've got you covered on the very best places to go!   From many amazing restaurants to incredible adventures in the surf and on land, this is your go-to source for unique and exciting things to do on the Big Island of Hawaii.  Or just take a Virtual Vacation!!    Let's go!

SAY YES!

If you've been asked to cook for a large group activity, be it a Girl's Camp or a Graduation Party, say Yes!  I'm here to help.  From Menus to Game Plans to Recipes, I'll help you keep on schedule and turn out amazingly delicious food if you're cooking for a crowd!  My recipes are tested and trusted.    Let's cook! 

AHONUI

Ever wished you could build your dream home?  Like amazing house design and home building ideas?  Me too!  Join me as I design and build a home on the Big Island of Hawaii. Follow along while I design each room. Enjoy a front row seat for the entire amazing construction process.  Let's play!

PARTY

Would you like to throw a Luau, but not sure where to start?   Want to know how to build a tiki bar and roast a pig?  Here's everything you need to have a luau.  How about a Christmas Feast or even a fabulous dinner for your neighborhood supper club?  You've come to the right place.    Let's party!

Wicked Good Loaded Halloween Bark

Wicked Good Loaded Halloween Bark

  Aloha Dreams

   Fabulous Recipes, Cooking for a Crowd & Dream Home Design      

1
2
3
4
5
6

Wicked Good Loaded Halloween Bark

So what’s your favorite Halloween memory?  Mine is getting to draw creepy halloween silhouette pictures in grade school.  I loved to draw spooky haunted houses with creepy trees, black cats on fences and of course a witch flying in front of the full moon.

Halloween Bark

Seeing these type pictures still brings a smile to my face.  So does this Wicked Good Halloween Bark.

Halloween Bark

Making Bark is ridiculously easy.  It’s ready in 15 minutes and is loaded with all kinds of fun flavors and textures. The salty crunch from the pretzels and peanut butter cups tempers the sweetness of the silky chocolate while the sprinkles and the candy corns add a great pop of Halloween color.

You’ll love making this Loaded Wicked Good Halloween Bark.   My 5 secrets guarantee your bark will be as DELICIOUS as it is EASY!


5 Secrets to Making Great Bark

Secret #1  Use the right chocolate.

For dark chocolate bark, you can’t beat Ghirardelli Chocolate Melting Wafers.  They have a wonderful chocolate-ly depth of flavor without the typical dark chocolate bitter taste.  You can get them on Amazon.  For milk chocolate, most craft stores carry Wilton Light Candy Cocoa Melts.  I don’t recommend using chocolate chips because in general when they melt, they’re thicker, less pourable, and harder to handle than melted bars or melting wafers of chocolate.

If it’s white chocolate you’re craving, Wal-mart, Target or Amazon carry Ghirardelli Chocolate White Chocolate Melting Wafers. You can also easily order them on Amazon.   When working with white chocolate be EXTRA careful. White chocolate melts more quickly, and burns more quickly.  Don’t even think about exceeding the 30-second microwave bursts, stirring between each.  I do NOT recommend using white chocolate CHIPS as they tend to scorch way too easily.

Halloween Bark
Halloween Bark

Secret #2 Include a Salty Item

I always like to include a salty item in the toppings, in this case the pretzels, but nuts of all kinds work well or even potato chips if you want to do a “snack” bark.  This wicked bark is loaded with all kinds of other goodies such as mini peanut butter cups or mini Kit Kats, and loads of color from wonderful witchy gold stars. Seasonal items are also fun, like the creepy eyeball candy or the candy corn.

Halloween Bark

To prep I simply put each of the ingredients in a small bowl and line a baking sheet with parchment or a Sil-Pat silicone mat.

Grocery stores are starting to carry many fun sprinkle options, but one of my favorite sprinkle shops is Sweetapolita – with absolutely the best sprinkles ever.  They have a delightful selection of sprinkles and will often send you a free “Emergency” sprinkle kit for your purse, just in case.  How fun!

Beyond that, the sky’s the limit.  Our Wicked Good bark is loaded with pretzels, creepy eye ball candy, and mini peanut butter cups.  I usually chop the mini candy bars into bite-size pieces to include in the mix.  I especially like the mini Reese’s Peanut Butter cups or the mini Kit Kat bars.  Seasonal items are also fun, like the creepy eyeball candy or the candy corn.  One note:  The mini eyeballs are actually gum balls.   Not being a gum fan I wouldn’t have used them had I realized that.  Somehow gum does not seem to be a good fit with chocolate.


Loaded Halloween Bark

Aren’t those sprinkles wonderful!!  They would make anything into a festive event.  (Of course I LOVE anything that sparkles!)

Halloween Bark

#3  Melt the chocolate.

The easiest way to do this is in the microwave.  Place your chocolate in a microwave safe dish and microwave for 1 minute on 50% power.  Very likely nothing will happen.  Stir the chocolate and put it back for additional 30 second increments at 50% power.  Most of the chocolate discs will not change shape and will have to be stirred after each heating to determine if they have melted enough.  Be careful and do not over-cook as it can scorch the chocolate.  Keep sneaking up on it in the 30 second increments.  It will probably take a total of 2 1/2 – 3 minutes.

Loaded Halloween Bark

Secret #4  Spread the chocolate 1/4 thick and gently press in the toppings.

With a rubber spatula, scrape the chocolate from the bowl and into a puddle on the center of the parchment paper.  Using an off-set spatula (if you don’t have one, treat yourself.  You’ll love their versatility.)   Spread the chocolate in an even layer about 1/4 inch thick. Try not to let the edges get too thick or too thin.

Halloween Bark

Working fairly quickly before the chocolate sets, add your toppings, pressing down slightly to ensure they stick.

Halloween Bark

Secret #5  Refrigerate and Break

Refrigerate until firm, about 1 hour.  The final secret is once you peel off the parchment paper, the easiest way to break it is to put it on a cutting board and press the tip of a sharp knife into it where you want it to break.  This is the least disruptive method and dislodges far less of the toppings than cutting it or breaking it into pieces by hand.

MAKE AHEAD NOTE: Store your bark in an airtight container in a cool, dry place until it’s needed. It will keep for 3 – 4 weeks no problem.

Halloween Bark

Here’s another version with the milk chocolate.

Halloween Bark
Halloween Bark

This Wicked Good Bark is a very flexible recipe based on what’s in your pantry. The recipe doubles or triples easily if you’re feeding a crowd.  Enjoy and Happy Halloween!

Halloween Bark

Pin for Later

Halloween Bark

Or Make Now


5 from 2 votes
Halloween Bark
Wicked Good Halloween Bark
Prep Time
7 mins
Cook Time
3 mins
Total Time
10 mins
 
Course: Dessert
Cuisine: American
Servings: 20 people
Author: Betsy Edwards
Ingredients
  • 24 - 30 ounces dark, milk, or semi-sweet chocolate melting wafers
  • 1/2 cup broken or chopped pretzel twists
  • 1/2 cup candy corn
  • 1/2 cup mini peanut butter cups rough chopped in half
  • 3 tablespoons sprinkles
Instructions
  1. Line a cookie sheet with parchment paper or wax paper, set aside.

  2. In a medium microwave-safe bowl, add the chocolate wafers and heat in the microwave on 50% power in 30-second increments, stirring after each 30 seconds, until chocolate has melted and becomes smooth when stirring.

  3. Using an offset spatula spread chocolate on the parchment or wax paper into an even layer, 1/4 inch thick. You should have about an 8 x 12 rectangle of chocolate.

  4. Evenly sprinkle the toppings over the chocolate; set aside to cool on the counter if your house isn't too hot or refrigerate until set hard.  Once cooled, transfer the bark to a cutting board and break the bark into pieces by pressing on it with the point of a sharp knife.


Aloha Dreams

Welcome to Aloha Dreams!

I'm so glad you dropped by.  I'm Betsy.  Here you'll find my favorite fabulous, trusted recipes - everything from delicious, quick meals for your family to wonderful classics made easy.

I'm also here to help you with large group recipes from 20 to 200.  So next opportunity you get to cook for a large group - Say 'Yes!'  Then relax. I've got your back.

Ever wished you could build your dream home? How about building your dream home in a tropical paradise?  Join me, room by room, as we design and build a fabulous dream home in Hawaii!

Aloha Dreams

Explore Aloha Dreams

Things to do Big Island of Hawaii
Dream Home Bathroom

EXPLORE

If you're planning a vacation to Hawaii, I've got you covered on the very best places to go!   From many amazing restaurants to incredible adventures in the surf and on land, this is your go-to source for unique and exciting things to do on the Big Island of Hawaii.  Or just take a Virtual Vacation!!    Let's go!

SAY YES!

If you've been asked to cook for a large group activity, be it a Girl's Camp or a Graduation Party, say Yes!  I'm here to help.  From Menus to Game Plans to Recipes, I'll help you keep on schedule and turn out amazingly delicious food if you're cooking for a crowd!  My recipes are tested and trusted.    Let's cook! 

AHONUI

Ever wished you could build your dream home?  Like amazing house design and home building ideas?  Me too!  Join me as I design and build a home on the Big Island of Hawaii. Follow along while I design each room. Enjoy a front row seat for the entire amazing construction process.  Let's play!

PARTY

Would you like to throw a Luau, but not sure where to start?   Want to know how to build a tiki bar and roast a pig?  Here's everything you need to have a luau.  How about a Christmas Feast or even a fabulous dinner for your neighborhood supper club?  You've come to the right place.    Let's party!

Hawaiian Passion Fruit Bars

Hawaiian Passion Fruit Bars

1
2
3
4
5
6

Hawaiian Passion Fruit Bars

passion fruit bars

Raise your hands if you like lemon bars.

Me too!

But some people find them a bit too tart for their dessert tastes.  Welcome to the solution.  Passion Fruit Bars are still a tangy treat – but the sweet kick from the passion fruit juice off-sets the tang wonderfully and it all goes perfectly with the buttery shortbread crust!

In case you’ve never seen one, this is a passion fruit.  (They’re also called Lilikoi (pron. lily-koi).  I’ve always thought that was a pretty word.)

passion fruit bars


You can remove the pulp and seeds and make a WONDERFUL tasting puree.

passion fruit bars

….or you can buy it here if you don’t happen to have any growing in your backyard.

The base is a super-crispy buttery crust that I also used for my Pineapple Cheesecake Bars.  It comes together in a snap and doesn’t require any chilling. It’s sturdy, sets easily, cuts cleanly and makes the perfect filling-to-crust ratio.

passion fruit bars

Pin for Later

passion fruit bars

Or Make Now

Family Size


Passion Fruit Bars - Family Size Version
Prep Time
15 mins
Cook Time
1 hr
Total Time
1 hr 15 mins
 

Cut in 3 rows by 6 rows to serve 18.  

An AlohaDreams.com recipe

Course: Dessert
Servings: 18 servings
Author: Betsy Edwards
Ingredients
For the Shortbread Base:
  • 1 cup all-purpose flour (4.25 ounces or 120 grams) spoon into measuring cup
  • 1/4 cup granulated sugar
  • 1/2 cup unsalted butter (1 stick, melted and slightly cooled)
  • 1/2 teaspoon vanilla extract
  • 1/2 teaspoon salt
For the Filling:
  • 8 large eggs
  • 2 1/3 cups granulated sugar (increase sugar to 2 2/3 cups if using passion fruit concentrate)
  • 1 1/2 cups passion fruit puree
  • 1/2 cup all-purpose flour
Instructions
For the Shortbread Base:
  1. Preheat oven to 350 degrees. Line the bottom and sides of a 9 x 13 baking pan with aluminum foil or parchment paper, leaving enough overhang on all sides to lift later. Set aside.

  2. In a medium bowl stir the melted butter, granulated sugar, vanilla, and salt. Add the flour and stir until everything is combined. Press the mixture evenly into the prepared baking pan.

  3. Bake at 350 degrees about 15 minutes or until edges are lightly browned. While the crust is baking, prepare the passion fruit filling.

For the Filling:
  1. In a large bowl, whisk together the eggs, granulated sugar, and passion fruit puree. Sift the flour into the egg mixture. Whisk until combined.
  2. When the crust is done baking, slide the rack half-way out of the oven. Pour the filling over the hot crust and return it to the oven. Reduce temperature to 325 F and bake for 25-30 minutes. It’s done when the center barely jiggles when the pan is tapped.
  3. Remove the pan from the oven and let cool until it reaches room temperature, then refrigerate to get cold before cutting.
MAKE AHEAD NOTE: Can be stored in an airtight container in the refrigerator for up to 1 week.
  1. When ready to serve, remove the bars from the pan using the parchment or foil to lift. Cut into 3 rows by 6 rows for 18 bars, wiping the knife between cuts. Sprinkle the top with powdered sugar and serving.


Large Group


Passion Fruit Bars
Prep Time
15 mins
Cook Time
45 mins
Total Time
1 hr
 

Cut into 4 rows by 6 rows to make 24 bars.

An AlohaDreams.com recipe

Course: Dessert
Servings: 24 servings
Author: Betsy Edwards
Ingredients
For the Shortbread base
  • 3 cups all-purpose bleached flour (12.75 ounces or 360 gram) Spoon into measuring cup to measure
  • 3/4 cup granulated sugar
  • 1 1/2 cup unsalted butter (2 1/2 sticks, melted)
  • 1 teaspoon vanilla extract
  • 1/2 teaspoon salt
For the Filling:
  • 16 large eggs
  • 4 2/3 cups granulated sugar (increase sugar to 5 cups if using passion fruit concentrate)
  • 3 cups passion fruit puree (24 fl. ounces)
  • 1 cup all-purpose flour
Special Equipment
  • 1 (13 x 18) half sheet baking pan
Instructions
For the Shortbread Base:
  1. Preheat oven to 350 degrees. Line the bottom and sides of 13 x 18 inch baking pan with aluminum foil or parchment paper, leaving enough overhang on all sides to lift later. Set aside.

  2. In a medium bowl stir the melted butter, granulated sugar, vanilla, and salt. Add the flour and stir until everything is combined. Press the mixture evenly into the prepared baking pan.
  3. Bake at 350 degrees about 15 minutes or until edges are lightly browned. While the crust is baking, prepare the passion fruit filling.

For the Filling:
  1. In a large bowl, whisk together the eggs, granulated sugar, and passion fruit puree. Sift the flour into the egg mixture. Whisk until combined.
  2. When the crust is done baking, slide the rack half-way out of the oven. Pour the filling over the hot crust and return it to the oven. Reduce temperature to 325 F and bake for 25-30 minutes. It’s done when the center barely jiggles when the pan is tapped.
  3. Remove the pan from the oven and let cool until it reaches room temperature, then refrigerate to get cold before cutting.
MAKE AHEAD NOTE: Can be stored in an airtight container in the refrigerator for up to 1 week.
  1. When ready to serve, remove the bars from the pan using the parchment or foil to lift. Cut into 4 rows by 6 rows for 24 bars, wiping the knife between cuts. Sprinkle the top with powdered sugar and serving.


Aloha Dreams

Welcome to Aloha Dreams!

I'm so glad you dropped by.  I'm Betsy.  Here you'll find my favorite fabulous, trusted recipes - everything from delicious, quick meals for your family to wonderful classics made easy.

I'm also here to help you with large group recipes from 20 to 200.  So next opportunity you get to cook for a large group - Say 'Yes!'  Then relax. I've got your back.

Ever wished you could build your dream home? How about building your dream home in a tropical paradise?  Join me, room by room, as we design and build a fabulous dream home in Hawaii!

Explore Aloha Dreams

Things to do Big Island of Hawaii
Dream Home Bathroom

EXPLORE

If you're planning a vacation to Hawaii, I've got you covered on the very best places to go!   From many amazing restaurants to incredible adventures in the surf and on land, this is your go-to source for unique and exciting things to do on the Big Island of Hawaii.  Or just take a Virtual Vacation!!    Let's go!

SAY YES!

If you've been asked to cook for a large group activity, be it a Girl's Camp or a Graduation Party, say Yes!  I'm here to help.  From Menus to Game Plans to Recipes, I'll help you keep on schedule and turn out amazingly delicious food if you're cooking for a crowd!  My recipes are tested and trusted.    Let's cook! 

AHONUI

Ever wished you could build your dream home?  Like amazing house design and home building ideas?  Me too!  Join me as I design and build a home on the Big Island of Hawaii. Follow along while I design each room. Enjoy a front row seat for the entire amazing construction process.  Let's play!

PARTY

Would you like to throw a Luau, but not sure where to start?   Want to know how to build a tiki bar and roast a pig?  Here's everything you need to have a luau.  How about a Christmas Feast or even a fabulous dinner for your neighborhood supper club?  You've come to the right place.    Let's party!

Beach Baby Pudding Cups

Beach Baby Pudding Cups

  Aloha Dreams

   Fabulous Recipes, Cooking for a Crowd & Dream Home Design      

1
2
3
4
5
6

Beach Baby Pudding Cups

Beach Baby Pudding Cups

Aren’t these darling?

These Beach Baby Coconut Pudding Cups are everything great about the islands: creamy coconut pudding, sweet juicy pineapple and the “sand” is crushed Golden Oreo’s.  I’ve made them multiple times for kids and the kids LOVE ‘EM (not to mention the adults).  You will too since they are so easy to make.  They are one of the 6 different desserts we’re having at our luau this weekend, including Hawaiian Pineapple Cheesecake Bars and Maui Flip Flops !!

How fun is that??

If you’ve seen recipes calling for an Oreo cookie crust you may have been like me and wondered if the recipe called for the whole cookie or just the 2 outside cookie “shells” without the creamy filling.  And the answer is…..the whole cookie!  Simply put the entire cookie in the food processor.  Pulse it until it’s the consistency of sand.

Beach Baby Pudding Cups

These taste best if made the same day. But you can make them the night before if you’re stretched for time.

Go for it even if you’re not having a luau. The kids EVERYONE will love them!

Beach Baby Pudding Cups

Pin for Later

Pineapple Cheesecake Bars

Or Make Now

Family Size


4 from 1 vote
Beach Baby Pudding Cups
Beach Baby Pudding Cups - Family Size
Prep Time
30 mins
 

Makes approximately 12 servings.

An AlohaDreams.com recipe.

Course: Dessert
Servings: 10 servings
Ingredients
  • 1/2 (4 ounces) package cream cheese bar , softened
  • 1 tablespoon butter , softened
  • 1/4 cup powdered sugar
  • 4 ounces Cool Whip topping
  • 1 (3 ounce) box JELL-O coconut cream pudding mix (vanilla works too)
  • 1/4 cup milk
  • 1 cup crushed pineapple in juice , drained very well.
  • 1/2 (1 pound 3.1 ounce) package Golden Oreos
Special Equipment
  • 12 paper drink umbrellas
  • 12 (9 ounce) plastic tumblers
Instructions
  1. Set out cream cheese and butter to soften. (Aloha Tip: to use immediately, you can soften the cream cheese by completely unwrapping it, placing in a microwave safe bowl and microwaving it for 10 seconds. You can do the same with the butter).

  2. Put complete Oreo cookie (both cookie and fillinin the food processor and blend using pluses until they are the texture of sand. Set aside.
  3. In a medium bowl combine cream cheese, butter, and powdered sugar with mixer. Fold in Cool Whip until well combined. In a separate bowl mix pudding mix and milk with a whisk. When well combined, add pudding to cream cheese mixture. Spoon the pudding cream cheese mixture into a 1 gallon bag. Place bag in a bowl and refrigerate for 15 minutes to get thicker.
  4. Drain the pineapple in a strainer for 10 minutes, pressing down to remove the extra juice).
MAKE AHEAD NOTE: Can be made to this point up to 1 day ahead. Cover the Oreo crumbs and refrigerate the pineapple and cream cheese mixtures each in a separate covered container.
  1. To assemble, place several tablespoons of Oreo crumbs in each tumbler. Cut off the corner of the baggie containing the pudding mixture. Add about ½ inch of the cream cheese pudding mixture to each tumbler. Gently tap the tumblers on the counter to displace any air bubbles if necessary. Add a layer of the crushed pineapple. Add another layer of several more tablespoons of Oreo Crumbs. Add a second half-inch layer of the pudding mixture followed with a second layer of the crushed pineapple. Top off with a layer of Oreo crumbs and a drink umbrella.
  2. Refrigerate until ready to serve. Best made the same day but can be made the day before.


Large Group


4 from 1 vote
Beach Baby Pudding Cups
Beach Baby Pudding Cups - Large Group
Prep Time
1 hr
Total Time
1 hr
 

A real kid pleaser for your next party or family dinner.  

An AlohaDreams.com recipe.

Course: Dessert
Servings: 28 servings
Author: Betsy Edwards
Ingredients
  • 2 (8 ounce) cream cheese bars , softened
  • ¼ cup butter , softened
  • ½ cup powdered sugar
  • 2 containers - 1 (8 ounce) container, 1 (12 ounce) Cool Whip topping
  • 1 (3 ounce) box JELL-O coconut cream pudding mix (vanilla works too)
  • 1/4 cup milk
  • 1 (20 ounce) can crushed pineapple in juice , drained very well.
  • 1 (1 pound 3.1 ounce) package Golden Oreos
Special Equipment
  • 28 paper drink umbrellas
  • 28 (9 ounce) plastic tumblers
Instructions
  1. Set out cream cheese and butter to soften. (Aloha Tip: to use immediately, you can soften the cream cheese by completely unwrapping it, placing in a microwave safe bowl and microwaving it for 10 seconds. You can do the same with the butter.)

  2. Put complete Oreo cookie (both cookie and filling) in the food processor and blend using pluses until they are the texture of sand. Set aside.

  3. In a medium bowl combine cream cheese, butter, and powdered sugar with mixer. Fold in Cool Whip until well combined. In a separate bowl mix pudding mix and milk with a whisk. When well combined, add pudding to cream cheese mixture. Spoon the pudding cream cheese mixture into a 1 gallon bag. Place bag in a bowl and refrigerate for 15 minutes to get thicker.

  4. Drain the pineapple in a strainer for 10 minutes, pressing down to remove the extra juice).

  5. MAKE AHEAD NOTE: Can be made to this point up to 1 day ahead. Cover the Oreo crumbs and refrigerate the pineapple and cream cheese mixtures each in a separate covered container.

  6. To assemble, place several tablespoons of Oreo crumbs in each tumbler. Cut off the corner of the baggie containing the pudding mixture. Add about ½ inch of the cream cheese pudding mixture to each tumbler. Gently tap the tumblers on the counter to displace any air bubbles if necessary. Add a thin layer of the crushed pineapple. Add another thin layer of Oreo Crumbs. Add a second thin layer of the pudding mixture followed with a second thin layer of the crushed pineapple. Top off with a sprinkling of the Oreo crumbs and a drink umbrella.

  7. Refrigerate until ready to serve.  Best made the same day, but can be made the night before.


Aloha Dreams

Welcome to Aloha Dreams!

I'm so glad you dropped by.  I'm Betsy.  Here you'll find my favorite fabulous, trusted recipes - everything from delicious, quick meals for your family to wonderful classics made easy.

I'm also here to help you with large group recipes from 20 to 200.  So next opportunity you get to cook for a large group - Say 'Yes!'  Then relax. I've got your back.

Ever wished you could build your dream home? How about building your dream home in a tropical paradise?  Join me, room by room, as we design and build a fabulous dream home in Hawaii!

Explore Aloha Dreams

Things to do Big Island of Hawaii
Dream Home Bathroom

EXPLORE

If you're planning a vacation to Hawaii, I've got you covered on the very best places to go!   From many amazing restaurants to incredible adventures in the surf and on land, this is your go-to source for unique and exciting things to do on the Big Island of Hawaii.  Or just take a Virtual Vacation!!    Let's go!

SAY YES!

If you've been asked to cook for a large group activity, be it a Girl's Camp or a Graduation Party, say Yes!  I'm here to help.  From Menus to Game Plans to Recipes, I'll help you keep on schedule and turn out amazingly delicious food if you're cooking for a crowd!  My recipes are tested and trusted.    Let's cook! 

AHONUI

Ever wished you could build your dream home?  Like amazing house design and home building ideas?  Me too!  Join me as I design and build a home on the Big Island of Hawaii. Follow along while I design each room. Enjoy a front row seat for the entire amazing construction process.  Let's play!

PARTY

Would you like to throw a Luau, but not sure where to start?   Want to know how to build a tiki bar and roast a pig?  Here's everything you need to have a luau.  How about a Christmas Feast or even a fabulous dinner for your neighborhood supper club?  You've come to the right place.    Let's party!

Hawaiian Pineapple Cheesecake Bars

Hawaiian Pineapple Cheesecake Bars

  Aloha Dreams

   Fabulous Recipes, Cooking for a Crowd & Dream Home Design      

1
2
3
4
5
6

Luscious Hawaiian Pineapple Cheesecake Bars

Pineapple Cheesecake Bars

Have you ever been to The Polynesian Cultural Center?  If not, you really owe it to yourself to visit it if you’re on Oahu.  You’ll enjoy exploring the rich heritage of 6 Pacific Islands. Wander through 42 acres of tropical splendor and enjoy the adventure of traditional hands-on activities.

Polynesian Cultural Center Recipes

You can learn to cook the Samoan way, using sticks, stones, leaves, husks, coconut milk, taro, fish, and plenty of patience. Or dine like alii (a hereditary line of rulers) at an authentic Polynesian luau and top it off with the most spectacular evening show in the islands.

Polynesian Cultural Center Recipes
One of the best desserts at the luau is a delicious pineapple dessert bar.  But you don’t have to plan a luau to enjoy these.  I really think you’ll like them.  Even people who don’t like pineapple or coconut take a bite and say “WOW!”    Treat yourself to a mini trip to Hawaii with these!
Pineapple Cheesecake Bars

You’ll love how amazing these bars will turn out.  They start with my favorite shortbread cookie as a base.  On that is spread a wonderful creamy cheesecake with a hint of pineapple, sweet white chocolate chips and crunchy toasted macadamia nuts.  Sprinkle on some toasted coconut and you’ll find out why everyone loves these!  They’re the next best thing to a trip to the Polynesian Cultural Center!

Pineapple Cheesecake Bars

These wonderful bars use my favorite shortbread recipe as a base.  It’s buttery, crunchy and firm enough to hold together even when cut into small bar-size pieces.  The dough comes together very easily and then you simply press it into the baking pan.  Since you won’t be seeing it under all that delightful pineapple cheesecake filling, it doesn’t have to be very neat, simply even.

Pineapple Cheesecake Bars

If you’ve never baked shortbread before the main thing is making sure you don’t over cook it.  You want to remove it from the oven when it’s a very light golden brown.  No darker than this.

Pineapple Cheesecake Bars

Cut into 4 rows by 6 rows to create 24 squares.  This is a reasonable size for a single serving.  Like this.

Pineapple Cheesecake Bars

To serve a larger group cut each of the 24 squares in half long-wise.  This size is ok if you’re serving several dessert choices, with enough of each choice for every guest.

Pineapple Cheesecake Bars

Pin for Later

Pineapple Cheesecake Bars

Or Make Now

Family Size


4 from 1 vote
Hawaiian Pineapple Cheesecake Bars
Luscious Hawaiian Cheesecake Bars – Family Size
Prep Time
20 mins
Cook Time
40 mins
Total Time
1 hr
 

An AlohaDreams.com recipe.

Course: Dessert
Servings: 8 servings
Author: Betsy Edwards
Ingredients
For the shortbread base
  • 1 cup all-purpose bleached flour (4.25 ounces or 120 grams), spoon into measuring cup to measure
  • 1/4 cup granulated sugar
  • 1/2 cup unsalted butter (1 stick, melted)
  • 1/2 teaspoon vanilla
  • 1/2 teaspoon salt
For the filling
  • 8 ounces cream cheese room temperature
  • 1 large egg
  • 1 cup powdered sugar
  • 1/4 cup granulated sugar
  • 1 cup crushed pineapple un-drained
  • 1/2 teaspoon pure vanilla extract
  • 1/2 cup white chocolate chip
  • 1/2 cup chopped macadamia nuts , divided
For the garnish
  • 1/2 cup sweetened flake coconut , toasted
Special Equipment
  • 1 8 x 8 baking dish
Instructions
For the garnish
  1. Move oven shelf to top position and turn on broiler. Spread 1/2 cup sweetened flake coconut and 1/4 cup rough chopped macadamia nuts on a cookie sheet. Heat under the broiler (DO NOT LEAVE THE BROILER) until coconut and nuts are a golden brown. (IF YOU LEAVE IT CAN EASILY BURN) Remove from oven and set aside.

For the shortbread base
  1. Preheat oven to 300 degrees. Line the bottom and sides of baking pan with aluminum foil or parchment paper, leaving enough overhang on all sides to lift later. Set aside.

  2. In a medium bowl stir the melted butter, granulated sugar, vanilla, and salt. Add the flour and stir until everything is combined. Press the mixture evenly into the prepared baking pan.
  3. Bake at 300 degrees about 15 minutes or until edges are lightly browned. While the crust is baking, prepare the coconut topping and cream cheese filling.
For the filling
  1. In a large bowl, with a mixer or by hand, mix eggs and 1 cup powdered sugar until completely combined. Add cream cheese, sugar, crushed pineapple and vanilla extract, and mix thoroughly. Gently fold-in 1/2 cup white chocolate chips and 1/4 cup chopped macadamia nuts.

  2. Spread filling evenly over the shortbread base. Increase oven temperature to 350 and bake on ON A CENTER SHELF for additional 25 minutes or until batter is set. Remove from oven, immediately sprinkle 1/4 cup reserved chopped, toasted macadamia nuts and 1/2 cup toasted coconut.

MAKE AHEAD NOTE: Let cool, cover lightly and refrigerated at least 12 and up to 24 hours.
  1. When ready to serve cut into bars.


Large Group


4 from 1 vote
Hawaiian Pineapple Cheesecake Bars
Luscious Hawaiian Cheesecake Bars – Large Group
Prep Time
20 mins
Cook Time
40 mins
Total Time
1 hr
 

An AlohaDreams.com recipe.

Course: Dessert
Servings: 24 bars
Author: Betsy Edwards
Ingredients
For the shortbread base
  • 3 cups all-purpose bleached flour (12.75 ounces or 360 grams) , spoon into measuring cup to measure
  • 3/4 cup granulated sugar
  • 1 1/2 cup unsalted butter (2 1/2 sticks, melted)
  • 1 teaspoon vanilla
  • 1/2 teaspoon salt
For the filling
  • 16 ounces cream cheese room temperature
  • 2 large eggs
  • 2 cups powdered sugar
  • 1/2 cup granulated sugar
  • 2 cups crushed pineapple un-drained (one 20 ounce can)
  • 1 teaspoon pure vanilla extract
  • 1 1/2 cup white chocolate chips divided
  • 1 cup chopped macadamia nuts divided
For the garnish
  • 1 cup sweetened flake coconut , toasted
Special Equipment
  • 1 (13 inch x 18 inch) half sheet baking sheet
Instructions
For the garnish
  1. Move oven shelf to top position and turn on broiler.  Spread 1 cup sweetened flake coconut and 1/2 cup rough chopped macadamia nuts on a cookie sheet.  Heat under the broiler (DO NOT LEAVE THE BROILER) until coconut and nuts are a golden brown.   (IF YOU LEAVE IT CAN EASILY BURN)  Remove from oven and set aside.

For the shortbread base
  1. Preheat oven to 300 degrees.  Line the bottom and sides of baking pan with aluminum foil or parchment paper, leaving enough overhang on all sides. Set aside.

    In a medium bowl stir the melted butter, granulated sugar, vanilla, and salt. Add the flour and stir until everything is combined. Press the mixture evenly into the prepared baking pan. 

    Bake at 300 degrees about 15 minutes or until edges are lightly browned. While the crust is baking, prepare the coconut topping and cream cheese filling.

For the filling
  1. In a large bowl, with a mixer or by hand, mix eggs and 2 cups powdered sugar until completely combined.  Add cream cheese, sugar, crushed pineapple and vanilla extract, and mix thoroughly.  Gently fold-in 1 cup white chocolate chips and 1/2 cup chopped macadamia nuts, reserving 1/2 cup of  white chocolate chips and 1 cup chopped macadamia nuts.  

    Spread filling evenly over the shortbread base.  Increase oven temperature to 350 and bake on ON A CENTER SHELF for additional 25 minutes or until batter is set. Remove from oven, immediately sprinkle 1/2 cup reserved chopped, toasted macadamia nuts and 1 cup toasted coconut.

MAKE AHEAD NOTE: Let cool, cover lightly and refrigerated at least 12 and up to 24 hours.
  1. When ready to serve cut into bars, 4 rows by 6 rows for a total of 24 bars.


Aloha Dreams

Welcome to Aloha Dreams!

I'm so glad you dropped by.  I'm Betsy.  Here you'll find my favorite fabulous, trusted recipes - everything from delicious, quick meals for your family to wonderful classics made easy.

I'm also here to help you with large group recipes from 20 to 200.  So next opportunity you get to cook for a large group - Say 'Yes!'  Then relax. I've got your back.

Ever wished you could build your dream home? How about building your dream home in a tropical paradise?  Join me, room by room, as we design and build a fabulous dream home in Hawaii!

Explore Aloha Dreams

Things to do Big Island of Hawaii
Dream Home Bathroom

EXPLORE

If you're planning a vacation to Hawaii, I've got you covered on the very best places to go!   From many amazing restaurants to incredible adventures in the surf and on land, this is your go-to source for unique and exciting things to do on the Big Island of Hawaii.  Or just take a Virtual Vacation!!    Let's go!

SAY YES!

If you've been asked to cook for a large group activity, be it a Girl's Camp or a Graduation Party, say Yes!  I'm here to help.  From Menus to Game Plans to Recipes, I'll help you keep on schedule and turn out amazingly delicious food if you're cooking for a crowd!  My recipes are tested and trusted.    Let's cook! 

AHONUI

Ever wished you could build your dream home?  Like amazing house design and home building ideas?  Me too!  Join me as I design and build a home on the Big Island of Hawaii. Follow along while I design each room. Enjoy a front row seat for the entire amazing construction process.  Let's play!

PARTY

Would you like to throw a Luau, but not sure where to start?   Want to know how to build a tiki bar and roast a pig?  Here's everything you need to have a luau.  How about a Christmas Feast or even a fabulous dinner for your neighborhood supper club?  You've come to the right place.    Let's party!

Tropical Salad

Never miss a single Fabulous Recipe!

Sign UP today and ENJOY free Recipes & Party Ideas in your inbox.

(No spam - I promise!)

You have Successfully Subscribed!